I came across this Quick Kitchen Conversions from Worldmarket.com and have found it to be so useful! Hope it comes in handy in your kitchen, too!

Inspiring home cooks to be creative with accessible, nutritious recipes.
I came across this Quick Kitchen Conversions from Worldmarket.com and have found it to be so useful! Hope it comes in handy in your kitchen, too!

I love the bright, fresh flavors of a chimichurri sauce. Grilled Chimichurri Shrimp with Quinoa Pilaf is the perfect weeknight recipe if you do a few steps ahead on the weekend. It sounds fancy though, doesn’t it?! The fresh herbs and garlic pack a nutritional punch. Quinoa is high in fiber and protein and is a complete protein, meaning it contains all nine essential amino acids that our bodies can’t make on their own. Add in the shrimp, which is also a healthy protein source and this meal is a winner in the nutrition department! Good thing it tastes just as good as it is for you!
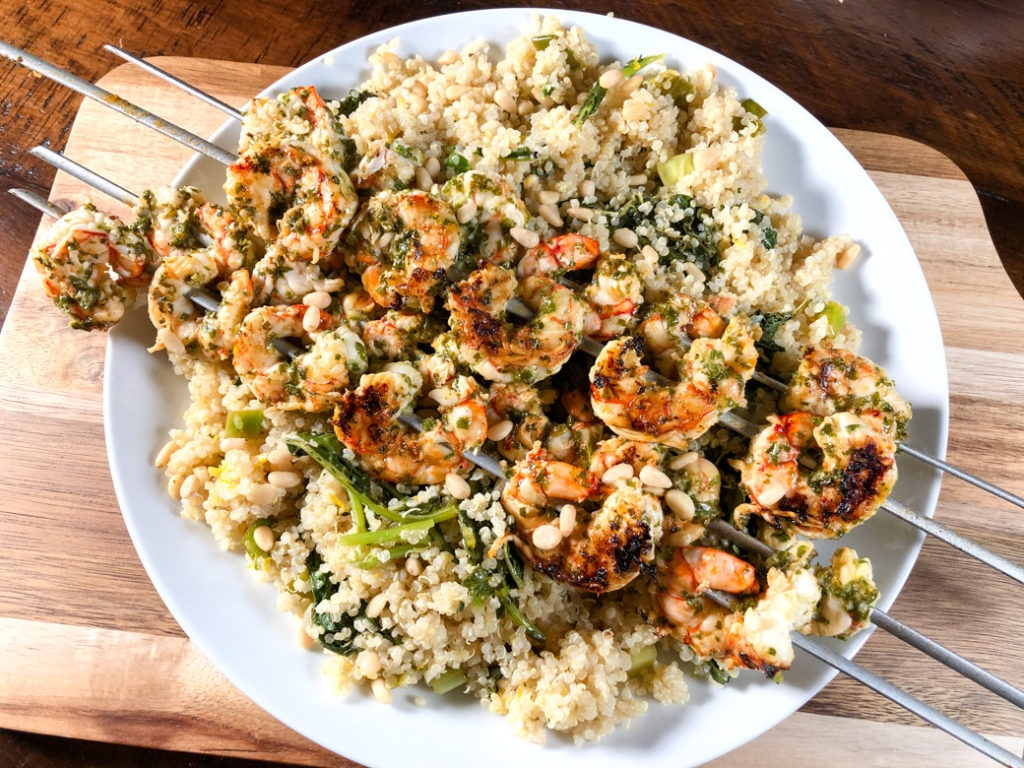
To make this Grilled Chimichurri Shrimp with Quinoa Pilaf an easy weeknight dinner, the key is prepping ahead. First, start with making the Chimichurri sauce. You’ll only need about 3/4 cup of the chimichurri for this recipe, so you can freeze the rest! It will stay good in the freezer for about a month. Next, throw the shrimp and 3/4 cup chimichurri into a Ziploc bag and into the fridge to marinate. Yay! You’re halfway done prepping! The final step is to cook the quinoa. You are only going to halfway prepare the quinoa recipe, as the final ingredients are best added at the end. To do this, boil the water. Add the quinoa and cover. Simmer for 10 minutes, then add the kale and cover. Simmer for 5 more minutes, turn off the heat, and let sit for 5 more minutes. Let cool and then transfer to a glass container and refrigerate. In a small container, combine the lemon juice, lemon zest, olive oil, and pine nuts and place in the fridge. Slice the green onion and store in a ziploc bag in the fridge.
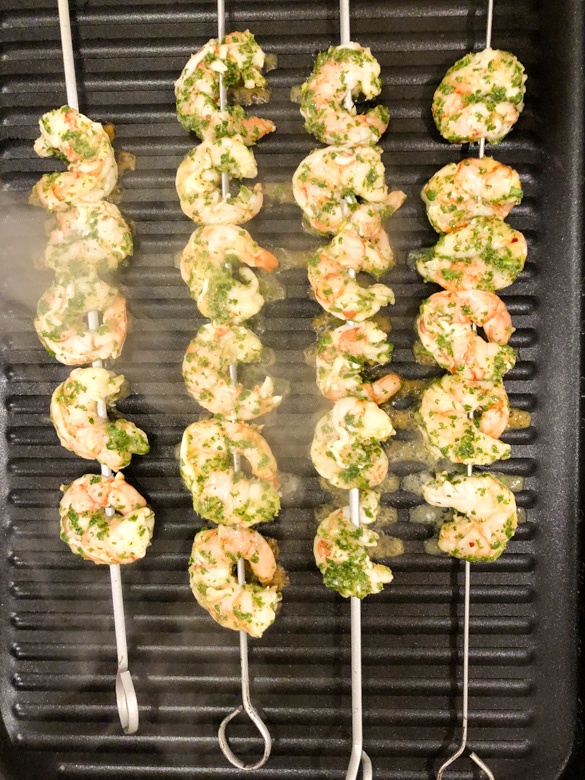
When ready to prepare the meal, thread the shrimp onto skewers (or, if using a grill pan, you can skip this step since there aren’t any grates for the shrimp to fall through). Heat a grill to medium high heat and grill for 2 minutes per side, until the shrimp is cooked. To finish the quinoa, place the cooked kale and quinoa mixture in a skillet over medium heat. Stir constantly until warmed through. Add in the lemon juice mixture and stir. Add in the sliced green onion and stir. Serve the shrimp skewers on a bed of the quinoa pilaf. Yum! There you have it – Grilled Chimichurri Shrimp with Quinoa Pilaf!

Note that this can all be prepared the night of serving, that’s totally fine! Let the shrimp marinate for an hour or so in the fridge (the chimichurri can easily still be prepped ahead – it will stay good in the fridge for a few days). To make the quinoa, as soon as the quinoa/kale mixture is done cooking, just add in the remaining ingredients! It’s still really a pretty quick dinner, it just goes a little faster when it is all pre-prepped.
Print
1 1/2 cups packed fresh parsley
1/2 cup packed fresh cilantro
1 tsp dried oregano
1/4 small red onion
3 cloves garlic
3 Tbsp red wine vinegar
2 Tbsp fresh lemon juice
1 tsp salt
3/4 cup olive oil
1 lb raw peeled and deveined shrimp
2 cups water
1 cup quinoa
1 small bunch kale, chopped, stems removed
1 lemon, zested and juiced
2 green onions, sliced
1 Tbsp olive oil
3 Tbsp pine nuts
salt and pepper, to taste
In a food processor, combine the red wine vinegar, lemon juice, salt, garlic, and onion. Process until finely minced. Then add the herbs to the food processor. Pour in the olive oil while pulsing. Pulse until the herbs are finely minced, but not pureed. Place the shrimp in a ziploc bag and pour 3/4 cup chimichurri over the shrimp. Seal the bag and refrigerate overnight (or at least 1 hour). When ready to prepare the shrimp, remove from the marinade and skewer. Heat a grill to medium high heat and cook the shrimp for 2 minutes on each side, until cooked through.
In a saucepan, bring the water to a boil. Add the quinoa, cover, and lower the heat to a simmer. Let the quinoa simmer for 10 minutes, then add the kale on top, cover, and simmer for 5 more minutes. Turn off the heat and let stand for 5-7 minutes until the quinoa is tender.
Meanwhile, in a small bowl, whisk to combine half of the lemon juice, the zest, olive oil, green onion, and pine nuts. When the quinoa is tender, pour the lemon juice mixture over the quinoa and fluff to combine.
Add salt and pepper to taste.
Place the quinoa pilaf on a serving platter. Top with the shrimp skewers and an additional sprinkle of lemon juice.
As I write this, I’ve got two loaves of Poppy Seed Bread in the oven. It’s really cold here today and my favorite things on cold days are baking, making a cozy meal, and hot chocolate by the fire. (Check out my insanely good hot chocolate recipe here).This is my favorite bread recipe and my kids love it too. One of these days I might try to “healthify” it, but its just so delicious and reminds me of when I was a kid. My Mom always served it with Tater Tot Casserole, and I do too! It’s an icy, snowy, cold winter day, so Tater Tot Casserole and Poppy Seed Bread is the perfect comfort meal for tonight. Tater Tot Casserole gives my kids plenty of good nutrients, so I don’t worry about them having a little of this yummy bread along side. It’s all about balance, right?! This recipe makes 2 loaves, so I typically bake both and then freeze the second loaf. Although sometimes they don’t last long enough to do that!

3 cups flour
1 1/2 tsp salt
1 1/2 tsp baking powder
2 1/2 cup sugar
1 1/2 tsp vanilla
1 1/2 cups milk
1 1/3 cups extra light olive oil
1 1/2 Tbsp poppyseed
3 eggs
1 1/2 tsp almond flavoring
3/4 cup sugar
1/4 cup orange juice
1/2 tsp vanilla
1/2 tsp almond flavoring
1 Tbsp melted butter
Preheat the oven to 350 degrees. Combine all ingredients for the bread together in a mixer. Grease and flour two bread pans. Divide the bread batter evenly among the two pans. Bake at 350 for 1 hour 15 minutes.
When the bread comes out of the oven, mix the ingredients for the glaze with a whisk. Pour half of the glaze over each loaf of bread, while still warm and in the pan. Let cool and turn out the loaves of bread.
I’ve made this salad for years now, but always breaded my own chicken tenders to put on it. One night, I was making the oh-so-complicated dinner of frozen chicken nuggets and Mac and Cheese for my kids, with no plan for the grown up meal other than to raid the fridge, when it dawned on me that I could make an easy buffalo chicken salad using their chicken nuggets! How genius is that?! They don’t like spicy buffalo, but I love it, so we both win. No second “kid-friendly” meal for me here! I felt like it was pretty genius.
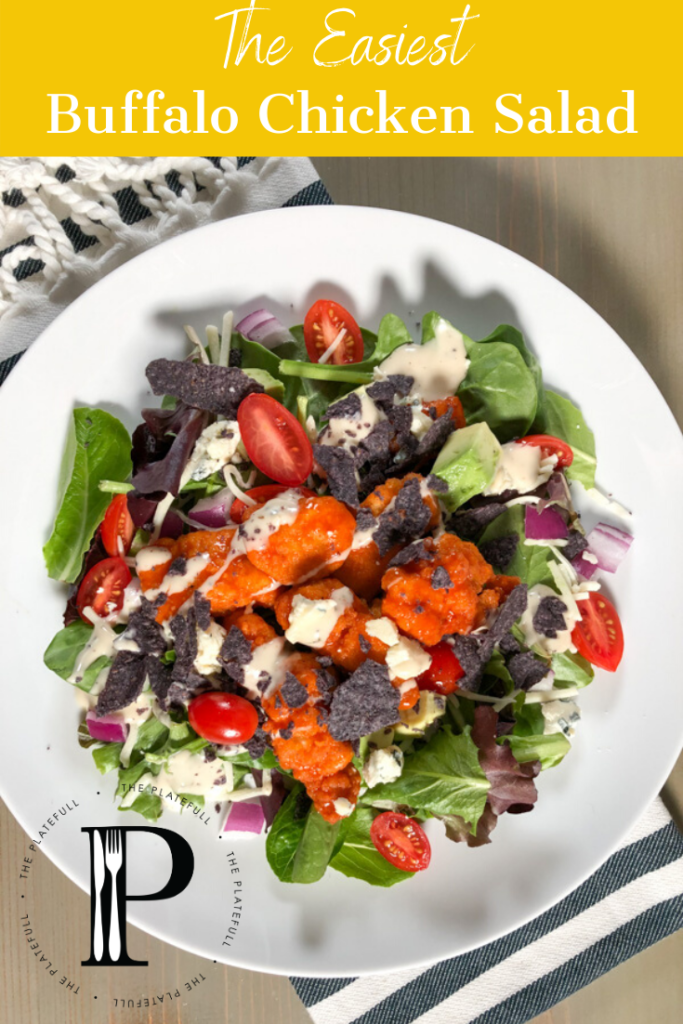
I use a very specific brand of chicken nugget for this. I use the Purdue Simply Smart Organic Chicken Nuggets (I get them at Costco). They are so good! They get nice and crispy and are chicken breast meat. I always bake them in the oven and would not recommend microwaving them for a salad like this (yuck). I would definitely not use any sort of animal shaped chicken nugget product type food either. These are real chicken, real breading, and real delicious. (This is not a sponsored post, they are just chicken nuggets our whole family actually really likes). If you haven’t tried them, you need to!

To make this easy buffalo chicken salad, cook the chicken nuggets in the oven according to package directions. While the chicken is cooking, slice tomatoes, avocado, and chop the red onion. On a plate, layer the mixed greens, red onion, tomato, avocado, shredded Monterey Jack cheese, crumbled gorgonzola cheese, and crushed blue corn tortilla chips. When the chicken is done cooking, add it to a bowl and pour buffalo sauce over the top. Stir to coat the chicken, then place on top of the salad. Drizzle your favorite ranch dressing over the top and that’s it! Couldn’t be any easier and comes together in 15 minutes! The best part is that when your salad is done, so is the food for the kids!
Print
Purdue Simply Smart Organic Chicken Nuggets
Frank’s Buffalo Sauce
Mixed Greens
Sliced grape tomatoes
Red onion, chopped
Avocado, sliced
Monterey Jack cheese, shredded
Crumbled Gorgonzola cheese
Blue corn chips, crushed
Ranch dressing
*Use the amount of ingredients that you need for the number of salads you plan to make.
Bake the chicken nuggets according to package directions. When the chicken nuggets are done cooking, place in a bowl and top with a drizzle of Frank’s buffalo sauce. Stir to coat the chicken.
On a plate, layer the mixed greens, tomato, avocado, red onion, shredded Monterey Jack cheese, gorgonzola, and crushed corn chips. Top with the buffalo chicken and ranch.
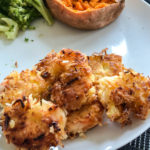
Okay, so this recipe takes some work – I’ll admit that. But, the end result is so good that it’s totally worth it! This is a weekend meal in our house, when I have a little more time for cooking. I like to serve this with a store bought orange marmalade for dipping (microwaved for a few seconds to make it sauce consistency) and broiled or grilled asparagus, like my Roasted Asparagus with Lemon and Feta. A simple baked sweet potato and steamed broccoli works great too!

1 lb peeled and deveined shrimp, patted dry
1/2 cup coconut flour
1/2 cup unsweetened shredded coconut
2 eggs, beaten
coconut oil, for frying
Pat the shrimp dry (make sure it is very dry so the coating sticks). Place the coconut flour in a bowl, the beaten eggs in second bowl, and the shredded coconut in a third bowl. Line them up in this order: coconut flour, eggs, shredded coconut. Dip the shrimp in the flour, shake off excess, then in the egg, then the shredded coconut. Set on a plate while you finish preparing the rest of the shrimp. Heat the coconut oil in a skillet over medium high heat. Add the shrimp (what you can fit – you will have to work in batches). Cook until tails start to turn pink, then flip. Cook until cooked through and golden brown. Serve with orange marmalade.
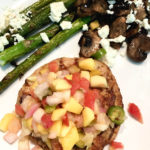
There are some (okay, a lot) of weeknights where after a full day of work and kids, I want a healthy dinner option, with basically no effort. Enter Chile Lime Chicken Burgers with Mango Salsa. You can find the chicken burgers in the freezer section at Trader Joe’s. Simply cook the burgers in a pan and top with the mango salsa (which I buy at Whole Foods, premade). How easy is that?! I like to serve this with asparagus and mushrooms, roasted in the oven and sprinkled with a squeeze of fresh lemon juice and feta, if I have time. If not, a simple salad works great too! I should also mention that this meal is a great, simple Whole30 compliant option!

1 package Chile Lime Chicken Burgers (Trader Joe’s)
1 container pre-made mango salsa (Whole Food’s)
Cook the chicken burgers according to package directions. Top with mango salsa and serve immediately.
This recipe is so simple, but makes the most incredible applesauce! I’ve always bought the pouches of organic cinnamon applesauce for the boys, but they are so expensive! They go through the stuff like water, so I thought, why not make my own? I use organic ingredients, and it’s so much cheaper than buying all of those pouches! Simply place peeled, sliced apples into a crockpot, top with the remaining ingredients, and let it cook in the crockpot. Mash, whisk, and serve! It’s soooo good warm on a cold day!
Feel free to swap out the sugar for honey, or leave it out all together for a little more tart applesauce. A lot of times, I leave it out altogether in order to reduce our added sugar intake.


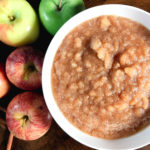
6 medium apples, peeled and sliced (I use half honeycrisp or pink lady and half granny smith)
1/2 cup granulated sugar
1/2 tsp ground cinnamon
1/2 cup water
Place the apples into a slow cooker. Sprinkle the sugar and cinnamon over then top, then pour the water in. Set the slow cooker to high and cook for 4 hours. Once the apples are soft, use a whisk to mash them and stir until smooth (or to the consistency that you prefer). Store in the fridge.
Any time I’m doing a Whole 30, this recipe is on my go-to list. It’s easy, few ingredients, and it feels like a total cheat meal. Which I know is not the point of Whole 30, but I have to make it as enjoyable as I can or I won’t stick with it. I serve these Buffalo Chicken Drummies with Dump Ranch. This ranch is so insanely good! I could drink the stuff – it’s that good. I have all of the herbs for it in my garden, so you’ll always find a jar of homemade Dump Ranch in my fridge. I put it on everything! It is also Whole 30 compliant, so you don’t have to feel deprived or a bit guilty about this one. Win!

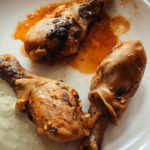
2 lbs chicken drummies
1/4 cup Frank’s hot sauce (or your favorite hot sauce)
2 Tbsp melted butter (use clarified butter for Whole 30)
1 Tbsp coconut aminos
1 clove garlic, minced
1/2 tsp seasoned salt
Black pepper, to taste
Salt, to taste
1 Tbsp olive oil
Preheat the oven to 450 degrees. Line a baking sheet with foil. Pat the chicken dry with paper towels. Brush with olive oil and sprinkle lightly with salt and pepper. Place on the prepared baking sheet and roast for 30-35 minutes, until cooked through.
While the chicken is cooking, whisk together the melted butter, hot sauce, coconut aminos, garlic, seasoned salt and pepper.
When the chicken is finished cooking, transfer to a heat-safe bowl. Pour the buffalo sauce over the top and use tongs to coat the chicken in the sauce. Serve immediately.
This is one of my favorite lunches. I can make a batch on the weekend and keep it in the fridge for 2-3 days. I eat it alone with a fork, on a croissant or bread, or in a lettuce wrap. Its Whole 30 compliant, so if I’m doing Whole 30, I go the lettuce wrap route. Any way you eat it, it’s super delicious!

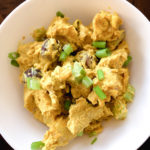
1 rotisserie chicken, chopped into chunks
1 cup avocado mayo (I like Primal Kitchen)
2 celery stalks, chopped
3 Tbsp yellow curry powder
1 tsp apple cider vinegar
Salt and Pepper to taste
3/4 cup dry roasted sliced almonds
1/2 cup sliced grapes
Sliced green onion, for serving
In a large bowl, mix the mayo, apple cider vinegar, curry powder, salt, and pepper. Add in the chicken, celery, grapes, and almonds and fold together to cover with the curry mayo mixture. For serving, top with sliced green onion.
I don’t really remember how we started calling this Snack Lunch, but no matter what time of day I serve this, we still call it Snack Lunch. This is my favorite meal because there’s no actual cooking involved, it can be on the table in 5 minutes, and my kids love it! Once a week on summer nights, I would set this out on the picnic table and let my kids graze as they played. I loved the relaxed mealtime and my kids ate more veggies than they ever do when I serve them! Now that its cold out, I will lay out a picnic blanket inside, or just put this out on the table. I’m always surprised at the amount of veggies they choose for themselves when I don’t say a word. Ha! You could put anything you like on your Snack Lunch platter. Here’s what I put on mine:

Put it all on a plate and let everyone graze!

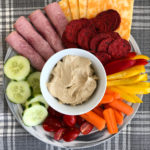
Grape or Cherry Tomatoes
Red, Yellow, or Orange Bell Pepper
Baby Carrots
Cucumber
Salami, Turkey, or Ham
Trader Joe’s Beet Crackers
Hummus
Cheese Slices