The Platefull

Inspiring home cooks to be creative with accessible, nutritious recipes.

  • The Platefull Blog
  • Lifestyle
  • Kids
  • Shop
  • About
    • Privacy Policy, Terms & Conditions, and Disclosures

Archives for February 2020

Veggie Pizza

February 28, 2020~ Main, The Platefull Blog

You know what day it is! It’s Friday pizza night in our house. We have had this tradition for years now and my kids are not happy if we have to skip a Friday pizza night for any reason. They love it! I’ve posted a few blog posts before about my favorite pizza ingredients, how to make the easiest homemade pizza crust, and different variations of pizzas that we like to make. Today I’m sharing one of my favorites – Veggie Pizza. I cook all of the veggies ahead and store them in the fridge until pizza night. I’m often surprised at what my kids will choose to put on their pizza if it’s their choice. They love making homemade pizza and having control. Isn’t that what all preschoolers want – control?! LOL. Mine do! I’ve learned the best thing I can do when it comes to kids and food is set out the food and keep my mouth shut. The more I intervene, the more dinner time battles there are. This is definitely true with Veggie Pizza too! I help them roll out their crust, then they put sauce on, they choose the veggies from the bowls I have sitting out, they put the cheese on, and I don’t intervene. Sometimes when they get down from their cooking towers, I will spread the cheese a little more evenly, but other than that, I don’t try to sneak anything in. If I don’t want them to eat something, I don’t make it an option! I hope you enjoy this delicious Veggie Pizza as much as I do!

Veggie Pizza
Print
clock clock iconcutlery cutlery iconflag flag iconfolder folder iconinstagram instagram iconpinterest pinterest iconfacebook facebook iconprint print iconsquares squares iconheart heart iconheart solid heart solid icon
Veggie Pizza

Veggie Pizza

  • Author: Sarah
Print Recipe
Pin Recipe

Ingredients

Scale

1 1/4 cup very warm water (108–110 degrees Fahrenheit)

1 package active dry yeast

pinch of sugar

4 cups flour

pinch of salt

Olive oil

Pizza Sauce

Shredded Mozzarella Cheese

1 8 oz container sliced baby Bella mushrooms

1 red bell pepper, diced

1 yellow bell pepper, diced

1 package or bunch broccolini

1 small yellow onion, diced

Olive oil


Instructions

Dissolve the sugar in the warm water and add the yeast.  Allow it to proof for 10-15 minutes.  You should see the yeast bubble up and form a layer of foam on top of the water.  

Place 2 cups flour in a mixing bowl and add a pinch of salt, 1-2 Tbsp olive oil, and the yeast/water mixture.  Using the dough hook attachment, mix until combined.  Add in the 3rd cup of flour and mix until combined, then add as much of the 4th cup as you need until the dough no longer sticks on your finger when you press on it.  Turn the dough out onto a floured surface and knead until smooth and elastic.  Form into a ball and place into a lightly oiled bowl, covering with a kitchen towel.  Let the dough rise for a few hours, then separate into 4 equal portions.  Roll each portion out into a pizza crust.

While the dough is rising, add olive oil to a pan and cook the mushrooms, peppers, and onion.  Preheat the oven to 400.  Place the broccolini on a sheet pan and drizzle with olive oil.  Roast for about 20 minutes, turning, until lightly browned. Reserve the cooked veggies in a bowl.

After rolling out the pizza crust, top with sauce, then cheese, then veggies.  Bake in a 450 degree oven for 10 minutes.


Did you make this recipe?

Tag @the.platefull on Instagram and hashtag it #theplatefull

Blackened Cajun Chicken Salad

February 27, 2020~ Main, Salads, The Platefull Blog

Please note that this post contains affiliate links and any sales made through such links will reward me a small commission – at no extra cost for you. All opinions are my own. See my disclosure for more information.

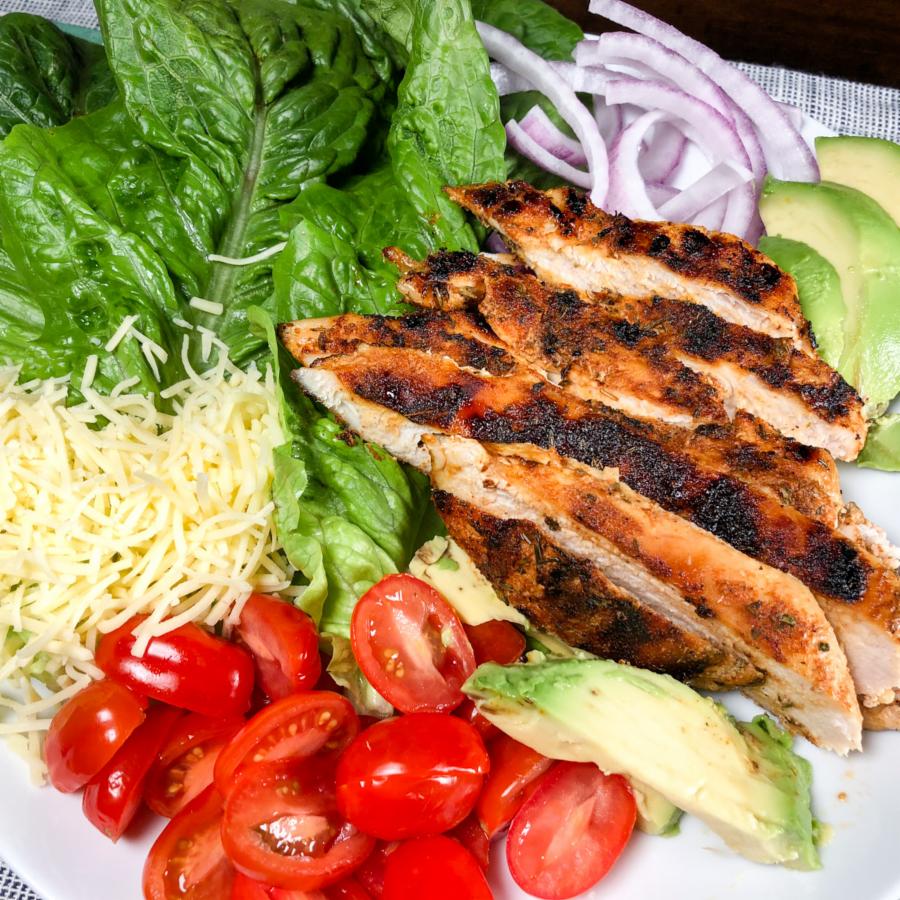
Blackened Cajun Chicken Salad is super quick to prep and I am seriously hooked! I’ve made this salad more times that I can count in the last month. It makes a quick weeknight dinner, but also a packable nutritious lunch. I posted the seasoning for the chicken a while back. It is Whole 30 compliant and packed with flavor. It is seriously so, so good!

I keep a lot of homemade seasoning mixes on hand, and Cajun seasoning is one of them! I love these spice containers for easily mixing and storing seasonings in an airtight container. The containers will hold a double batch of this Cajun seasoning. Here they are in use in my kitchen! I store taco seasoning, spaghetti seasoning, Cajun seasoning, Au Jus seasoning, Italian dressing mix, and homemade beef bouillon granules in them.

Okay, so for the Blackened Cajun Chicken Salad, the first step is to pound the chicken breasts. I do this for two reasons. One, I’m impatient and want them to cook faster. Two, I like more surface area for the yummy spice mix! Once they are pounded to about 1/2 inch thick, I coat both sides really well with the spice mix and pat them to make it stick. Then, I throw them on the grill (outside or a grill pan both work great). Cook for 3-4 minutes on each side while you prep the rest of the salad.

I serve this salad with big leaves of Romaine (because, hello, can’t be bothered with cutting lettuce – let those people work for their dinner). I pile on tomatoes, cheddar cheese, thinly sliced red onion, avocado, and sliced Blackened Cajun Chicken. Drizzle with ranch and that’s it! So easy, and so incredibly delicious!

Print
clock clock iconcutlery cutlery iconflag flag iconfolder folder iconinstagram instagram iconpinterest pinterest iconfacebook facebook iconprint print iconsquares squares iconheart heart iconheart solid heart solid icon
Blackened Cajun Chicken Salad

Blackened Cajun Chicken Salad

  • Author: Sarah
Print Recipe
Pin Recipe

Ingredients

FOR THE CAJUN SEASONING

1 Tbsp paprika

1 Tbsp garlic powder

2 tsp oregano

2 tsp thyme

2 tsp salt

1 tsp cayenne

1/2 tsp ground black pepper

FOR THE SALAD

4 chicken breasts, pounded to 1/4 inch thickness

1 head romaine lettuce

1 cup grape tomatoes, halved

1/2 small red onion, thinly sliced

1 avocado, sliced

1 cup shredded white cheddar cheese

Ranch Dressing

Croutons (optional)


Instructions

Mix all seasoning ingredients in an airtight container or small bowl.  (I like to use an airtight container so that I can shake well to mix).  

Heat a grill or grill pan over medium high heat.  Sprinkle a generous amount of seasoning on both sides of each chicken breast, to completely coat the chicken, without leaving loose seasoning.  Gently press the seasoning into the chicken breast. Place the chicken on the grill and cook for 3-4 minutes on each side, until blackened and cooked through.  Remove the chicken from the grill and set aside.

To assemble the salad, tear large pieces of romaine and place on large serving platter or divide amongst individual plates.  Slice the chicken breast and place on top.  Top with tomatoes, cheese, onion, avocado, ranch dressing, and croutons (if using).


Did you make this recipe?

Tag @the.platefull on Instagram and hashtag it #theplatefull

Beef and Lentil Meatballs

February 26, 2020~ Main, The Platefull Blog

I’ve mentioned this in previous posts, but I’ve been working hard to find a way to get more fiber and protein in my kids. They love spaghetti and meatballs, so I figured why not try to make the meatballs fit my goals for their nutrition? Beef and Lentil Meatballs have now been a huge hit with my boys for quite some time! They are so versatile. I’ve served them with a variety of sauces, including traditional spaghetti and meatballs and they are a hit every time! (Hint: you can use the sauce portion of my spaghetti recipe for easy spaghetti and meatballs! Just leave out the onion and hamburger, instead letting the meatballs warm in the sauce).

I love to keep a few batches of Beef and Lentil Meatballs in the freezer for those dinner emergency nights. They’ve spared us from eating out more than once. I love having meals like that on hand!

To start the prep for Beef and Lentil Meatballs, cook the green lentils. From there, it’s super easy! Let the lentils cool, then add all of the ingredients to a food processor and pulse until well combined and the lentils are broken up some.

Beef and Lentil Meatballs

Form into meatballs a little smaller than a golf ball.

Beef and Lentil Meatballs

Then, cover the bottom of a skillet with oil, heat over medium high heat, and cook the meatballs, rolling around to cook evenly, until all sides are browned. Drain on a paper towel, let cool, then freeze individually on a baking sheet. Once the meatballs are frozen, transfer to a freezer bag. This recipe makes about 24 meatballs, so I typically package into 12 meatballs per package.

Beef and Lentil Meatballs
Print
clock clock iconcutlery cutlery iconflag flag iconfolder folder iconinstagram instagram iconpinterest pinterest iconfacebook facebook iconprint print iconsquares squares iconheart heart iconheart solid heart solid icon
Beef and Lentil Meatballs

Beef and Lentil Meatballs

  • Author: Sarah
Print Recipe
Pin Recipe

Ingredients

Scale

1 lb ground beef

1 cup green lentils, cooked

1/2 cup finely chopped onion

2 garlic cloves, minced

1/2 cup breadcrumbs

1 large egg, lightly beaten

1 tsp dried thyme

1/2 tsp dried oregano

1 tsp salt

1/2 tsp ground black pepper

Olive oil, for cooking


Instructions

Be sure the lentils have cooled.  Combine all ingredients in a food processor and pulse several times to combine well and blend in the lentils.  (You can also use your hands to mix well, but you will have larger lentil pieces in the meatballs).  Form into balls slightly smaller than the size of a golf ball.  You should get 20-24 meatballs.  

Heat enough oil to cover the bottom of a skillet over medium heat.  When the oil is hot, add the meatballs.  Roll around to brown evenly on the outside and cook until cooked through, about 7-8 minutes.  Repeat with remaining meatballs in batches, if needed.


Did you make this recipe?

Tag @the.platefull on Instagram and hashtag it #theplatefull

Protein Pancakes

February 23, 2020~ Breakfast, The Platefull Blog

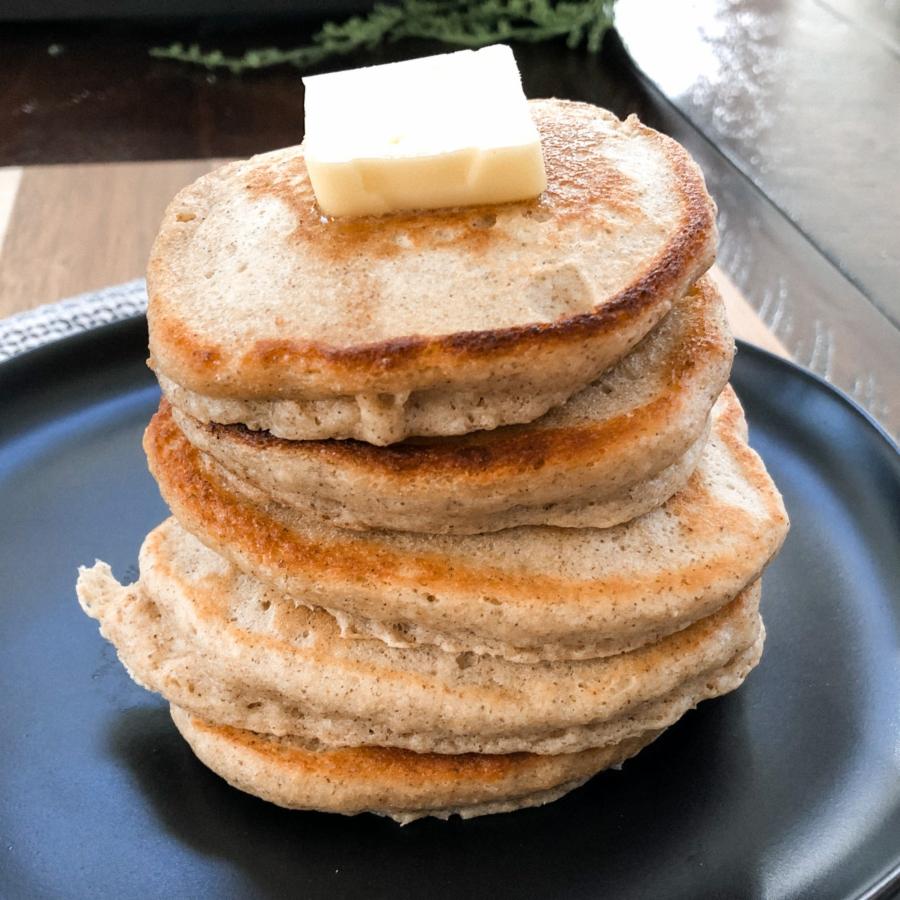
My kids absolutely love pancakes for breakfast. I make them most weekends. Given the amount of pancakes that they consume, I wanted a way to still give them what they love, but pack in a nutritional punch to get their little bodies off to a strong start. They love these Protein Pancakes (they actually didn’t even notice that they were any different than the normal pancakes I make). Protein Pancakes have become our new go-to for weekend breakfasts. I make a big batch on Sundays and then we reheat in the toaster in the early part of the week before school. Look how fluffy these pancakes are! I’m in love. Light, fluffy, and a protein boost.

The trick to making these is that I first combine the sour cream and chia seeds and let it sit for about 10 minutes to start to soften the seeds. Then I add that mixture to my blender and blend until the chia seeds are very fine. I add the chia sour cream mixture to the rest of the liquid ingredients before mixing in with the dry ingredients.

To cook them, I heat a large skillet over medium heat and add 1 Tbsp butter. Once the butter has melted, I use a 1/4 cup measuring cup to pour batter into the pan. Let the pancakes cook for a couple minutes, until the top starts to bubble, then flip and cook a couple minutes more. Yum!

Print
clock clock iconcutlery cutlery iconflag flag iconfolder folder iconinstagram instagram iconpinterest pinterest iconfacebook facebook iconprint print iconsquares squares iconheart heart iconheart solid heart solid icon
Protein Pancakes

Protein Pancakes

  • Author: Sarah
  • Yield: 18 pancakes 1x
Print Recipe
Pin Recipe

Ingredients

Scale

1 cup sour cream

3 Tbsp chia seeds

1 1/2 cups buttermilk

4 Tbsp melted butter

2 eggs

2 cups whole wheat pastry flour

1 tsp baking powder

1/2 tsp baking soda

1 tsp salt

1 Tbsp sugar


Instructions

In a bowl, stir together the sour cream and chia seeds.  Let sit for 10 minutes.  In the meantime, melt the butter.  In a large bowl, whisk together the eggs and buttermilk.  Slowly drizzle in the melted butter, while whisking to combine.  Set aside. In a medium bowl, with a dry whisk, combine the flour, baking powder, baking soda, salt, and sugar.  Set aside.

Transfer the sour cream and chia mixture to a blender and blend on high speed for about 1 minute, until the chia is finely ground into the sour cream.  Whisk into the liquid mixture.  Add the dry mixture to the liquid mixture and stir with a fork to combine.  If the mixture is too dry, add buttermilk, 1 Tbsp at a time, until it reaches pancake consistency.

Heat a griddle or pan over medium heat.  Melt 1 Tbsp butter in the skillet and using a 1/4 cup measuring cup, measure pancake batter into the skillet.  Cook until bubbly on top, then flip and cook for another minute or two until cooked through.  


Notes

Tip:  I keep air-tight containers of the dry ingredients pre-mixed in my pantry to save time.  

Tip:  This recipe makes about 18 pancakes.  I store the leftovers in the fridge, in a Ziploc bag with a paper towel in it to absorb moisture.  Reheat in the toaster for a protein-packed breakfast!

Did you make this recipe?

Tag @the.platefull on Instagram and hashtag it #theplatefull

Cajun Seasoning

February 21, 2020~ Sauces and Dressings, The Platefull Blog

Please note that this post contains affiliate links and any sales made through such links will reward me a small commission – at no extra cost for you. All opinions are my own. See my disclosure for more information.

I cannot get enough of this Cajun Seasoning. I use it for my Cajun Shrimp and Veggie Skillet and most recently, I’ve been using it for Blackened Cajun Chicken Salads. I cannot get enough of that salad, either! It is seriously so, so good that I crave it. I’ve added it to the weekly meal plan every week since I first made it! I keep this Cajun Seasoning pre-mixed on hand in the pantry in my favorite spice containers. I love having homemade spice mixes ready to go. It makes using homemade mixes just as easy as store bought, but I control the ingredients and flavors. I love these containers because they stack easily in my pantry and are narrow, so they don’t take up as much space as a jar. Plus, there’s plenty of room for getting a measuring spoon in.

Print
clock clock iconcutlery cutlery iconflag flag iconfolder folder iconinstagram instagram iconpinterest pinterest iconfacebook facebook iconprint print iconsquares squares iconheart heart iconheart solid heart solid icon

Cajun Seasoning

  • Author: Sarah
Print Recipe
Pin Recipe

Ingredients

Scale

1 Tbsp paprika

1 Tbsp garlic powder

2 tsp oregano

2 tsp thyme

2 tsp salt

1 tsp cayenne

1/2 tsp ground black pepper


Instructions

Combine all ingredients together and store in an airtight container.


Did you make this recipe?

Tag @the.platefull on Instagram and hashtag it #theplatefull

The Best Baked Beans

February 16, 2020~ Side Dishes, The Platefull Blog

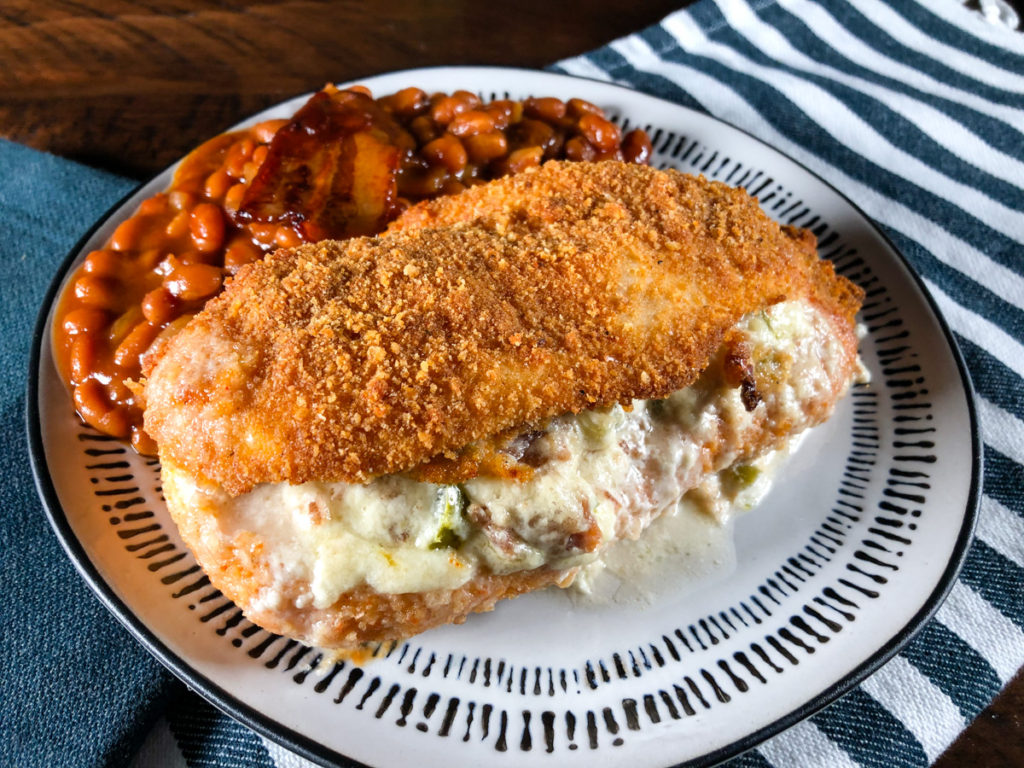
Baked Beans are a summer time staple in our house. They just pair so perfectly with grilled food! I love this recipe because it makes a huge batch that I can store in the freezer in smaller portions. These baked beans are perfect. Sweet, savory, and a little smoky with that delicious bacon flavor. I like to serve these with any grilled meat or my Cowboy Stuffed Chicken. These are absolutely the best baked beans, no doubt about it!

Start by sautéing the onions in butter over medium heat.

In a large bowl, combine all remaining ingredients except the bacon.

Add the sautéed onions to the mixture and stir to combine well. Pour the mixture into a 9×13 baking dish that has been sprayed with cooking spray. Top with the slices of bacon and bake at 325° for 2-3 hours. When the beans come out of the oven, use a large serving spoon to gently press on the top to accumulate the bacon fat and skim off.

Print
clock clock iconcutlery cutlery iconflag flag iconfolder folder iconinstagram instagram iconpinterest pinterest iconfacebook facebook iconprint print iconsquares squares iconheart heart iconheart solid heart solid icon
The Best Baked Beans

The Best Baked Beans

  • Author: Sarah
Print Recipe
Pin Recipe

Ingredients

Scale

5 cans pork and beans (VanCamp’s)

1 large yellow sweet onion, chopped

2 Tbsp butter

3/4 cup ketchup

1/2 cup molasses

3 Tbsp yellow mustard

1/2 cup brown sugar

6 slices uncooked bacon, each slice cut into thirds


Instructions

Preheat the oven to 325°.  Spray a 9×13 baking dish with cooking spray.

Heat a skillet over medium heat and melt the butter in the pan.  Add the chopped onions and cook until translucent.  In a large bowl, add the beans, onions, ketchup, molasses, mustard, and brown sugar.  Stir to mix well.  Scoop out into the baking dish.  Top with the slices of bacon and bake, uncovered, at 325° for 2-3 hours, until carmelized and bubbly.  When the beans come out of the oven, use a large serving spoon to gently press on the top to skim off the bacon fat.


Did you make this recipe?

Tag @the.platefull on Instagram and hashtag it #theplatefull

Cowboy Stuffed Chicken

February 15, 2020~ Main, The Platefull Blog

I love stuffed chicken breasts for a few reasons. One, they are perfect for prepping ahead, wrapping individually, and freezing. Two, I can throw them in the oven, microwave some steamer veggies, and dinner is on the table with very little effort from me! Three, they are super flavorful and prevent the chicken from drying out in the oven. Best of all, my kids love stuffed chicken. I think it’s all the cheese. 🙂

Start by making the filling. Combine the softened cream cheese, cheddar cheese, jalapeño, and crumbled bacon in a bowl. When I make this, I combine the cheeses and bacon and then take enough out to stuff one chicken breast before adding the jalapeños to the mixture because my kids don’t like spicy.

Mix the bread crumbs and BBQ seasoning in a bowl. In another bowl, lightly beat the egg. Cut a pocket into the chicken breasts and stuff with the cheese mixture. Dip the chicken breast on all sides in the egg, then in the breadcrumb mixture, making sure all sides are coated.

Place the chicken breasts on a foil lined sheet pan and bake at 375° for about 30 minutes, until the internal temp reaches 165°.

Print
clock clock iconcutlery cutlery iconflag flag iconfolder folder iconinstagram instagram iconpinterest pinterest iconfacebook facebook iconprint print iconsquares squares iconheart heart iconheart solid heart solid icon
Cowboy Stuffed Chicken

Cowboy Stuffed Chicken

  • Author: Sarah
Print Recipe
Pin Recipe

Ingredients

Scale

2 chicken breasts

2 oz cream cheese, softened

1/2 cup shredded cheddar cheese

2 Tbsp chopped jalapeno (1 Tbsp if using fresh)

3 slices cooked bacon, crumbled

2/3 cup bread crumbs

1 Tbsp BBQ seasoning

1 egg, beaten


Instructions

Preheat the oven to 375°.  Slice horizontally into the middle of the chicken breast, but do not slice all the way through.  This creates a pocket for the filling.

In a small bowl, combined the cream cheese, cheddar cheese, crumbled bacon, and jalapeños. 

In a bowl, combine the breadcrumbs and BBQ seasoning.

In another bowl, lightly beat the egg.

Divide the filling into 2 equal portions and stuff each chicken breast.  Dip the stuffed chicken breast in the egg, coating all sides.  Then dip into the breadcrumb mixture, coating all sides.  Repeat with the other chicken breast.

Place on a baking sheet lined with foil and bake at 375° for 30-35 minutes, until the chicken reaches an internal temp of 165°.


Did you make this recipe?

Tag @the.platefull on Instagram and hashtag it #theplatefull

Smoky BBQ Seasoning

February 15, 2020~ Sauces and Dressings, The Platefull Blog

Please note that this post contains affiliate links and any sales made through such links will reward me a small commission – at no extra cost for you. All opinions are my own. See my disclosure for more information.

Smoky BBQ Seasoning is the perfect seasoning for my Cowboy Stuffed Chicken. It’s the perfect summertime meal (or winter time when you are craving summer flavors!). The chicken can bake while you’re outside relaxing or playing with the kids. It’s hearty, full of flavor, and an all-around family favorite.

I love to make homemade seasonings. I can control the ingredients and the flavors. I mix up batches of my various homemade seasonings so that I can keep them on hand just like a jar of store-bought seasonings. It means that when it comes time to cook, there’s no extra effort involved. I like to store my homemade seasonings in these Progressive Spice Containers. They are airtight, the perfect size for stacking neatly in my pantry without taking up too much space, have a lid made for sprinkling, but also the perfect sized opening for a measuring spoon. I feel a post of all of my homemade seasonings coming on!

Cowboy Stuffed Chicken
Print
clock clock iconcutlery cutlery iconflag flag iconfolder folder iconinstagram instagram iconpinterest pinterest iconfacebook facebook iconprint print iconsquares squares iconheart heart iconheart solid heart solid icon

Smoky BBQ Seasoning

  • Author: Sarah
Print Recipe
Pin Recipe

Ingredients

Scale

1 Tbsp smoked paprika

2 tsp brown sugar

1 tsp seasoned salt

1 tsp garlic powder

1 tsp dry mustard

1/2 tsp black pepper


Instructions

Combine all ingredients and store in an airtight container.


Did you make this recipe?

Tag @the.platefull on Instagram and hashtag it #theplatefull

Cheddar and Green Chile Cornbread

February 13, 2020~ Side Dishes, The Platefull Blog

There really is nothing better than Cheddar and Green Chile Cornbread with a bowl of chili. Today is the coldest day that we’ve had all winter and I’m thinking I need to make a trip to the store for that exact meal! Although, I don’t really want to go out in this cold…decisions, decisions. In case you missed it, I of course love my own chili recipe, but here’s another recipe from one of my favorite food bloggers that I like to make to switch things up sometimes! Both are absolutely delicious! And of course, the perfect side dish for any chili recipe is Cheddar and Green Chile Cornbread! It’s easy to make and is always a crowd pleaser. I’ve gotten so many compliments on this recipe over the years!

My favorite thing about this cornbread is that it’s not dry at all! Most cornbreads come out pretty dry, which isn’t that appealing to me. Give this one a try and let me know what you think!

Cheddar and Green Chile Cornbread
Print
clock clock iconcutlery cutlery iconflag flag iconfolder folder iconinstagram instagram iconpinterest pinterest iconfacebook facebook iconprint print iconsquares squares iconheart heart iconheart solid heart solid icon
Cheddar and Green Chile Cornbread

Cheddar and Green Chile Cornbread

  • Author: Sarah
Print Recipe
Pin Recipe

Ingredients

Scale

1/2 cup butter, melted

1/2 cup sugar

2 eggs

1/2 (15 oz) can cream-style corn

1 (4 oz) can chopped green chiles, drained

1/4 cup shredded Monterey Jack cheese

1/4 cup shredded cheddar cheese

1/2 cup flour

1/2 cup yellow cornmeal

2 tsp baking powder


Instructions

Preheat oven to 300°.  Grease an 8×8 square baking dish.  Beat together the butter and sugar, then add the eggs one at a time and beat until combined well.  Stir in the corn, chiles, and cheeses.  Add the flour, cornmeal, and baking powder. and stir to combine.  Pour into the pan and bake at 300° for 1 hour.


Did you make this recipe?

Tag @the.platefull on Instagram and hashtag it #theplatefull

Egg and Feta Breakfast Wrap

February 12, 2020~ Breakfast, The Platefull Blog

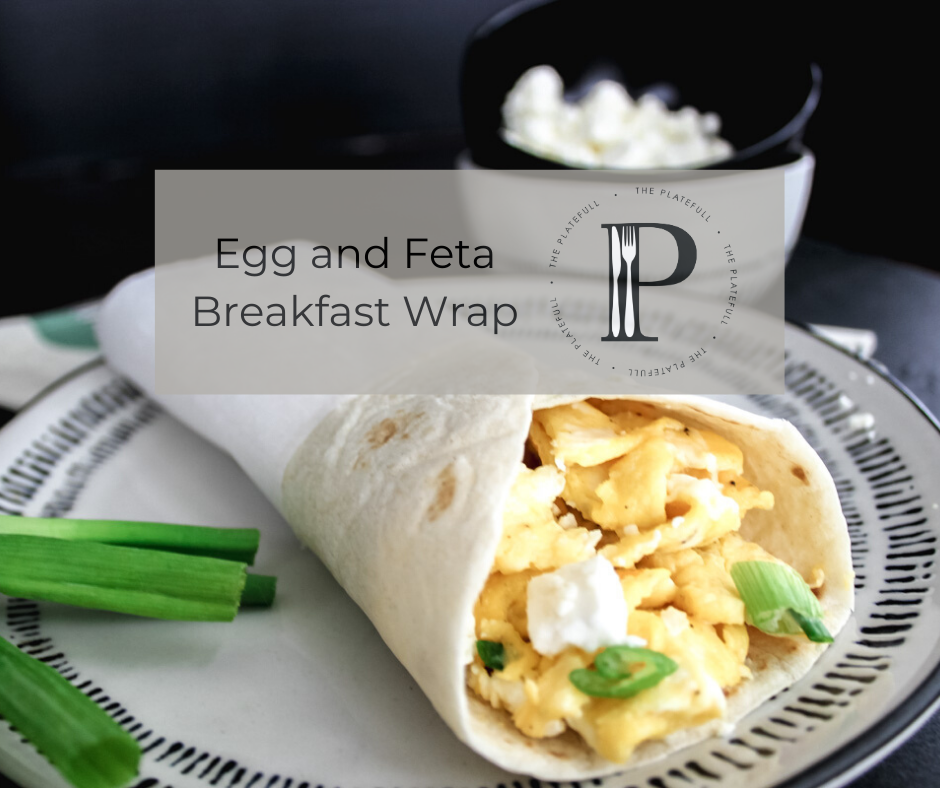
This Egg and Feta Breakfast Wrap is so insanely simple, but totally crave-worthy. When we lived in Sydney, there was a local coffee shop near the office that I visited every day. Every morning I had the same thing. The Egg and Feta Breakfast Wrap with a vanilla latte. The coffee there was so good and recreating this breakfast at home takes me back to some pretty wonderful memories!

Egg and Feta Breakfast Wrap

It really couldn’t be any easier to make. To make one wrap, scramble 2 eggs. Place the scrambled eggs on a flour tortilla. Top with crumbled feta and sliced scallions. Roll up and enjoy! See? Easy!

Print
clock clock iconcutlery cutlery iconflag flag iconfolder folder iconinstagram instagram iconpinterest pinterest iconfacebook facebook iconprint print iconsquares squares iconheart heart iconheart solid heart solid icon
Egg and Feta Breakfast Wrap

Egg and Feta Breakfast Wrap

  • Author: Sarah
Print Recipe
Pin Recipe

Ingredients

Scale

1 Flour Toritlla

2 eggs

1 Tbsp sliced scallions

1 Tbsp crumbled feta

salt and pepper to taste


Instructions

Heat a small skillet over medium low heat.  Crack the eggs into a bowl and beat lightly with a fork.  Sprinkle in a small amount of salt and pepper.  Scramble the eggs, then place on the flour tortilla.  Top with the scallions and feta and roll into a wrap.


Did you make this recipe?

Tag @the.platefull on Instagram and hashtag it #theplatefull

  • 1
  • 2
  • Next Page »

Categories

  • Appetizers
  • Baking
  • Breakfast
  • Dessert
  • Drinks
  • Kids
  • Lifestyle
  • Main
  • Recipes
  • Salads
  • Sauces and Dressings
  • Side Dishes
  • Soups
  • The Platefull Blog
  • Uncategorized

Archives

  • March 2025
  • July 2021
  • January 2021
  • July 2020
  • June 2020
  • May 2020
  • April 2020
  • March 2020
  • February 2020
  • January 2020
  • December 2019
  • November 2019
  • October 2019
  • September 2019
  • August 2019
  • September 2017
  • April 2017
  • March 2017
  • February 2017
  • January 2017
  • November 2016
  • October 2016

Recent Comments

  • Jennifer on Avocado and Egg Breakfast Stack
  • Christine Kish on Recipe Organization
  • Sarah on Easy Recipes for the Whole30
  • Jenn on Easy Recipes for the Whole30

- THEME BY ECLAIR DESIGNS -