The Platefull

Inspiring home cooks to be creative with accessible, nutritious recipes.

  • The Platefull Blog
  • Lifestyle
  • Kids
  • Shop
  • About
    • Privacy Policy, Terms & Conditions, and Disclosures

Poppy Seed Bread

January 18, 2020~ Baking, The Platefull Blog

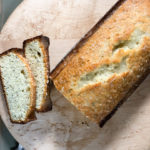
As I write this, I’ve got two loaves of Poppy Seed Bread in the oven. It’s really cold here today and my favorite things on cold days are baking, making a cozy meal, and hot chocolate by the fire. (Check out my insanely good hot chocolate recipe here).This is my favorite bread recipe and my kids love it too. One of these days I might try to “healthify” it, but its just so delicious and reminds me of when I was a kid. My Mom always served it with Tater Tot Casserole, and I do too! It’s an icy, snowy, cold winter day, so Tater Tot Casserole and Poppy Seed Bread is the perfect comfort meal for tonight. Tater Tot Casserole gives my kids plenty of good nutrients, so I don’t worry about them having a little of this yummy bread along side. It’s all about balance, right?! This recipe makes 2 loaves, so I typically bake both and then freeze the second loaf. Although sometimes they don’t last long enough to do that!

The Best Poppy Seed Bread
Print
clock clock iconcutlery cutlery iconflag flag iconfolder folder iconinstagram instagram iconpinterest pinterest iconfacebook facebook iconprint print iconsquares squares iconheart heart iconheart solid heart solid icon
The Best Poppy Seed Bread

Poppyseed Bread

  • Author: Sarah
Print Recipe
Pin Recipe

Ingredients

For the bread

3 cups flour

1 1/2 tsp salt

1 1/2 tsp baking powder

2 1/2 cup sugar

1 1/2 tsp vanilla

1 1/2 cups milk

1 1/3 cups extra light olive oil

1 1/2 Tbsp poppyseed

3 eggs

1 1/2 tsp almond flavoring

For the glaze

3/4 cup sugar

1/4 cup orange juice

1/2 tsp vanilla

1/2 tsp almond flavoring

1 Tbsp melted butter


Instructions

Preheat the oven to 350 degrees.  Combine all ingredients for the bread together in a mixer.  Grease and flour two bread pans.  Divide the bread batter evenly among the two pans.  Bake at 350 for 1 hour 15 minutes.

When the bread comes out of the oven, mix the ingredients for the glaze with a whisk.  Pour half of the glaze over each loaf of bread, while still warm and in the pan.  Let cool and turn out the loaves of bread.


Did you make this recipe?

Tag @the.platefull on Instagram and hashtag it #theplatefull

Gooey Caramel Rolls

December 16, 2019~ Baking, Breakfast, The Platefull Blog

My Mom has made these rolls for many, many years and they are a family favorite. They are easy because they rise on the counter overnight and then are baked fresh in the morning for breakfast.

Start by thawing the frozen bread dough. Melt the butter and mix with the brown sugar, corn syrup, and water in the bottom of a round cake pan. Tear the dough into pieces and dip in a cinnamon/sugar mixture. Place the torn bread dough pieces on top of the caramel mixture. You will fill the pan pretty tightly. Cover loosely with foil and leave on the counter overnight to rise. You will awake to this!

All there is left to do is bake the rolls! Bake for 25-30 minutes at 350, until they are golden on top. To serve, flip the pan onto a plate.

Print
clock clock iconcutlery cutlery iconflag flag iconfolder folder iconinstagram instagram iconpinterest pinterest iconfacebook facebook iconprint print iconsquares squares iconheart heart iconheart solid heart solid icon

Mom’s Caramel Rolls

  • Author: Sarah
  • Yield: 8 servings 1x
Print Recipe
Pin Recipe

Ingredients

Scale

1/2 stick butter, melted

1/2 cup brown sugar

1/6 cup corn syrup

1/6 cup water

1 loaf frozen bread dough

1/4 cup granulated sugar

1 Tbsp ground cinnamon


Instructions

Thaw the bread dough.  Spray a 8-9 inch round cake pan with baking spray.  When the dough is thawed, place the melted butter, brown sugar, corn syrup, and water in the bottom of a round 8 or 9 inch cake pan.  (You can use a 1/3 cup measuring cup, fill it halfway with corn syrup, then the rest with water to get 1/6 cup of each).  Stir to combine well.  

In a small bowl, combine the granulated sugar and cinnamon and stir to combine.  Tear the bread dough into about 2 inch pieces and roll each piece in the cinnamon sugar mixture.  Place on top of the caramel sauce in the pan.  Cover loosely with foil and let rise on the counter overnight.

In the morning, preheat the oven to 350 degrees.  Bake for 25-30 minutes, until the top in golden brown. Turn out onto a plate or serving dish.


Did you make this recipe?

Tag @the.platefull on Instagram and hashtag it #theplatefull

The Best Chocolate Chip Cookies

December 10, 2019~ Baking, Dessert, The Platefull Blog

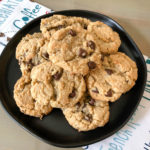
This is my Mom’s chocolate chip cookie recipe and I think they are the absolute best! My kids haven’t ever turned one down, so I guess they think they are pretty good too. 😉

Print
clock clock iconcutlery cutlery iconflag flag iconfolder folder iconinstagram instagram iconpinterest pinterest iconfacebook facebook iconprint print iconsquares squares iconheart heart iconheart solid heart solid icon

The Best Chocolate Chip Cookies

  • Author: Sarah
Print Recipe
Pin Recipe

Ingredients

Scale

1 cup Crisco

3/4 cup brown sugar

3/4 cup granulated sugar

1 tsp vanilla extract

2 eggs

2 cups flour

1 tsp baking soda

1 tsp salt

1/2 tsp cream of tarter

1 1/2 cups chocolate chips

1/2 cup quick oatmeal


Instructions

Preheat the oven to 350.  Beat the crisco, sugars, vanilla, and eggs until fluffy.  Add flour, baking soda, salt, and cream of tarter and mix until combined.  Stir in the chocolate chips and oatmeal.  Using a 1 inch cookie scoop, scoop balls of cookie dough onto a baking sheet.  Bake at 350 for 10 minutes.


Did you make this recipe?

Tag @the.platefull on Instagram and hashtag it #theplatefull

Caramel Chocolate Chip Oat Squares

December 9, 2019~ Baking, Dessert, The Platefull Blog

My mom made these when I was a kid and they’ve always been one of my favorites. I make these every Christmas when I’m doing my holiday baking. I hope you like them as much as I do!

Start by combining the flour, oats, sugar, baking soda, salt, and melted butter to make the crust.

Press about 2/3 of the crust mixture evenly into the bottom of an 8×8 baking dish and bake for 10 minutes at 350 degrees.

Remove from the oven and sprinkle with chocolate chips and nuts.

Pour the caramel evenly over the top.

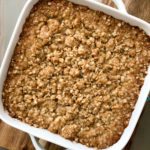
Crumble the remaining crust mixture over the top and bake for an additional 15 minutes.

Print
clock clock iconcutlery cutlery iconflag flag iconfolder folder iconinstagram instagram iconpinterest pinterest iconfacebook facebook iconprint print iconsquares squares iconheart heart iconheart solid heart solid icon

Caramel Chocolate Chip Oat Squares

  • Author: Sarah
Print Recipe
Pin Recipe

Ingredients

Scale

1 cup flour

1 cup quick oatmeal

3/4 cup brown sugar

1/2 tsp baking soda

1/4 tsp salt

3/4 cup melted butter

32 Kraft caramels, unwrapped (or 1 bag Kraft ready to melt caramel balls)

5 Tbsp evaporated milk

1/2 tsp vanilla

1 cup chocolate chips

1 cup chopped walnuts (or pecans)


Instructions

Preheat the oven to 350 degrees.  Combine flour, oatmeal, sugar, soda, salt and melted butter.  Put about 2/3 of the mixture into an 8×8 baking dish, pressing evenly into the bottom. Bake for 10 minutes.  

In the meantime, melt the caramels in the microwave.  Add the evaporated milk and vanilla and stir well to combine until smooth.  Remove the crust from the oven.  Sprinkle with chocolate chips and nuts.  Pour the caramel evenly over the top.  Crumble the remaining oat mixture over the top and bake for an additional 15 minutes.


Did you make this recipe?

Tag @the.platefull on Instagram and hashtag it #theplatefull

Candy Cane Bars

December 8, 2019~ Baking, Dessert, The Platefull Blog

Candy cane bars are a nice break from chocolate in holiday baking (don’t get me wrong, I love chocolate…like, a lot…). These bars are both beautiful and delicious!

First, make the cookie crust and press into a 9×3 prepared baking dish (lined with foil and coated with baking spray). Bake at 375 for 18-20 minutes, until barely light golden.

Remove from the oven and let cool completely. Then, using the edges of the foil, lift the bars out of the pan and slide off of the foil onto a cutting board. Spread the frosting over the top.

Sprinkle on the crushed candy canes and snowflake sprinkles (if using).

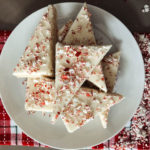
Cut into triangles to serve. Aren’t they beautiful?!

Print
clock clock iconcutlery cutlery iconflag flag iconfolder folder iconinstagram instagram iconpinterest pinterest iconfacebook facebook iconprint print iconsquares squares iconheart heart iconheart solid heart solid icon

Candy Cane Bars

  • Author: Sarah
Print Recipe
Pin Recipe

Ingredients

For the bars

2 1/2 cups flour

1/2 tsp baking powder

1/2 tsp salt

1/2 cup butter, softened

3/4 cup sugar

1/4 cup powdered sugar

1 egg

4 Tbsp plain greek yogurt

1 tsp vanilla

For the frosting

1/2 cup butter, softened

2 Tbsp cream cheese, softened

3 cups powdered sugar

1/2 tsp peppermint extract

For topping

1/4 cup finely crushed candy canes

Snowflake sprinkles (optional)


Instructions

Preheat the oven to 375 degrees.  Line a 9×13 baking dish with foil coated in cooking spray.  In a mixer bowl, cream together 1/2 cup of softened butter with granulated sugar and powdered sugar.  Add in the egg, greek yogurt, and vanilla and mix well to combine.  Add in the flour, baking powder, and salt and mix until the dough is no longer crumbly.

Press the dough into the lined baking dish.  Bake for 18-20 minutes, until just starting to turn light golden brown.  Set aside to cool completely.

For the frosting, whip the softened 1/2 cup of butter until fluffy.  Add the cream cheese and peppermint extract and mix to combine.  Add in the powdered sugar, 1 cup at a time and mix well.  

Using the edges of the foil, lift the crust out of the baking dish and slide off of the foil onto a cutting board.  Spread the frosting over the top of the cooled bars.  Sprinkle with crushed candy canes and snowflake sprinkles.  Cut into triangles to serve.


Notes

You can find pre-crushed candy cane pieces at some specialty stores like World Market.  Williams Sonoma has beautiful snowflake sprinkles.

Did you make this recipe?

Tag @the.platefull on Instagram and hashtag it #theplatefull

Parmesan and Roasted Garlic Bread

December 5, 2019~ Baking, Side Dishes, The Platefull Blog

This is the fattiest, butteriest, cheesiest, but most delicious garlic bread ever made. Ha! That’s probably not the way you’re supposed to start a blog post, huh? It’s not low calorie, but I can promise it’ll be a crowd pleaser! When I make Italian food on weeknights, I typically go with frozen garlic knots or bread because….time. But, when I’m craving a slow meal on a chilly weekend night and time in the kitchen with my family, it’s usually Italian food and this bread on the menu.

Start by cutting the top off of the garlic bulbs and remove the loose “paper” from the outside edges of the bulb. Place in a muffin tin. Drizzle with a little olive oil, and sprinkle with salt and pepper. Cover the tops with foil and roast in a 400 degree oven for 40-45 minutes or until golden brown. Let cool, then squeeze the garlic cloves out of the bulb and into a bowl. You should either use the roasted garlic immediately, or if you want to do this step ahead, you can freeze the roasted garlic. There are two ways you could do this:

  • Method 1: Line a baking sheet with parchment paper. Lay each clove separately on the parchment paper and freeze. Once frozen, you can move the cloves to a Ziploc bag and place back in the freezer.
  • Method 2: Mash the roasted garlic cloves. Measure out 1 tsp portions into an ice cube tray, wrap in plastic wrap several times so it doesn’t make your freezer smell, and keep frozen. Note that once you do this, you will never be able to use that ice cube tray for anything else because it will absorb the garlic odor and taste.

Once the garlic is roasted, you will mash it and combine with softened butter, parsley, salt, and pepper. (In this picture, I have not yet removed the cloves from the bulb – please don’t try to mash the whole bulb – ha!).

Next you will slice the baguette on the diagonal, not slicing all the way through. You want the slices to be about an inch and a half to 2 inches apart.

You will then use a fork to stuff the roasted garlic and butter mixture into each diagonal slit. Open each slit slightly and sprinkle in some grated parmesan. Last, cover the top of the baguette with the butter mixture and sprinkle with grated parmesan cheese.

Bake at 350 for about 12-15 minutes, until starting to crisp on the outside.

Slice and serve!

Print
clock clock iconcutlery cutlery iconflag flag iconfolder folder iconinstagram instagram iconpinterest pinterest iconfacebook facebook iconprint print iconsquares squares iconheart heart iconheart solid heart solid icon

Parmesan and Roasted Garlic Bread

  • Author: Sarah
Print Recipe
Pin Recipe

Ingredients

Scale

3 garlic bulbs

2 Tbsp olive oil

2 sticks of butter, softened

2 Tbsp chopped flat-leaf parsley

2 sourdough baguettes

1/2 cup grated parmesan cheese


Instructions

Start by cutting the top off of the garlic bulbs and remove the loose “paper” from the outside edges of the bulb. Place in a muffin tin. Drizzle with a little olive oil, and sprinkle with salt and pepper. Cover the tops with foil and roast in a 400 degree oven for 40-45 minutes or until golden brown. Let cool, then squeeze the garlic cloves out of the bulb and into a bowl.

Adjust oven temperature to 350 degrees. Use a fork to mash the garlic, then add the 2 sticks of softened butter and parsley. Slice the baguettes diagonally, but not cutting through. Spread half of the butter mixture in between each slice on both baguettes, being careful not to tear the baguette apart at the bottom. Sprinkle parmesan cheese in between each slice. Spread the remaining butter mixture over the top of both baguettes and sprinkle on a little more parmesan cheese. Bake for 12-15 minutes until the butter is all melted and the bread is starting to crisp.


Did you make this recipe?

Tag @the.platefull on Instagram and hashtag it #theplatefull

Pumpkin Cream Cheese Braid

November 24, 2019~ Baking, Breakfast, The Platefull Blog

I’ve been working on a short-cut Cream Cheese Filled Pumpkin Muffin, so I’ve got a lot of pumpkin and cream cheese on hand. My kids love my Nutella Cream Cheese Braid, so with all this extra pumpkin, I thought, “why not?!” It turned out so delicious! It’s the perfect sweet accompaniment for an egg casserole. I’ll definitely be serving this for our guests at Thanksgiving!

To start, flatten out a sheet of crescent roll dough. You can either press the seams together or buy the dough sheet. (The dough sheet would be much easier). Make 2 inch slits diagonally along each edge of the dough, leaving space in the middle to place the filling.

Spread the cream cheese mixture and pumpkin down the center of the dough and fold up the ends.

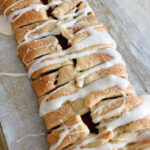
Wrap each strip of dough up and over. I’m sure you’ll make yours look neater than mine!

After it comes out of the oven, glaze and serve!

Print
clock clock iconcutlery cutlery iconflag flag iconfolder folder iconinstagram instagram iconpinterest pinterest iconfacebook facebook iconprint print iconsquares squares iconheart heart iconheart solid heart solid icon

Pumpkin Cream Cheese Braid

  • Author: Sarah
Print Recipe
Pin Recipe

Ingredients

Scale

1 can crescent roll dough (preferably the non-perforated sheet)

4 oz cream cheese, softened

3 Tbsp white sugar, divided

1 1/4 tsp pumpkin pie spice, divided

2/3 cup canned pumpkin

1 Tbsp turbinado sugar

For the glaze:

2 oz cream cheese, softened

2 Tbsp milk

1 cup powdered sugar

1 tsp vanilla extract


Instructions

Preheat the oven to 375 degrees.  Lay a piece of parchment paper on a baking sheet.  Unroll the can of crescent roll dough.  If it is perforated, press the seams together to seal.  Cut diagonal strips on each side of the dough, leaving a solid strip in the center (where you will spread the filling).

Use a mixer to cream together the softened cream cheese, 2 Tbsp white sugar, and 1/2 tsp pumpkin pie spice.  Set aside.

In a small bowl, stir together 2/3 cup pumpkin puree, 1 Tbsp white sugar, and 1/2 tsp pumpkin pie spice.

Spread the cream cheese mixture down the center of the dough.  Then, spread the pumpkin mixture over the top of the cream cheese mixture.  Fold in the ends of the dough, then fold in the strips of dough to meet in the center.  

In a small bowl, combine 1 Tbsp turbinado sugar and 1/4 tsp pumpkin pie spice.  Sprinkle over the top before baking. 

Bake at 375 for 15 minutes.  While the braid is baking, in a mixer, cream together the ingredients for the glaze: cream cheese, milk, powdered sugar, and vanilla.  (Note that the vanilla will give it an off white color.  If you prefer a pure white color, leave the vanilla out.  I personally love the flavor of the vanilla glaze with the pumpkin pie spice).  

When the braid is finished baking, remove from the oven and drizzle with the glaze.  Let cool for a few minutes before slicing and serving.


Did you make this recipe?

Tag @the.platefull on Instagram and hashtag it #theplatefull

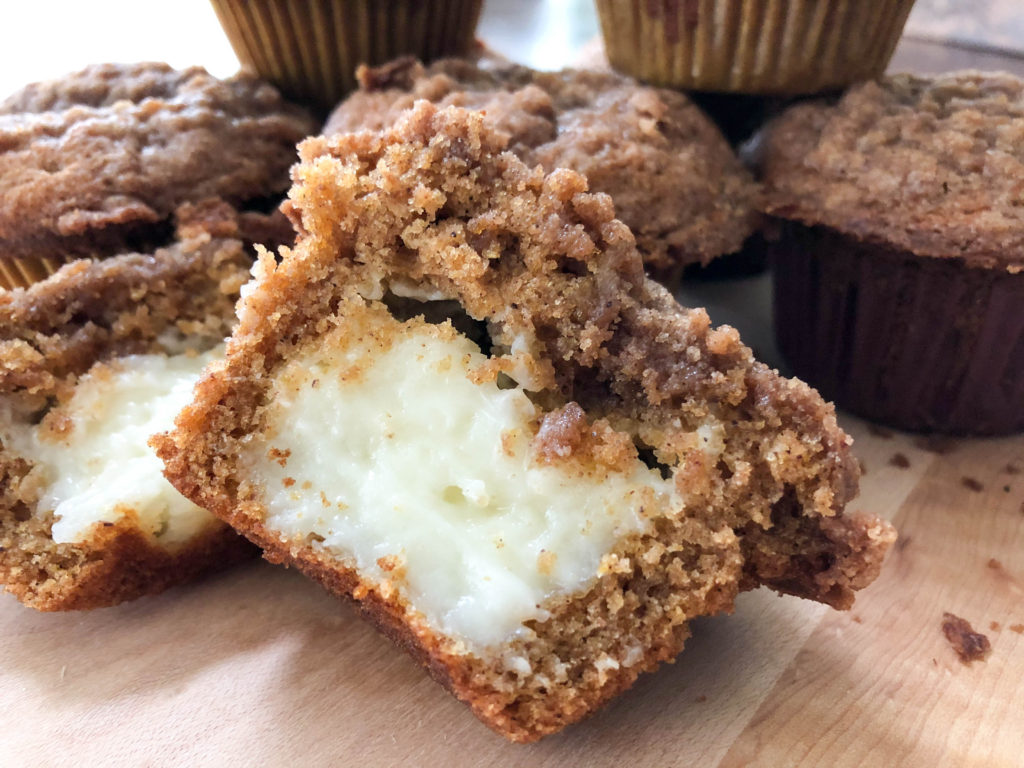
Cream Cheese Filled Pumpkin Muffins with Cinnamon Streusel

November 22, 2019~ Baking, Breakfast, The Platefull Blog

This is the perfect Fall muffin recipe! These Cream Cheese Filled Pumpkin Muffins use a secret shortcut – Trader Joe’s Pumpkin Bread Mix. They are insanely good…its hard to eat just one! I am a huge fan of this Trader Joe’s mix, so I saw no reason to make this recipe harder that it had to be by reinventing the wheel! The Cinnamon Streusel topping might look familiar. It’s from my Perfect Blueberry Muffin recipe! It’s the perfect finishing touch to these muffins – don’t leave it off!

About 3 hours before making this recipe, start by making the filling, as it needs time to set up in the freezer. This prevents it from disintegrating into the muffin when baking, leaving you with plenty of delicious filling! Beat together the cream cheese and powdered sugar. Spray a piece of foil or press-n-seal with baking spray, then scoop the cream cheese mixture into a log shape. If you make the log the width of a piece of regular sized foil or wrap, it will be the perfect length! Use your hands to form it into a tight log, then freeze for 3 hours.

To make the log, I first spread the cream cheese mixture with a spatula into a log shape the best I can.

I then fold one side of the foil over and use that to form the cream cheese into a more firm log shape.

I then finish wrapping it and freeze! At this time, you can set out the butter to soften for the streusel topping.

After 3 hours, mix the pumpkin muffin mixture according to the package directions. Line a muffin tin and spray with baking spray. Fill the muffin cups about halfway with the muffin mix.

Remove the cream cheese log from the freezer and slice into 12 equal portions. Place 1 portion in the center of each muffin cup, lightly pressing down so it doesn’t fall over.

Top each muffin cup with muffin mix, filling the cup to the top. Make the streusel topping by combining the softened butter, flour, brown sugar, and cinnamon with a fork, until it makes small crumbles.

Top each muffin cup with cinnamon streusel topping and bake according to package directions.

The next step is to try to not eat all of these fluffy filled muffins at once!

Print
clock clock iconcutlery cutlery iconflag flag iconfolder folder iconinstagram instagram iconpinterest pinterest iconfacebook facebook iconprint print iconsquares squares iconheart heart iconheart solid heart solid icon

Cream Cheese Filled Pumpkin Muffins

  • Author: Sarah
Print Recipe
Pin Recipe

Ingredients

Scale

1 box Trader Joe’s Pumpkin Bread and Muffin Mix

1 8oz block cream cheese, softened

1 cup powdered sugar

1/4 cup butter, softened

1/3 cup flour

1/2 cup brown sugar

1 tsp cinnamon


Instructions

In a mixer, beat the cream cheese until smooth.  Add the powdered sugar and beat until smooth.  Spray a piece of foil or Press-N-Seal with baking spray.  Spoon the cream cheese mixture down the center to form a log shape.  Roll the wrapping around the cream cheese log, gently pressing as you go so that it forms a pretty solid log.  Freeze for 3 hours.

Once the cream cheese log is fairly solid, preheat the oven according to package directions.  Prepare the pumpkin muffin mix according to package directions.  Prepare a muffin tin with liners and spray lightly with cooking spray.  Fill each muffin cup halfway full with the pumpkin muffin mixture.  Prepare the cinnamon streusel topping by using a fork to combine the softened butter, flour, brown sugar, and cinnamon.  It should be in small crumbs.  Remove the cream cheese filling from the freezer and wrapping.  Cut into 12 equal pieces.  Place a cream cheese piece in the center of each muffin cup.  Scoop the remaining pumpkin muffin mixture over the top of the cream cheese filling.  Sprinkle the crumb topping on top.  Bake according to package directions.


Did you make this recipe?

Tag @the.platefull on Instagram and hashtag it #theplatefull

Pumpkin Cheesecake

November 10, 2019~ Baking, Dessert, The Platefull Blog

Every year for Thanksgiving, I make my apple pie. It’s beautiful and delicious and my absolute favorite. But, the weird people in my family love pumpkin pie. I will never understand the love for pumpkin pie, with its mushy texture. But, I do love pumpkin flavor. This cheesecake makes the perfect compromise! Don’t ask me how the mushiness of cheesecake is okay but the mushiness of pumpkin pie is inedible…that’s just the way it is. This cheesecake can be made ahead and refrigerated. On Thanksgiving Day, just decorate and serve!

Start by preparing the crust. Combine the melted butter with the graham cracker crumbs and 1 Tbsp of the sugar. I try to buy graham cracker crumbs, but if I can’t find them, I let my kids turn graham crackers into crumbs for me since they are experts at making crumbs.

Then, press the crumb mixture into a springform pan. I used a pan with a bottom that lifts out because I couldn’t find my springform pan and I just wanted to eat the cheesecake already. It worked fine too.

Once you’ve mixed the filling, pour it into the pan and bake for 60-70 minutes at 350.

It will turn golden on top. My cheesecakes always crack, and it really doesn’t bother me because I just cover them with a topping. If you are super fussed about your cheesecake cracking, rumor has it you could try starting with room temperature cream cheese and bake it in a water bath. Sounds like a lot of effort to me for a cheesecake that will taste the same. I say just cover the top with whipped cream and no one will ever know. 😉

Print
clock clock iconcutlery cutlery iconflag flag iconfolder folder iconinstagram instagram iconpinterest pinterest iconfacebook facebook iconprint print iconsquares squares iconheart heart iconheart solid heart solid icon

Pumpkin Cheesecake

  • Author: Sarah
Print Recipe
Pin Recipe

Ingredients

Scale

1 1/2 cups graham cracker crumbs

5 Tbsp butter, melted

1 cup plus 1 Tbsp granulated sugar

3 8-oz packages cream cheese, softened

1 tsp vanilla extract

1 cup canned pumpkin

3 eggs

1/2 tsp cinnamon

1/4 tsp nutmeg

1/4 tsp allspice

Whipped Cream, for serving

Chopped Pecans, for serving


Instructions

Preheat the oven to 350 degrees.  Combine graham cracker crumbs, melted butter, and 1 Tbsp sugar.  Stir with a fork until the mixture is combined well with the butter.  It should be crumbly.  Pour the crust mixture into an 8 inch springform pan.  Press the crumb mixture into the bottom and about 2/3 of the way up the sides of the pan.  Bake the crust for 5 minutes, then set aside.

In a mixing bowl, add the cream cheese, 1 cup of sugar, and vanilla.  Beat until smooth.  Add the eggs, pumpkin, and spices and beat until well combined.  Pour the filling into the crust.  Bake for 60-70 minutes.  Allow the cheesecake to cool completely before refrigerating. 

When ready to serve, top the cheesecake with whipped cream and chopped pecans.


Did you make this recipe?

Tag @the.platefull on Instagram and hashtag it #theplatefull

Monster Cookie Energy Bites

November 5, 2019~ Baking

These no-bake energy bites taste just like a real Monster Cookie! My boys like them, and I like them because I don’t have to monitor multiple batches of cookies in the oven. I store them in an air tight container for the week for quick after school snacks. I find myself grabbing them for a healthy sweet treat just as often as the kids do!

One note about these – my boys love them with M&Ms. In these photos, I only had normal sized M&Ms, so that’s what I used, however it is pretty difficult to get them to hold together with the larger M&M pieces. I recommend using either mini chocolate chips or mini M&Ms for these. :). Sometimes you gotta go with what you have in the pantry though, right?!

Print
clock clock iconcutlery cutlery iconflag flag iconfolder folder iconinstagram instagram iconpinterest pinterest iconfacebook facebook iconprint print iconsquares squares iconheart heart iconheart solid heart solid icon

Monster Cookie Energy Bites

  • Author: Sarah
Print Recipe
Pin Recipe

Ingredients

Scale

1/2 cup creamy peanut butter

1/3 cup honey

1 tsp vanilla extract

1 cup raw old fashioned oats

2/3 cup unsweetened shredded coconut

1/2 cup ground flaxseed meal

6 Tbsp mini M&Ms (or sub mini chocolate chips)


Instructions

In a bowl, stir together peanut butter, honey, and vanilla extract.  Add oats, shredded coconut, and flaxseed meal and stir well to combine.  Fold in M&Ms and refrigerate the mixture for 30 minutes.  After the mixture has chilled, shape into balls.  I make mine about the size of a golfball.  Store in an airtight container in the fridge for up to one week.


Did you make this recipe?

Tag @the.platefull on Instagram and hashtag it #theplatefull

  • 1
  • 2
  • Next Page »

Categories

  • Appetizers
  • Baking
  • Breakfast
  • Dessert
  • Drinks
  • Kids
  • Lifestyle
  • Main
  • Recipes
  • Salads
  • Sauces and Dressings
  • Side Dishes
  • Soups
  • The Platefull Blog
  • Uncategorized

Archives

  • March 2025
  • July 2021
  • January 2021
  • July 2020
  • June 2020
  • May 2020
  • April 2020
  • March 2020
  • February 2020
  • January 2020
  • December 2019
  • November 2019
  • October 2019
  • September 2019
  • August 2019
  • September 2017
  • April 2017
  • March 2017
  • February 2017
  • January 2017
  • November 2016
  • October 2016

Recent Comments

  • Jennifer on Avocado and Egg Breakfast Stack
  • Christine Kish on Recipe Organization
  • Sarah on Easy Recipes for the Whole30
  • Jenn on Easy Recipes for the Whole30

- THEME BY ECLAIR DESIGNS -