The Platefull

Inspiring home cooks to be creative with accessible, nutritious recipes.

  • The Platefull Blog
  • Lifestyle
  • Kids
  • Shop
  • About
    • Privacy Policy, Terms & Conditions, and Disclosures

Fruit Pizza

January 17, 2021~ Dessert, Main, The Platefull Blog, Uncategorized

It’s been a minute, but I’m back with a really fun recipe! As we’ve added people to our family, this recipe is often highly debated. When I was a kid, we ate this for dinner, but as our family has grown, no one else seems to consider this a meal….weird. They all consider it dessert. Whatever you want to consider it, it’s delicious! I will admit, I make this as a super-fun-special-treat for my kids. They think its awesome when they get to basically eat cookies for dinner. While fueling their bodies with nourishing food is very important to me, you only live once! My family makes this Fruit Pizza every Christmas Eve, as part of our Christmas Eve Appetizer tradition.

It’s super simple to make. Roll out refrigerated sugar cookie dough into the shape of a pizza and bake according to package directions.

Make the cream cheese frosting and spread over the cooled sugar cookie crust. Set out different types of cut fruit and let people top their fruit pizza the way they like!

Print
clock clock iconcutlery cutlery iconflag flag iconfolder folder iconinstagram instagram iconpinterest pinterest iconfacebook facebook iconprint print iconsquares squares iconheart heart iconheart solid heart solid icon
Fruit Pizza

Fruit Pizza

  • Author: Sarah
Print Recipe
Pin Recipe

Ingredients

Scale

1 roll of sugar cookie dough

8 oz cream cheese

1/2 c powdered sugar

1 tsp vanilla

Assorted fruit, washed and cut


Instructions

Spread the sugar cookie dough in a pizza sized circle on a pizza pan.  Bake at 375 for 12 min.  Using a mixer, cream together the cream cheese, powdered sugar, and vanilla.  When the cookie dough is finished cooking, let cool completely.  Once cool, spread the cream cheese mixture over the top of the cookie.  Top with cut fruit of your choice.  (I use berries, apples, kiwi, banana).  


Did you make this recipe?

Tag @the.platefull on Instagram and hashtag it #theplatefull

Parmesan Crusted Pork Chops

June 23, 2020~ Main, The Platefull Blog

The further we get into staying at home, the more I am completely over cooking! As someone who loves to cook, even I am tired of preparing meals three times a day. It seems as though all I do is cook, cleanup, and repeat. Who’s with me?! My goal for this weekend is to put together a list of my favorite freezer meals and get them prepped so that I can cut back on my time in the kitchen. Until then, it’s Parmesan Crusted Pork Chops to the rescue as a quick and easy weeknight meal!

As you well know by now, I love prep ahead recipes for weeknight meals. This Parmesan Crusted Pork Chops recipe is easy to prep ahead. Mix the Parmesan cheese, bread crumbs, garlic powder, and black pepper in a bowl. Cover and store in the fridge until you are ready to bake the pork chops. When ready, remove the mixture from the fridge and give it a quick stir with a fork. Rub the olive oil on the pork chops and press them into the bread crumb mixture. Shake off the excess and place on a baking pan with edges. I like to line my baking pan with foil to make cleanup easier.

Throw a veggie in a skillet (or microwave a bag of steamer veggies), the pork chops in the oven, and 30 minutes later, dinner is served! I love recipes like this! One of my favorite recipes to serve with Parmesan Crusted Pork Chops is my Blistered Garlicky Green Beans. They are oh-so-good!

What are your go-to easy meals right now?

Parmesan Crusted Pork Chops
Print
clock clock iconcutlery cutlery iconflag flag iconfolder folder iconinstagram instagram iconpinterest pinterest iconfacebook facebook iconprint print iconsquares squares iconheart heart iconheart solid heart solid icon
Parmesan Crusted Pork Chops

Parmesan Crusted Pork Chops

  • Author: Sarah
Print Recipe
Pin Recipe

Ingredients

Scale

4 boneless pork chops, 1/2 inch thick

1 Tbsp olive oil

1 cup grated Parmesan cheese

1 cup Italian breadcrumbs

1 tsp black pepper

1 tsp garlic powder


Instructions

Preheat oven to 350°.  Combine the Parmesan cheese, bread crumbs, pepper, and garlic powder in a bowl.  Rub the pork chops with olive oil, then press in the breadcrumb mixture on all sides, to coat.  Shake off excess and place on a foil-lined baking pan. Bake at 350° for 40-45 minutes, until pork chops are cooked through.


Did you make this recipe?

Tag @the.platefull on Instagram and hashtag it #theplatefull

Whole30 Mediterranean Turkey Wraps

May 22, 2020~ Main, The Platefull Blog

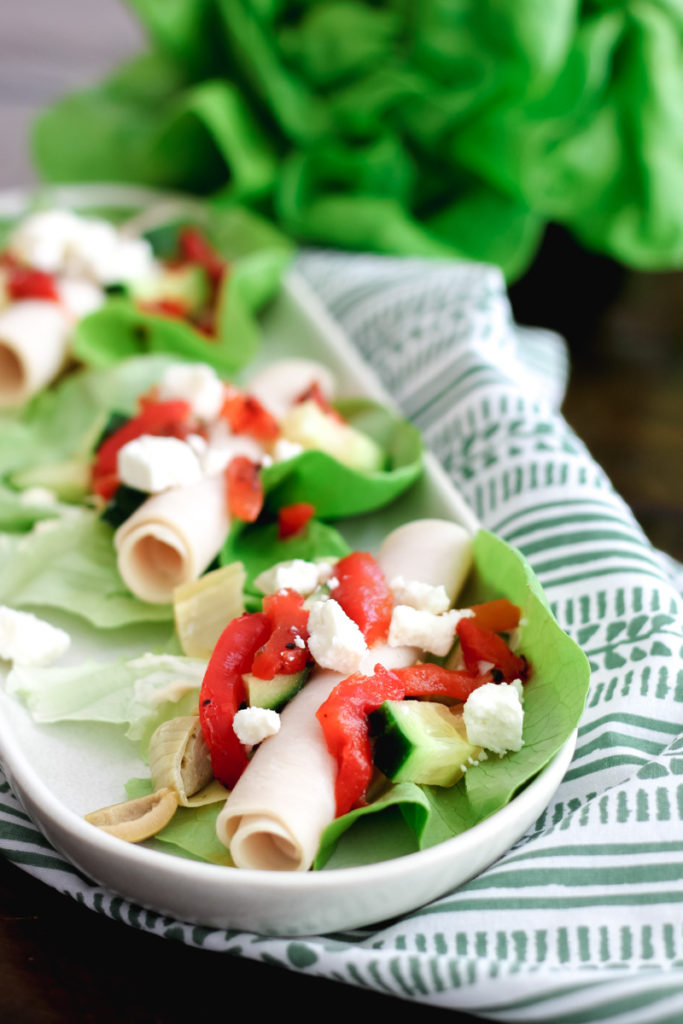
I am currently doing a Whole-30-ish. Ha. It’s my own way of forcing myself to focus with intention on my nutrition, but still allowing myself a few things that are not Whole 30 compliant. Anytime I’m focusing on nutrition, I’m constantly in search of easy, healthy recipes. Whole30 Mediterranean Turkey Wraps come together in 5 minutes and are a perfect solution for those raid-the-fridge days. Add any veggies you like!

I’m finding it especially hard to stick to good nutrition these days. Having the kids out of school while still trying to work a full time job is a lot. That’s why it’s essential that I have a set of go-to, low prep meals that I can fall back on. Otherwise, it’s way too easy to reach for the bag of chips. Or the Dot’s Pretzels. OMG. Have you tried Dot’s Pretzels?! Anyway…Whole30 Mediterranean Turkey Wraps are super simple to prepare, easy to pack as a portable lunch, and delicious! No cooking required.

If you are not concerned about keeping this recipe Whole 30 compliant, Feta is a wonderful addition! You can also switch it up by using hummus in place of the mayo. This still keeps it light and healthy, but gives it a little different flavor. Equally delicious!

If you are looking for other Whole 30 meal ideas, check out my roundup of easy Whole 30 recipes here!

Print
clock clock iconcutlery cutlery iconflag flag iconfolder folder iconinstagram instagram iconpinterest pinterest iconfacebook facebook iconprint print iconsquares squares iconheart heart iconheart solid heart solid icon

Whole 30 Mediterranean Turkey Wraps

  • Author: Sarah
Print Recipe
Pin Recipe

Ingredients

Butter lettuce leaves

Sliced deli turkey

Roasted red peppers

Diced cucumber

Sliced Kalamata olives

Sliced roasted red pepper

Diced jarred artichoke hearts

Crumbled feta cheese (optional)

Avocado Mayo


Instructions

Spread a small amount (about 1 tsp) of avocado mayo on each butter lettuce leaf.  Roll a slice of turkey and place in the middle.  Top with cucumber, olives, artichokes, roasted red pepper, and feta (if using).  Enjoy as a lettuce wrap!


Notes

To remain Whole 30 compliant, omit the Feta cheese.  

As another variation, use hummus in place of mayo (this is not Whole 30 compliant, but it is yummy and healthy!)

Did you make this recipe?

Tag @the.platefull on Instagram and hashtag it #theplatefull

Cuban Pork Bowls

May 19, 2020~ Main, The Platefull Blog

I have been loving bowls lately! They are simple to make and perfect for keeping in the fridge for easy lunches! Cuban Pork Bowls are so delicious, flavorful, and healthy. The pork is so good, easy in the slow cooker, and super versatile! Add it to salads, wraps, make a Cuban sandwich, soups, over rice with beans and guac, or in a bowl like this!

I like to make a big batch of this meat and then divide it into smaller portions to freeze. For a super quick weeknight meal, I buy frozen fire-roasted sweet potato cubes, pre-made guacamole, a can of cuban black beans from Trader Joe’s, and the frozen Organic Jasmine Rice from Trader Joe’s. Simply heat the meat, potatoes, beans and rice, and you’re done!

You can also easily make this meal Whole 30 compliant by leaving out the rice, or substituting cauliflower rice if that’s your thing.

Print
clock clock iconcutlery cutlery iconflag flag iconfolder folder iconinstagram instagram iconpinterest pinterest iconfacebook facebook iconprint print iconsquares squares iconheart heart iconheart solid heart solid icon
Cuban Pork Bowls

Cuban Pork Bowls

  • Author: Sarah
Print Recipe
Pin Recipe

Ingredients

Scale

For the Pork:

2 Tbsp extra virgin olive oil

1/2 cup orange juice

1/2 cup lime juice

1 1/2 tsp salt

1 tsp cumin

1 tsp dried oregano

1/4 tsp crushed red pepper flakes

1/8 tsp black pepper

7 cloves garlic, peeled and smashed

1 small sweet onion, sliced thin

1 bay leaf

3 pound pork shoulder

For the Bowls:

Roasted Sweet Potato, diced into 2 inch chunks

Rice, cooked

Cuban Style Black Beans, heated

Romain lettuce, chopped

Smashed avocado (or guacamole)


Instructions

Place the onion and bay leaf in the bottom of a slow cooker.  Place the pork shoulder on top of the onions.  In a bowl, combine remaining pork ingredients (oil, orange juice, lime juice, spices, and garlic).  Pour over the top of the pork shoulder.  Cover and cook on low for 8-9 hours, until tender.  Transfer the pork to a cutting board to shred, then return the shredded meat to the slow cooker and mix well with the sauce.

For the sweet potato, peel and dice the potato.  Toss with about 1 tsp olive oil and roast at 400 ° for 15-20 minutes, until beginning to brown. Alternatively, you can use frozen fire-roasted sweet potato chunks and heat.

For the beans, warm a can of Cuban style black beans on the stove.  (My favorite is Trader Joe’s brand).

Prepare the rice, according to package directions.  (I like to use the frozen Trader Joe’s Organic Jasmine Rice because I can quickly microwave it).

To prepare the bowls, layer rice in the bottom of a bowl.  Top with sweet potato, lettuce, beans, pork, and guacamole (or smashed avocado).


Did you make this recipe?

Tag @the.platefull on Instagram and hashtag it #theplatefull

Honey Mustard Chicken and Veggie Kabobs

April 15, 2020~ Main, The Platefull Blog

It’s again a very busy week in our house. One of these days I keep thinking I’ll figure out how to slow things down, but it sure hasn’t happened yet! I knew that Sunday meal prep would be huge this week in simplifying my weeknight routines. I prepped these delicious Honey Mustard Chicken and Veggie Kabobs ahead, so it only took a few minutes on the grill. While the kabobs were grilling, it gave me just enough time to throw together a quick fruit salad, and dinner was ready! My kids gave the definite stamp of approval on this chicken. They said, “This is really good, Momma! It tasted sweet!” Why do I always feel so victorious when they love a new meal right off the bat?! Ha.

Here’s the trick to kicking things up a notch with these Honey Mustard Chicken and Veggie Kabobs. When you make the marinade, it will end up serving multiple purposes. It will get split three ways (not equal), to serve as the marinade, the basting sauce while grilling, and as a dip!

The chicken in this recipe is so versatile. It’s great in a wrap, on a salad, or even on it’s own as grilled chicken tenders! It is one of those recipes that has become a staple in my freezer because I can do so many different things with it and my kids love it.

Print
clock clock iconcutlery cutlery iconflag flag iconfolder folder iconinstagram instagram iconpinterest pinterest iconfacebook facebook iconprint print iconsquares squares iconheart heart iconheart solid heart solid icon

Honey Mustard Chicken and Veggie Kabobs

  • Author: Sarah
Print Recipe
Pin Recipe

Ingredients

Scale

For the Kabobs

1 1/2 lbs chicken, cut into 1 1/2 inch cubes

1 large red onion, cut into 1 1/2 inch chunks

2 small zucchinis, cut into 1/4 inch slices

1 8-oz package baby Bella mushrooms, whole

3 Tbsp olive oil

For the Marinade

1/4 cup honey

2 Tbsp Dijon mustard

2 Tbsp yellow mustard

2 Tbsp orange juice

1 Tbsp coconut aminos (or soy sauce)

1 Tbsp brown sugar

1 tsp parsley

1 tsp paprika

1 tsp garlic powder

1 tsp salt

1/2 tsp onion powder

1/4 tsp pepper

For Honey Mustard Dip:

3 Tbsp reserved honey mustard marinade

2 Tbsp mayonnaise

1/3 cup sour cream


Instructions

Combine all marinade ingredients.  Remove 1/3 cup of the marinade to a small bowl and set aside.  Add the chicken to the remaining marinade, along with 3 Tbsp of olive oil.  Stir well to combine and coat the chicken.  Cover and refrigerate, allowing the chicken to marinate for at least 4-6 hours, or overnight.

From the reserved marinade, remove 3 Tbsp and place in a small bowl.  Add the mayo and sour cream and stir to combine.    This makes the honey mustard dipping sauce.  Refrigerate until ready to serve.

When ready to cook, preheat the grill to medium high heat.  Thread the zucchini, mushrooms, red onion, and marinated chicken onto grill-safe skewers.  Place onto the grill and immediately baste the top with reserved marinade.  Grill for 4-5 minutes, then flip and baste again.  Grill for another 4-5 minutes, until the chicken is cooked through.  

Serve with the honey mustard dipping sauce.


Did you make this recipe?

Tag @the.platefull on Instagram and hashtag it #theplatefull

Huli Huli Chicken Wraps

April 13, 2020~ Main, The Platefull Blog

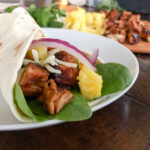
Raise your hand if you also have kids that are super picky about eating meat! 🙋🏻‍♀️. My boys have strong opinions when it comes to eating meat. They love ground beef but honestly aren’t huge fans of the rest. The first time I made Huli Huli Chicken Wraps, they both said, “This chicken is yummy, Mommy.” That’s when I knew the recipe needed no adjustments and was instantly added to our regular rotation!

I like to let them be creative with their food and how they choose to eat it. I set everything out on the table and they take what they want. If they want a wrap, cool. Chicken on the side with pineapple in the tortilla, cool. The less direction I give once the food is on the table, the better they eat. I tend to make a lot of meals that I serve “deconstructed” on a cutting board like this one (ingredients out on the table), and they put it together in whatever way they want.

Huli Huli Chicken Wraps are the perfect weeknight meal. I marinate the chicken ahead, so the only thing to do the night of serving is grill the chicken and set out the other ingredients. Easy peasy!

Huli Huli Chicken could be served in a variety of ways. It could even be grilled ahead of time and served cold or reheated. Here are a few ideas:

  • Hawaiian Quesadillas
  • Huli Huli rice or quinoa bowl
  • Marinate a whole chicken breast and serve grilled, with a store-bought pineapple salsa on top
  • Huli Huli Grilled Chicken Sandwich with Swiss cheese and a grilled pineapple ring
  • Hawaiian stuffed chicken (marinate a chicken breast, then slice a pocket and stuff with grated Swiss cheese and diced pineapple)
  • On a salad, with strawberries, pineapple, goat cheese, candied pecans, and a poppyseed vinaigrette
Print
clock clock iconcutlery cutlery iconflag flag iconfolder folder iconinstagram instagram iconpinterest pinterest iconfacebook facebook iconprint print iconsquares squares iconheart heart iconheart solid heart solid icon

Huli Huli Chicken Wraps

  • Author: Sarah
Print Recipe
Pin Recipe

Ingredients

Scale

For the chicken

2 lb chicken tenders

1 cup pineapple juice

1/2 cup coconut aminos

1/2 cup brown sugar

1/3 cup ketchup

1/4 cup chicken broth

2 tsp fresh grated ginger

2 tsp minced garlic

For the wraps

Flour tortillas

Green onion, sliced

Mixed greens

Diced fresh pineapple

Monterey Jack Cheese, shredded

Sour Cream


Instructions

In a bowl, add the marinade ingredients and whisk to combine.  Place the chicken tenders in a Ziploc bag or container and pour the marinade over the chicken.  Stir or toss with your hands to combine.  Marinate overnight (or freeze for later).

When ready to serve, heat a grill to medium high heat.  Remove the chicken tenders from the marinade and grill for about 4-5 minutes on each side, until cooked through.  Remove from the grill and chop into bite-size pieces.

To assemble the wraps, layer the lettuce, pineapple, chicken, cheese, green onion, and sour cream on a flour tortilla.  Roll into a wrap and enjoy!


Did you make this recipe?

Tag @the.platefull on Instagram and hashtag it #theplatefull

Sheet Pan Roast Chicken and Veggies

April 11, 2020~ Main, The Platefull Blog

I love sheet pan dinners and I especially love Sheet Pan Roast Chicken and Veggies. I prep the veggies and chicken ahead for this recipe, which means that on a weeknight, I toss the veggies on the pan, place the chicken on top, and it goes right into the oven. It’s easy, we can work on homework or play while it’s baking, and it’s a nutritious meal that we all enjoy.

I make Sheet Pan Roast Chicken and Veggies work for me. While the recipe below is the basic recipe, I use this recipe as an opportunity to use up veggies and herbs. In the Fall, since I grow sage in my garden, I’ll add a little chopped sage to the butter mixture. Other veggies that work well in this dish are fresh green beans, diced Yukon or purple potatoes, butternut squash, fresh beets, and cauliflower. Fresh thyme, rosemary, or sage all work well, too! Feel free to play with this recipe to make it work for you!

To prep the recipe ahead of time, peel and chop the veggies. Place them in a container or bag and refrigerate until needed. Prepare the herb butter mixture and work it under the skin of the chicken thighs. Refrigerate the chicken thighs until ready to cook. When ready to bake, proceed with the recipe instructions below! With a little prep done ahead of time, this recipe actually makes a crazy easy weeknight meal. My favorite way to serve it is with Pear and Cranberry Chopped Salad. Roasted chicken and veggies on a weeknight – who knew?!

Print
clock clock iconcutlery cutlery iconflag flag iconfolder folder iconinstagram instagram iconpinterest pinterest iconfacebook facebook iconprint print iconsquares squares iconheart heart iconheart solid heart solid icon

Sheet Pan Roast Chicken and Veggies

  • Author: Sarah
Print Recipe
Pin Recipe

Ingredients

Scale

3 Tbsp butter, softened

2 tsp fresh rosemary, chopped

2 tsp lemon zest

1 garlic clove, minced

1/2 tsp salt

1/4 tsp black pepper

1/2 onion, cut into wedges

1 parsnip, sliced into coins

3 carrots, sliced into coins

1 sweet potato, peeled and diced

1 rutabaga, peeled and diced

6 chicken thighs, bone in and skin on

Olive oil

Salt and Pepper, to taste


Instructions

Preheat the oven to 400°.

In a small bowl, combine the softened butter, rosemary, lemon zest, garlic, salt, and pepper.  Loosen the skin on the chicken thighs in one place, careful not to remove the skin, and use your fingers to work the butter mixture under the skin.  

Prepare the veggies and place on a sheet pan.  Drizzle with a little olive oil, sprinkle with salt and pepper, and toss to combine.  Spread evenly on the sheet pan.  Place the chicken thighs on top.  Roast for 30 to 40 minutes, until the veggies are tender and the chicken is cooked through.


Did you make this recipe?

Tag @the.platefull on Instagram and hashtag it #theplatefull

Grilled Mahi Mahi with Mango Salsa

April 10, 2020~ Main, The Platefull Blog

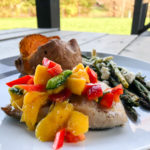
We’ve finally had some really nice days here, as warm as 80 degrees. The second it gets remotely nice outside, my boys start begging to eat dinner at the picnic table outside and make S’mores for dessert. It’s not at all hard to convince me, as I love being out in our backyard as much as they do! Our yard overlooks a pond and it’s my favorite place to be. I love the peace that comes with watching the water move. Grilled Mahi Mahi with Mango Salsa is the perfect quick and easy outdoor dinner.

Our picnic table is the perfect spot to camp out – it’s big enough to fit my whole (big!) family, because my husband and I built it ourselves, to the size I wanted! It only took us about a day to build and we’ve gotten so much use out of it. Check out the plans here! (Or just browse her site to get lost in awesome DIY projects). I stained my outdoor table and matching benches with a gray stain.

When it hit 80 degrees a couple days ago, I knew I needed to dig the Mahi Mahi out of the freezer. Seafood is such as easy thing to keep on hand in the freezer because its so quick to cook! Grilled Mahi Mahi with Mango Salsa is so easy, but packed with fresh flavors of Spring and Summer.

To make Grilled Mahi Mahi with Mango Salsa, heat the grill over medium heat. Brush both sides of the Mahi Mahi with olive oil, then sprinkle a little salt and pepper over the top. Grill for about 5 minutes on each side. (I used a grill pan, which I also grilled the asparagus on, just to make sure nothing fell through the grates). Here’s a link to my favorite grill pans.

The mango salsa can be prepared ahead, or while the Mahi Mahi is grilling. Simply combine diced mango, diced red pepper, finely chopped fresh jalapeño, and a squeeze of lime juice. That’s it! Super fresh and flavorful.

I like to throw asparagus on the grill to serve with this (check out my Lemon and Feta Asparagus, which is what I served here, just grilled instead of Roasted). Microwave a sweet potato, and you’ve got dinner on the table in 15 minutes! Can’t beat that!

Print
clock clock iconcutlery cutlery iconflag flag iconfolder folder iconinstagram instagram iconpinterest pinterest iconfacebook facebook iconprint print iconsquares squares iconheart heart iconheart solid heart solid icon

Grilled Mahi Mahi with Mango Salsa

  • Author: Sarah
  • Prep Time: 5 minutes
  • Cook Time: 10 minutes
  • Total Time: 15 minutes
  • Yield: 2 servings 1x
Print Recipe
Pin Recipe

Ingredients

Scale

2 Mahi Mahi Filets, thawed if previously frozen

1 tsp olive oil

salt and pepper, to taste

1 mango, diced

1/2 red bell pepper, diced

1/2 fresh jalapeño, finely chopped

1 Tbsp fresh squeezed lime juice


Instructions

Preheat a grill to medium heat.  Brush both sides of the fish with olive oil, then sprinkle with salt and pepper.  Grill over medium heat for about 4-5 minutes on each side, or until cooked through, depending on the thickness of the fish.  

While the fish is cooking, combine mango, red bell pepper, and jalapeño in a small bowl.  Add lime juice and toss to combine.

When the fish is cooked, serve with the mango salsa.


Did you make this recipe?

Tag @the.platefull on Instagram and hashtag it #theplatefull

Easy Marinated Grilled Chicken

March 25, 2020~ Main, The Platefull Blog

You will always find this Easy Marinated Grilled Chicken in my freezer. I can throw it in the fridge to thaw overnight and the next day, throw it on the grill with some veggies or sweet corn and dinner is ready in minutes. It’s perfect on it’s own, but makes a great chicken for salads or wraps as well! My kids absolutely love this recipe, so it’s a staple in our house. I snapped this photo in a hurry to get dinner on the table, so it’s not the best picture (maybe I’ll get around to re-doing it sometime), but I promise you, your whole family will love this Easy Marinated Grilled Chicken! It’s crazy good!

Print
clock clock iconcutlery cutlery iconflag flag iconfolder folder iconinstagram instagram iconpinterest pinterest iconfacebook facebook iconprint print iconsquares squares iconheart heart iconheart solid heart solid icon
Easy Marinated Grilled Chicken

Easy Marinated Grilled Chicken

  • Author: Sarah
Print Recipe
Pin Recipe

Ingredients

Scale

1/3 cup soy sauce

1/3 cup French dressing

6 shakes garlic salt

6 drops tabasco

1 package chicken breast tenders (raw)


Instructions

In a bowl, whisk together the soy sauce, French dressing, garlic salt, and tabasco.  Pour into a Ziploc bag and add the chicken tenders.  Toss to combine and refrigerate or freeze until ready to cook.

When ready to cook, heat a grill over medium high heat.  Grill the chicken for 10-15 minutes, until cooked through, flipping halfway through.


Did you make this recipe?

Tag @the.platefull on Instagram and hashtag it #theplatefull

Veggie Pizza

February 28, 2020~ Main, The Platefull Blog

You know what day it is! It’s Friday pizza night in our house. We have had this tradition for years now and my kids are not happy if we have to skip a Friday pizza night for any reason. They love it! I’ve posted a few blog posts before about my favorite pizza ingredients, how to make the easiest homemade pizza crust, and different variations of pizzas that we like to make. Today I’m sharing one of my favorites – Veggie Pizza. I cook all of the veggies ahead and store them in the fridge until pizza night. I’m often surprised at what my kids will choose to put on their pizza if it’s their choice. They love making homemade pizza and having control. Isn’t that what all preschoolers want – control?! LOL. Mine do! I’ve learned the best thing I can do when it comes to kids and food is set out the food and keep my mouth shut. The more I intervene, the more dinner time battles there are. This is definitely true with Veggie Pizza too! I help them roll out their crust, then they put sauce on, they choose the veggies from the bowls I have sitting out, they put the cheese on, and I don’t intervene. Sometimes when they get down from their cooking towers, I will spread the cheese a little more evenly, but other than that, I don’t try to sneak anything in. If I don’t want them to eat something, I don’t make it an option! I hope you enjoy this delicious Veggie Pizza as much as I do!

Veggie Pizza
Print
clock clock iconcutlery cutlery iconflag flag iconfolder folder iconinstagram instagram iconpinterest pinterest iconfacebook facebook iconprint print iconsquares squares iconheart heart iconheart solid heart solid icon
Veggie Pizza

Veggie Pizza

  • Author: Sarah
Print Recipe
Pin Recipe

Ingredients

Scale

1 1/4 cup very warm water (108–110 degrees Fahrenheit)

1 package active dry yeast

pinch of sugar

4 cups flour

pinch of salt

Olive oil

Pizza Sauce

Shredded Mozzarella Cheese

1 8 oz container sliced baby Bella mushrooms

1 red bell pepper, diced

1 yellow bell pepper, diced

1 package or bunch broccolini

1 small yellow onion, diced

Olive oil


Instructions

Dissolve the sugar in the warm water and add the yeast.  Allow it to proof for 10-15 minutes.  You should see the yeast bubble up and form a layer of foam on top of the water.  

Place 2 cups flour in a mixing bowl and add a pinch of salt, 1-2 Tbsp olive oil, and the yeast/water mixture.  Using the dough hook attachment, mix until combined.  Add in the 3rd cup of flour and mix until combined, then add as much of the 4th cup as you need until the dough no longer sticks on your finger when you press on it.  Turn the dough out onto a floured surface and knead until smooth and elastic.  Form into a ball and place into a lightly oiled bowl, covering with a kitchen towel.  Let the dough rise for a few hours, then separate into 4 equal portions.  Roll each portion out into a pizza crust.

While the dough is rising, add olive oil to a pan and cook the mushrooms, peppers, and onion.  Preheat the oven to 400.  Place the broccolini on a sheet pan and drizzle with olive oil.  Roast for about 20 minutes, turning, until lightly browned. Reserve the cooked veggies in a bowl.

After rolling out the pizza crust, top with sauce, then cheese, then veggies.  Bake in a 450 degree oven for 10 minutes.


Did you make this recipe?

Tag @the.platefull on Instagram and hashtag it #theplatefull

  • 1
  • 2
  • 3
  • …
  • 6
  • Next Page »

Categories

  • Appetizers
  • Baking
  • Breakfast
  • Dessert
  • Drinks
  • Kids
  • Lifestyle
  • Main
  • Recipes
  • Salads
  • Sauces and Dressings
  • Side Dishes
  • Soups
  • The Platefull Blog
  • Uncategorized

Archives

  • March 2025
  • July 2021
  • January 2021
  • July 2020
  • June 2020
  • May 2020
  • April 2020
  • March 2020
  • February 2020
  • January 2020
  • December 2019
  • November 2019
  • October 2019
  • September 2019
  • August 2019
  • September 2017
  • April 2017
  • March 2017
  • February 2017
  • January 2017
  • November 2016
  • October 2016

Recent Comments

  • Jennifer on Avocado and Egg Breakfast Stack
  • Christine Kish on Recipe Organization
  • Sarah on Easy Recipes for the Whole30
  • Jenn on Easy Recipes for the Whole30

- THEME BY ECLAIR DESIGNS -