The Platefull

Inspiring home cooks to be creative with accessible, nutritious recipes.

  • The Platefull Blog
  • Lifestyle
  • Kids
  • Shop
  • About
    • Privacy Policy, Terms & Conditions, and Disclosures

Blackened Cajun Chicken Salad

February 27, 2020~ Main, Salads, The Platefull Blog

Please note that this post contains affiliate links and any sales made through such links will reward me a small commission – at no extra cost for you. All opinions are my own. See my disclosure for more information.

Blackened Cajun Chicken Salad is super quick to prep and I am seriously hooked! I’ve made this salad more times that I can count in the last month. It makes a quick weeknight dinner, but also a packable nutritious lunch. I posted the seasoning for the chicken a while back. It is Whole 30 compliant and packed with flavor. It is seriously so, so good!

I keep a lot of homemade seasoning mixes on hand, and Cajun seasoning is one of them! I love these spice containers for easily mixing and storing seasonings in an airtight container. The containers will hold a double batch of this Cajun seasoning. Here they are in use in my kitchen! I store taco seasoning, spaghetti seasoning, Cajun seasoning, Au Jus seasoning, Italian dressing mix, and homemade beef bouillon granules in them.

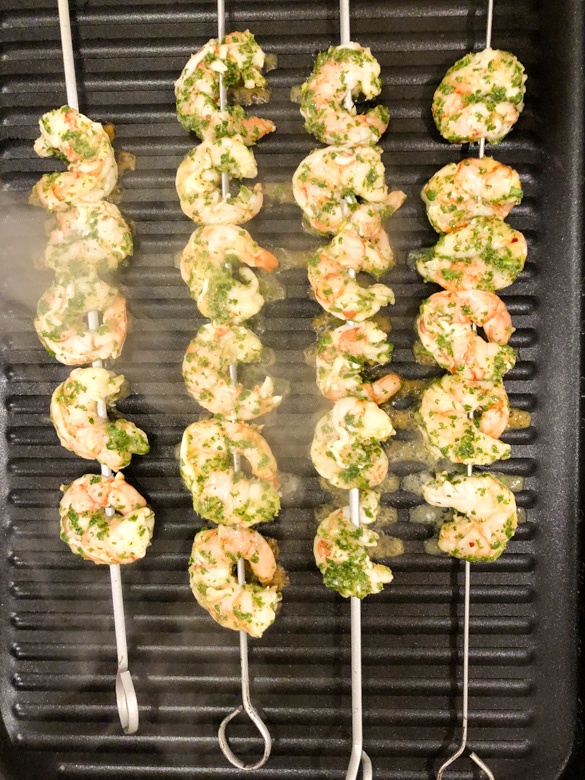
Okay, so for the Blackened Cajun Chicken Salad, the first step is to pound the chicken breasts. I do this for two reasons. One, I’m impatient and want them to cook faster. Two, I like more surface area for the yummy spice mix! Once they are pounded to about 1/2 inch thick, I coat both sides really well with the spice mix and pat them to make it stick. Then, I throw them on the grill (outside or a grill pan both work great). Cook for 3-4 minutes on each side while you prep the rest of the salad.

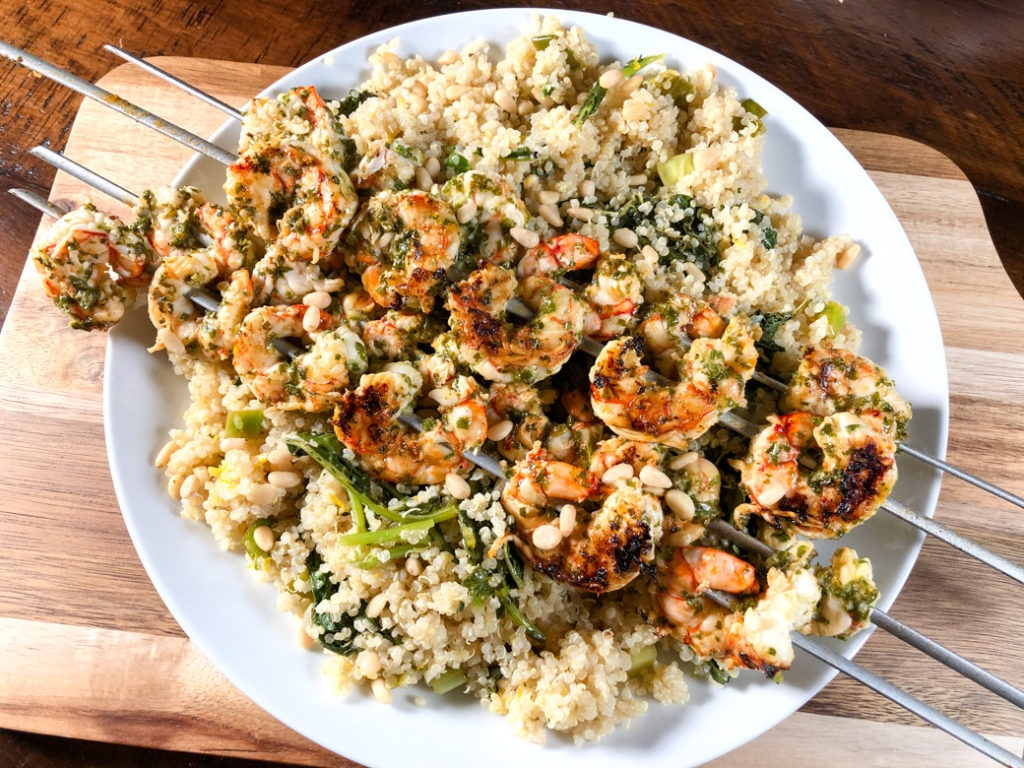
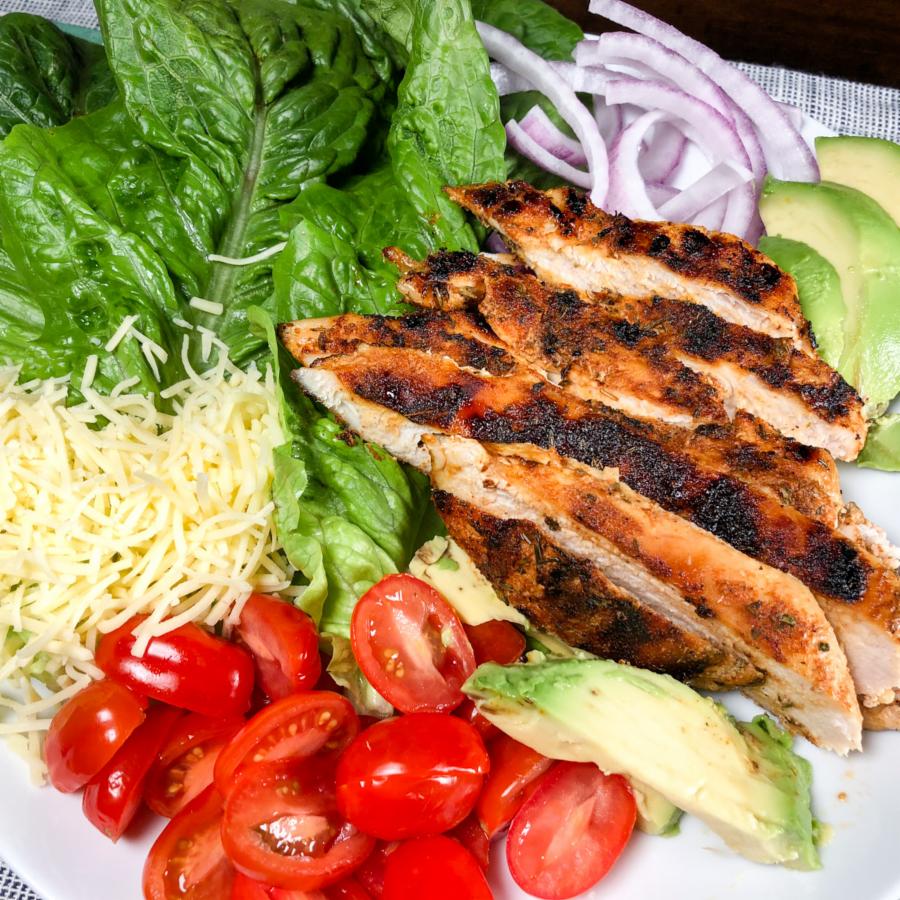
I serve this salad with big leaves of Romaine (because, hello, can’t be bothered with cutting lettuce – let those people work for their dinner). I pile on tomatoes, cheddar cheese, thinly sliced red onion, avocado, and sliced Blackened Cajun Chicken. Drizzle with ranch and that’s it! So easy, and so incredibly delicious!

Print
clock clock iconcutlery cutlery iconflag flag iconfolder folder iconinstagram instagram iconpinterest pinterest iconfacebook facebook iconprint print iconsquares squares iconheart heart iconheart solid heart solid icon
Blackened Cajun Chicken Salad

Blackened Cajun Chicken Salad

  • Author: Sarah
Print Recipe
Pin Recipe

Ingredients

FOR THE CAJUN SEASONING

1 Tbsp paprika

1 Tbsp garlic powder

2 tsp oregano

2 tsp thyme

2 tsp salt

1 tsp cayenne

1/2 tsp ground black pepper

FOR THE SALAD

4 chicken breasts, pounded to 1/4 inch thickness

1 head romaine lettuce

1 cup grape tomatoes, halved

1/2 small red onion, thinly sliced

1 avocado, sliced

1 cup shredded white cheddar cheese

Ranch Dressing

Croutons (optional)


Instructions

Mix all seasoning ingredients in an airtight container or small bowl.  (I like to use an airtight container so that I can shake well to mix).  

Heat a grill or grill pan over medium high heat.  Sprinkle a generous amount of seasoning on both sides of each chicken breast, to completely coat the chicken, without leaving loose seasoning.  Gently press the seasoning into the chicken breast. Place the chicken on the grill and cook for 3-4 minutes on each side, until blackened and cooked through.  Remove the chicken from the grill and set aside.

To assemble the salad, tear large pieces of romaine and place on large serving platter or divide amongst individual plates.  Slice the chicken breast and place on top.  Top with tomatoes, cheese, onion, avocado, ranch dressing, and croutons (if using).


Did you make this recipe?

Tag @the.platefull on Instagram and hashtag it #theplatefull

Beef and Lentil Meatballs

February 26, 2020~ Main, The Platefull Blog

I’ve mentioned this in previous posts, but I’ve been working hard to find a way to get more fiber and protein in my kids. They love spaghetti and meatballs, so I figured why not try to make the meatballs fit my goals for their nutrition? Beef and Lentil Meatballs have now been a huge hit with my boys for quite some time! They are so versatile. I’ve served them with a variety of sauces, including traditional spaghetti and meatballs and they are a hit every time! (Hint: you can use the sauce portion of my spaghetti recipe for easy spaghetti and meatballs! Just leave out the onion and hamburger, instead letting the meatballs warm in the sauce).

I love to keep a few batches of Beef and Lentil Meatballs in the freezer for those dinner emergency nights. They’ve spared us from eating out more than once. I love having meals like that on hand!

To start the prep for Beef and Lentil Meatballs, cook the green lentils. From there, it’s super easy! Let the lentils cool, then add all of the ingredients to a food processor and pulse until well combined and the lentils are broken up some.

Beef and Lentil Meatballs

Form into meatballs a little smaller than a golf ball.

Beef and Lentil Meatballs

Then, cover the bottom of a skillet with oil, heat over medium high heat, and cook the meatballs, rolling around to cook evenly, until all sides are browned. Drain on a paper towel, let cool, then freeze individually on a baking sheet. Once the meatballs are frozen, transfer to a freezer bag. This recipe makes about 24 meatballs, so I typically package into 12 meatballs per package.

Beef and Lentil Meatballs
Print
clock clock iconcutlery cutlery iconflag flag iconfolder folder iconinstagram instagram iconpinterest pinterest iconfacebook facebook iconprint print iconsquares squares iconheart heart iconheart solid heart solid icon
Beef and Lentil Meatballs

Beef and Lentil Meatballs

  • Author: Sarah
Print Recipe
Pin Recipe

Ingredients

Scale

1 lb ground beef

1 cup green lentils, cooked

1/2 cup finely chopped onion

2 garlic cloves, minced

1/2 cup breadcrumbs

1 large egg, lightly beaten

1 tsp dried thyme

1/2 tsp dried oregano

1 tsp salt

1/2 tsp ground black pepper

Olive oil, for cooking


Instructions

Be sure the lentils have cooled.  Combine all ingredients in a food processor and pulse several times to combine well and blend in the lentils.  (You can also use your hands to mix well, but you will have larger lentil pieces in the meatballs).  Form into balls slightly smaller than the size of a golf ball.  You should get 20-24 meatballs.  

Heat enough oil to cover the bottom of a skillet over medium heat.  When the oil is hot, add the meatballs.  Roll around to brown evenly on the outside and cook until cooked through, about 7-8 minutes.  Repeat with remaining meatballs in batches, if needed.


Did you make this recipe?

Tag @the.platefull on Instagram and hashtag it #theplatefull

Cowboy Stuffed Chicken

February 15, 2020~ Main, The Platefull Blog

I love stuffed chicken breasts for a few reasons. One, they are perfect for prepping ahead, wrapping individually, and freezing. Two, I can throw them in the oven, microwave some steamer veggies, and dinner is on the table with very little effort from me! Three, they are super flavorful and prevent the chicken from drying out in the oven. Best of all, my kids love stuffed chicken. I think it’s all the cheese. 🙂

Start by making the filling. Combine the softened cream cheese, cheddar cheese, jalapeño, and crumbled bacon in a bowl. When I make this, I combine the cheeses and bacon and then take enough out to stuff one chicken breast before adding the jalapeños to the mixture because my kids don’t like spicy.

Mix the bread crumbs and BBQ seasoning in a bowl. In another bowl, lightly beat the egg. Cut a pocket into the chicken breasts and stuff with the cheese mixture. Dip the chicken breast on all sides in the egg, then in the breadcrumb mixture, making sure all sides are coated.

Place the chicken breasts on a foil lined sheet pan and bake at 375° for about 30 minutes, until the internal temp reaches 165°.

Print
clock clock iconcutlery cutlery iconflag flag iconfolder folder iconinstagram instagram iconpinterest pinterest iconfacebook facebook iconprint print iconsquares squares iconheart heart iconheart solid heart solid icon
Cowboy Stuffed Chicken

Cowboy Stuffed Chicken

  • Author: Sarah
Print Recipe
Pin Recipe

Ingredients

Scale

2 chicken breasts

2 oz cream cheese, softened

1/2 cup shredded cheddar cheese

2 Tbsp chopped jalapeno (1 Tbsp if using fresh)

3 slices cooked bacon, crumbled

2/3 cup bread crumbs

1 Tbsp BBQ seasoning

1 egg, beaten


Instructions

Preheat the oven to 375°.  Slice horizontally into the middle of the chicken breast, but do not slice all the way through.  This creates a pocket for the filling.

In a small bowl, combined the cream cheese, cheddar cheese, crumbled bacon, and jalapeños. 

In a bowl, combine the breadcrumbs and BBQ seasoning.

In another bowl, lightly beat the egg.

Divide the filling into 2 equal portions and stuff each chicken breast.  Dip the stuffed chicken breast in the egg, coating all sides.  Then dip into the breadcrumb mixture, coating all sides.  Repeat with the other chicken breast.

Place on a baking sheet lined with foil and bake at 375° for 30-35 minutes, until the chicken reaches an internal temp of 165°.


Did you make this recipe?

Tag @the.platefull on Instagram and hashtag it #theplatefull

Vietnamese Noodle Bowls

February 8, 2020~ Main, The Platefull Blog

I developed a love for Vietnamese food during our time living in Australia. It was so good there, and something that is hard to find living in the Midwest! When we moved home, I wanted to find a way to make some of my favorites at home! These Vietnamese Noodle Bowls are so delicious. I love making them because not only do they taste amazing, but it brings back wonderful memories of our time in Australia.

Vietnamese Noodle Bowls

To make these Vietnamese Noodle Bowls, start by preparing the marinade for the meat and cutting the pork tenderloin into 1/4 inch slices. You will skewer them to grill them, so be sure you have enough meat to skewer when you cut the slices, while still keeping them quite thin so that they cook quickly. To make the marinade, combine the sugar, pepper, garlic, shallot, lemongrass, and ginger in a food processor (or, I use the Magic Bullet for this). Pulse it a few times, then add in the coconut aminos (or soy sauce), fish sauce, and olive oil. If you are doing Whole 30, feel free to leave out the sugar or throw a date in for a little sweetness. Place the meat in the marinade and refrigerate for at least 1 hour (or freeze for later).

To prep the veggies, grate the carrot and mix in the sugar. After 15 minutes, add the lemon juice, vinegar, garlic, chile, and fish sauce. Cover and refrigerate until ready to serve. Slice some cucumber and chop some cilantro, mint, and peanuts.

When you are ready to prepare the bowls, preheat your grill to high heat. While the grill is preheating, prepare the rice noodles according to package directions. Remove the meat from the marinade and thread onto skewers. Grill 2-3 minutes on each side, until beginning to char.

To serve, place the noodles in the bottom of a bowl. Top with meat, carrot, cucumber, bean sprouts (not pictured), cilantro, mint, and peanuts. I like to drizzle Hoisin sauce and sweet chili sauce on top. Then there’s just one thing left to do – enjoy!

Print
clock clock iconcutlery cutlery iconflag flag iconfolder folder iconinstagram instagram iconpinterest pinterest iconfacebook facebook iconprint print iconsquares squares iconheart heart iconheart solid heart solid icon
Vietnamese Noodle Bowls

Vietnamese Noodle Bowls

  • Author: Sarah
Print Recipe
Pin Recipe

Ingredients

For the Pork:

1 pound pork tenderloin, sliced into 1/4 inch thick slices

2 Tbsp sugar

1 tsp black pepper

2 garlic cloves

1 shallot, quartered

1 4-inch piece fresh lemongrass, halved

1 1-inch piece peeled ginger, halved

1 Tbsp coconut aminos

1 Tbsp fish sauce

1 Tbsp olive oil

For the Carrots

1/3 cup grated carrots 

2 Tbsp sugar

1/4 cup lemon juice

1/4 cup rice vinegar

1 tsp minced garlic

1 Thai Chile, thinly sliced

1 Tbsp fish sauce

For Serving

Rice noodles, prepared according to package directions

3 Tbsp chopped cilantro

3 Tbsp chopped mint

1 cup sliced cucumber

1 cup fresh bean sprouts

1/3 cup chopped peanuts

Hoisin or Sweet Chili Sauce


Instructions

In a food processor, combine the sugar, pepper, garlic, shallot, lemongrass, and ginger.  Pulse a few times to chop everything and mix together.  Then add the coconut aminos, fish sauce, and olive oil.  Process until well combined.  Place the pork tenderloin pieces in a Ziploc bag and pour the marinade over the top.  Seal the bag and toss it in your hands to cover all of the meat with the marinade.  Refrigerate for at least 1 hour or freeze to use later.

To prepare the veggies, grate the carrot.  Place in a bowl and cover with 2 Tbsp sugar.  Let stand for 10-15 minutes, then add the lemon juice, rice vinegar, garlic, Chile, and fish sauce.  Stir to combine, cover, and refrigerate until ready to use.  Slice the cucumber, chop the mint, cilantro, and peanuts and refrigerate until ready to use.

When ready to serve, preheat the grill to high heat.  Prepare the rice noodles according to package directions while the grill is preheating.  Remove the meat from the marinade and skewer.  Grill over high heat for 2-3 minutes on each side, until starting to char.  

To serve, place cooked rice noodles in a bowl.  Top with meat, carrot, cucumber, bean sprouts, cilantro, mint, and peanuts.  If desired, drizzle on hoisin or sweet chili sauce.


Did you make this recipe?

Tag @the.platefull on Instagram and hashtag it #theplatefull

Pizza Stuffed Potato Skins

February 7, 2020~ Main, The Platefull Blog

It’s no secret that I love simple traditions. They give our family something unique and fun to look forward to, and a simple chance to make memories. Every Friday night in our house is pizza night. It’s been our tradition for a few years now and the boys look forward to it every week! We never miss a pizza night. Pizza Stuffed Potato Skins are perfect for those times when I’m trying to really put focus on my nutrition, but I still want that pizza taste. Pizza Stuffed Potato Skins are Whole 30 compliant and totally satisfying, so I don’t feel like I’m missing out on the party.

Whole 30 Pizza Stuffed Potato Skins

The key to having Pizza Stuffed Potato Skins come together quickly is prepping ahead. I cook the mushrooms and Italian sausage (mine is Whole 30 compliant) ahead and just reheat. Store bought, Whole 30 compliant marinara sauce (my favorite is Kirkland’s brand from Costco) is a great shortcut for this recipe. I love to serve these with my favorite homemade Dump Ranch!

Note that I use Applegate’s pepperoni for this recipe. While turbinado sugar is listed in the ingredients, it’s a small enough amount that the label reads “0 grams added sugar.” I am okay with this while on a Whole 30, but if you are not, then leave it out!

What family traditions do you look forward to?

Print
clock clock iconcutlery cutlery iconflag flag iconfolder folder iconinstagram instagram iconpinterest pinterest iconfacebook facebook iconprint print iconsquares squares iconheart heart iconheart solid heart solid icon
Whole 30 Pizza Stuffed Potato Skins

Pizza Stuffed Potato Skins

  • Author: Sarah
  • Yield: 2 servings 1x
Print Recipe
Pin Recipe

Ingredients

Scale

2 russet potatoes

4 Tbsp marinara sauce, warmed

1/2 lb Italian Sausage, cooked and drained

12 slices pepperoni, sliced

4 oz sliced mushrooms, sautéed

4 oz can sliced black olives, drained

Penzey’s Pizza Seasoning


Instructions

To prepare the potatoes, preheat the oven to 400°.  Wash the potatoes and poke holes in them.  Brush the outside with olive oil and bake for 30-40 minutes, until tender.  Let cool for a few minutes, then cut the potatoes in half lengthwise.  Use a spoon to gently scoop out the middle, leaving a small edge of potato in the skin.  Brush the inside and outside with olive oil and return to the oven, baking 5 minutes on each side.

While the potatoes are cooking, cook the Italian sausage and mushrooms.  Slice the pepperoni.  Warm the marinara in the microwave.  Drain the black olives.

When the potato skins are finished baking, fill them with sauce, Italian sausage, mushrooms, pepperoni, and black olives.  Top with a sprinkle of pizza seasoning.  I like to serve these with a Whole 30 compliant ranch for dipping.


Notes

Save the insides of the potato for mashed potatoes with another meal!

I like to prep the sausage and mushrooms ahead.  I also cook the potatoes and scoop out the insides ahead.  On the night of serving, simply brush the skins with olive oil and bake for a few minutes on both sides to heat through.

Did you make this recipe?

Tag @the.platefull on Instagram and hashtag it #theplatefull

Cajun Shrimp and Veggie Skillet

February 3, 2020~ Main, The Platefull Blog

We have a super busy week ahead, so of course that means Cajun Shrimp and Veggie Skillet is on the menu! This is one of my favorite prep ahead meals, because it doesn’t require any cooking ahead of time. Simply chop the veggies, thaw the shrimp (if needed), and you’re good to go for a super quick and easy dinner! On busy weeknights, I’m often tempted to run through a drive through because there are nights I feel like I just don’t have time to cook and clean up. I love this Cajun Shrimp and Veggie skillet because it comes together in one pan, in less time than it would take me to go through a drive through. Not only is it fast, but its packed with healthy veggies and protein, so I feel great about serving it!

To make this Whole 30 compliant, use a compliant sausage and Cajun seasoning. Or, leave the sausage out!

Cajun Shrimp and Veggie Skillet

To prep this meal in advance, I chop the veggies on Sunday afternoon, then we eat this on Monday night.

Cajun Shrimp and Veggie Skillet

When ready to cook, heat a large skillet over medium high heat. In a small bowl, whisk together the olive oil and Cajun seasoning. Add the sausage and veggies to the pan and cook until just starting to soften, about 5 minutes.

After 5 minutes, add the shrimp and pour the Cajun mixture over the top. Stir to coat the meat and veggies in the seasoning. Cook for about 5 more minutes, stirring every couple minutes to cook the shrimp evenly. When the shrimp are done, you’re ready to serve!

Print
clock clock iconcutlery cutlery iconflag flag iconfolder folder iconinstagram instagram iconpinterest pinterest iconfacebook facebook iconprint print iconsquares squares iconheart heart iconheart solid heart solid icon
Cajun Shrimp and Veggie Skillet

Cajun Shrimp and Veggie Skillet

  • Author: Sarah
  • Prep Time: 5 minutes
  • Cook Time: 10 minutes
  • Total Time: 15 minutes
  • Yield: 6 servings 1x
Print Recipe
Pin Recipe

Ingredients

Scale

1 pound large shrimp, peeled and deveined

12 ounces sausage, sliced (I like Aidell’s Organic Cajun Style Andouille Sausage)

2 medium sized zucchini, chopped into chunks

2 medium sized yellow squash, chopped into chunks

½ bunch asparagus, cut into thirds

2 red bell pepper chopped into chunks

3 Tablespoons olive oil

3 Tablespoons Cajun Seasoning


Instructions

In a small bowl, whisk together the olive oil and Cajun seasoning.  Heat a large skillet over medium high heat.  Add the sausage and veggies to the pan and cook just starting to soften, about 5 minutes.  Add the shrimp and Cajun mixture to the pan and toss with the rest of the ingredients to coat everything in the Cajun seasoning.  Cook for about 5 more minutes, stirring to cook the shrimp evenly.  


Did you make this recipe?

Tag @the.platefull on Instagram and hashtag it #theplatefull

Grilled Chimichurri Shrimp with Quinoa Pilaf

January 26, 2020~ Main, The Platefull Blog

I love the bright, fresh flavors of a chimichurri sauce. Grilled Chimichurri Shrimp with Quinoa Pilaf is the perfect weeknight recipe if you do a few steps ahead on the weekend. It sounds fancy though, doesn’t it?! The fresh herbs and garlic pack a nutritional punch. Quinoa is high in fiber and protein and is a complete protein, meaning it contains all nine essential amino acids that our bodies can’t make on their own. Add in the shrimp, which is also a healthy protein source and this meal is a winner in the nutrition department! Good thing it tastes just as good as it is for you!

Chimichurri Shrimp and Quinoa Pilaf

To make this Grilled Chimichurri Shrimp with Quinoa Pilaf an easy weeknight dinner, the key is prepping ahead. First, start with making the Chimichurri sauce. You’ll only need about 3/4 cup of the chimichurri for this recipe, so you can freeze the rest! It will stay good in the freezer for about a month. Next, throw the shrimp and 3/4 cup chimichurri into a Ziploc bag and into the fridge to marinate. Yay! You’re halfway done prepping! The final step is to cook the quinoa. You are only going to halfway prepare the quinoa recipe, as the final ingredients are best added at the end. To do this, boil the water. Add the quinoa and cover. Simmer for 10 minutes, then add the kale and cover. Simmer for 5 more minutes, turn off the heat, and let sit for 5 more minutes. Let cool and then transfer to a glass container and refrigerate. In a small container, combine the lemon juice, lemon zest, olive oil, and pine nuts and place in the fridge. Slice the green onion and store in a ziploc bag in the fridge.

When ready to prepare the meal, thread the shrimp onto skewers (or, if using a grill pan, you can skip this step since there aren’t any grates for the shrimp to fall through). Heat a grill to medium high heat and grill for 2 minutes per side, until the shrimp is cooked. To finish the quinoa, place the cooked kale and quinoa mixture in a skillet over medium heat. Stir constantly until warmed through. Add in the lemon juice mixture and stir. Add in the sliced green onion and stir. Serve the shrimp skewers on a bed of the quinoa pilaf. Yum! There you have it – Grilled Chimichurri Shrimp with Quinoa Pilaf!

Note that this can all be prepared the night of serving, that’s totally fine! Let the shrimp marinate for an hour or so in the fridge (the chimichurri can easily still be prepped ahead – it will stay good in the fridge for a few days). To make the quinoa, as soon as the quinoa/kale mixture is done cooking, just add in the remaining ingredients! It’s still really a pretty quick dinner, it just goes a little faster when it is all pre-prepped.

Print
clock clock iconcutlery cutlery iconflag flag iconfolder folder iconinstagram instagram iconpinterest pinterest iconfacebook facebook iconprint print iconsquares squares iconheart heart iconheart solid heart solid icon
Chimichurri Shrimp and Quinoa Pilaf

Grilled Chimichurri Shrimp with Quinoa Pilaf

  • Author: Sarah
Print Recipe
Pin Recipe

Ingredients

For the Chimichurri Shrimp

1 1/2 cups packed fresh parsley

1/2 cup packed fresh cilantro

1 tsp dried oregano

1/4 small red onion

3 cloves garlic

3 Tbsp red wine vinegar

2 Tbsp fresh lemon juice

1 tsp salt

3/4 cup olive oil

1 lb raw peeled and deveined shrimp

For the Quinoa Pilaf

2 cups water

1 cup quinoa

1 small bunch kale, chopped, stems removed

1 lemon, zested and juiced

2 green onions, sliced

1 Tbsp olive oil

3 Tbsp pine nuts

salt and pepper, to taste


Instructions

For the Chimichurri Shrimp

In a food processor, combine the red wine vinegar, lemon juice, salt, garlic, and onion.  Process until finely minced.  Then add the herbs to the food processor.  Pour in the olive oil while pulsing.  Pulse until the herbs are finely minced, but not pureed.  Place the shrimp in a ziploc bag and pour 3/4 cup chimichurri over the shrimp.  Seal the bag and refrigerate overnight (or at least 1 hour).  When ready to prepare the shrimp, remove from the marinade and skewer.  Heat a grill to medium high heat and cook the shrimp for 2 minutes on each side, until cooked through.

For the Quinoa Pilaf

In a saucepan, bring the water to a boil.  Add the quinoa, cover, and lower the heat to a simmer.  Let the quinoa simmer for 10 minutes, then add the kale on top, cover, and simmer for 5 more minutes.  Turn off the heat and let stand for 5-7 minutes until the quinoa is tender.

Meanwhile, in a small bowl, whisk to combine half of the lemon juice, the zest, olive oil, green onion, and pine nuts.  When the quinoa is tender, pour the lemon juice mixture over the quinoa and fluff to combine.  
Add salt and pepper to taste.

Place the quinoa pilaf on a serving platter.  Top with the shrimp skewers and an additional sprinkle of lemon juice.


Did you make this recipe?

Tag @the.platefull on Instagram and hashtag it #theplatefull

Coconut Shrimp

January 13, 2020~ Main, The Platefull Blog

Okay, so this recipe takes some work – I’ll admit that. But, the end result is so good that it’s totally worth it! This is a weekend meal in our house, when I have a little more time for cooking. I like to serve this with a store bought orange marmalade for dipping (microwaved for a few seconds to make it sauce consistency) and broiled or grilled asparagus, like my Roasted Asparagus with Lemon and Feta. A simple baked sweet potato and steamed broccoli works great too!

Print
clock clock iconcutlery cutlery iconflag flag iconfolder folder iconinstagram instagram iconpinterest pinterest iconfacebook facebook iconprint print iconsquares squares iconheart heart iconheart solid heart solid icon
Coconut Shrimp

Coconut Shrimp

  • Author: Sarah
Print Recipe
Pin Recipe

Ingredients

Scale

1 lb peeled and deveined shrimp, patted dry

1/2 cup coconut flour

1/2 cup unsweetened shredded coconut

2 eggs, beaten

coconut oil, for frying


Instructions

Pat the shrimp dry (make sure it is very dry so the coating sticks).  Place the coconut flour in a bowl, the beaten eggs in second bowl, and the shredded coconut in a third bowl.  Line them up in this order: coconut flour, eggs, shredded coconut.  Dip the shrimp in the flour, shake off excess, then in the egg, then the shredded coconut.  Set on a plate while you finish preparing the rest of the shrimp.  Heat the coconut oil in a skillet over medium high heat.  Add the shrimp (what you can fit – you will have to work in batches).  Cook until tails start to turn pink, then flip.  Cook until cooked through and golden brown.  Serve with orange marmalade. 


Did you make this recipe?

Tag @the.platefull on Instagram and hashtag it #theplatefull

Chile Lime Chicken Burgers with Mango Salsa

January 10, 2020~ Main, The Platefull Blog

There are some (okay, a lot) of weeknights where after a full day of work and kids, I want a healthy dinner option, with basically no effort. Enter Chile Lime Chicken Burgers with Mango Salsa. You can find the chicken burgers in the freezer section at Trader Joe’s. Simply cook the burgers in a pan and top with the mango salsa (which I buy at Whole Foods, premade). How easy is that?! I like to serve this with asparagus and mushrooms, roasted in the oven and sprinkled with a squeeze of fresh lemon juice and feta, if I have time. If not, a simple salad works great too! I should also mention that this meal is a great, simple Whole30 compliant option!

Print
clock clock iconcutlery cutlery iconflag flag iconfolder folder iconinstagram instagram iconpinterest pinterest iconfacebook facebook iconprint print iconsquares squares iconheart heart iconheart solid heart solid icon

Chile Lime Chicken Burgers with Mango Salsa

  • Author: Sarah
Print Recipe
Pin Recipe

Ingredients

Scale

1 package Chile Lime Chicken Burgers (Trader Joe’s)

1 container pre-made mango salsa (Whole Food’s)


Instructions

Cook the chicken burgers according to package directions.  Top with mango salsa and serve immediately.


Did you make this recipe?

Tag @the.platefull on Instagram and hashtag it #theplatefull

Buffalo Chicken Drummies

January 8, 2020~ Main, The Platefull Blog

Any time I’m doing a Whole 30, this recipe is on my go-to list. It’s easy, few ingredients, and it feels like a total cheat meal. Which I know is not the point of Whole 30, but I have to make it as enjoyable as I can or I won’t stick with it. I serve these Buffalo Chicken Drummies with Dump Ranch. This ranch is so insanely good! I could drink the stuff – it’s that good. I have all of the herbs for it in my garden, so you’ll always find a jar of homemade Dump Ranch in my fridge. I put it on everything! It is also Whole 30 compliant, so you don’t have to feel deprived or a bit guilty about this one. Win!

Print
clock clock iconcutlery cutlery iconflag flag iconfolder folder iconinstagram instagram iconpinterest pinterest iconfacebook facebook iconprint print iconsquares squares iconheart heart iconheart solid heart solid icon
Buffalo Chicken Drummies

Buffalo Chicken Drummies

  • Author: Sarah
Print Recipe
Pin Recipe

Ingredients

Scale

2 lbs chicken drummies

1/4 cup Frank’s hot sauce (or your favorite hot sauce)

2 Tbsp melted butter (use clarified butter for Whole 30)

1 Tbsp coconut aminos

1 clove garlic, minced

1/2 tsp seasoned salt

Black pepper, to taste

Salt, to taste

1 Tbsp olive oil


Instructions

Preheat the oven to 450 degrees.  Line a baking sheet with foil.  Pat the chicken dry with paper towels.  Brush with olive oil and sprinkle lightly with salt and pepper.  Place on the prepared baking sheet and roast for 30-35 minutes, until cooked through.  

While the chicken is cooking, whisk together the melted butter, hot sauce, coconut aminos, garlic, seasoned salt and pepper.

When the chicken is finished cooking, transfer to a heat-safe bowl.  Pour the buffalo sauce over the top and use tongs to coat the chicken in the sauce.  Serve immediately.


Did you make this recipe?

Tag @the.platefull on Instagram and hashtag it #theplatefull

  • « Previous Page
  • 1
  • 2
  • 3
  • 4
  • …
  • 6
  • Next Page »

Categories

  • Appetizers
  • Baking
  • Breakfast
  • Dessert
  • Drinks
  • Kids
  • Lifestyle
  • Main
  • Recipes
  • Salads
  • Sauces and Dressings
  • Side Dishes
  • Soups
  • The Platefull Blog
  • Uncategorized

Archives

  • March 2025
  • July 2021
  • January 2021
  • July 2020
  • June 2020
  • May 2020
  • April 2020
  • March 2020
  • February 2020
  • January 2020
  • December 2019
  • November 2019
  • October 2019
  • September 2019
  • August 2019
  • September 2017
  • April 2017
  • March 2017
  • February 2017
  • January 2017
  • November 2016
  • October 2016

Recent Comments

  • Jennifer on Avocado and Egg Breakfast Stack
  • Christine Kish on Recipe Organization
  • Sarah on Easy Recipes for the Whole30
  • Jenn on Easy Recipes for the Whole30

- THEME BY ECLAIR DESIGNS -