The Platefull

Inspiring home cooks to be creative with accessible, nutritious recipes.

  • The Platefull Blog
  • Lifestyle
  • Kids
  • Shop
  • About
    • Privacy Policy, Terms & Conditions, and Disclosures

Cajun Seasoning

February 21, 2020~ Sauces and Dressings, The Platefull Blog

Please note that this post contains affiliate links and any sales made through such links will reward me a small commission – at no extra cost for you. All opinions are my own. See my disclosure for more information.

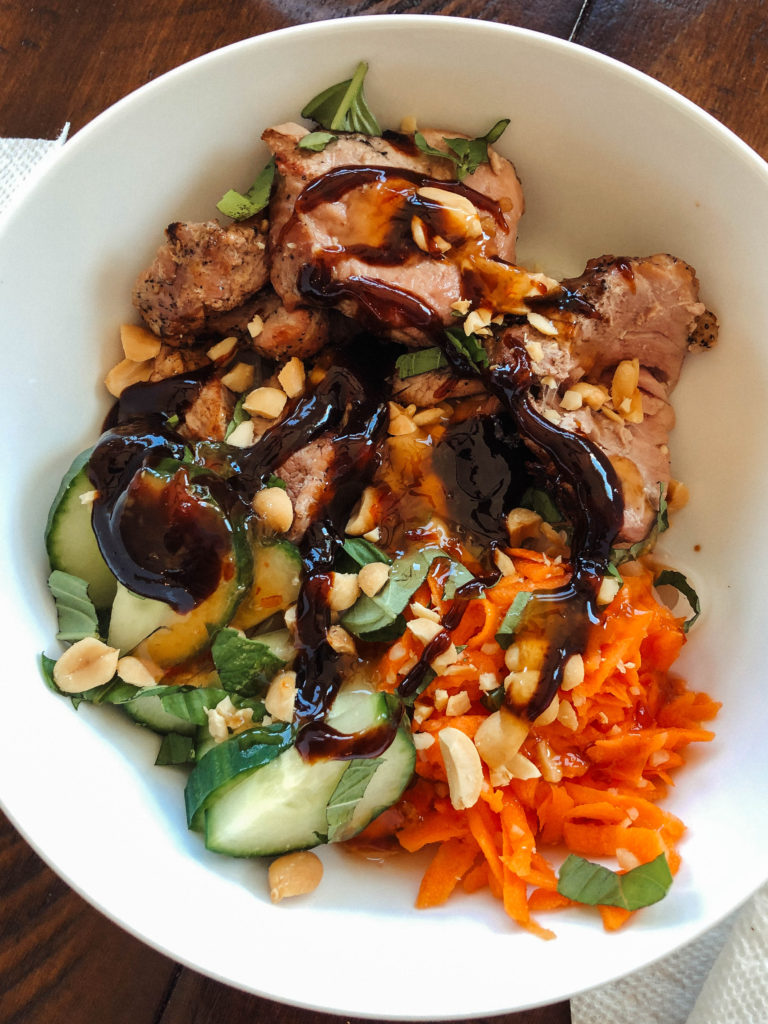
I cannot get enough of this Cajun Seasoning. I use it for my Cajun Shrimp and Veggie Skillet and most recently, I’ve been using it for Blackened Cajun Chicken Salads. I cannot get enough of that salad, either! It is seriously so, so good that I crave it. I’ve added it to the weekly meal plan every week since I first made it! I keep this Cajun Seasoning pre-mixed on hand in the pantry in my favorite spice containers. I love having homemade spice mixes ready to go. It makes using homemade mixes just as easy as store bought, but I control the ingredients and flavors. I love these containers because they stack easily in my pantry and are narrow, so they don’t take up as much space as a jar. Plus, there’s plenty of room for getting a measuring spoon in.

Print
clock clock iconcutlery cutlery iconflag flag iconfolder folder iconinstagram instagram iconpinterest pinterest iconfacebook facebook iconprint print iconsquares squares iconheart heart iconheart solid heart solid icon

Cajun Seasoning

  • Author: Sarah
Print Recipe
Pin Recipe

Ingredients

Scale

1 Tbsp paprika

1 Tbsp garlic powder

2 tsp oregano

2 tsp thyme

2 tsp salt

1 tsp cayenne

1/2 tsp ground black pepper


Instructions

Combine all ingredients together and store in an airtight container.


Did you make this recipe?

Tag @the.platefull on Instagram and hashtag it #theplatefull

The Best Baked Beans

February 16, 2020~ Side Dishes, The Platefull Blog

Baked Beans are a summer time staple in our house. They just pair so perfectly with grilled food! I love this recipe because it makes a huge batch that I can store in the freezer in smaller portions. These baked beans are perfect. Sweet, savory, and a little smoky with that delicious bacon flavor. I like to serve these with any grilled meat or my Cowboy Stuffed Chicken. These are absolutely the best baked beans, no doubt about it!

Start by sautéing the onions in butter over medium heat.

In a large bowl, combine all remaining ingredients except the bacon.

Add the sautéed onions to the mixture and stir to combine well. Pour the mixture into a 9×13 baking dish that has been sprayed with cooking spray. Top with the slices of bacon and bake at 325° for 2-3 hours. When the beans come out of the oven, use a large serving spoon to gently press on the top to accumulate the bacon fat and skim off.

Print
clock clock iconcutlery cutlery iconflag flag iconfolder folder iconinstagram instagram iconpinterest pinterest iconfacebook facebook iconprint print iconsquares squares iconheart heart iconheart solid heart solid icon
The Best Baked Beans

The Best Baked Beans

  • Author: Sarah
Print Recipe
Pin Recipe

Ingredients

Scale

5 cans pork and beans (VanCamp’s)

1 large yellow sweet onion, chopped

2 Tbsp butter

3/4 cup ketchup

1/2 cup molasses

3 Tbsp yellow mustard

1/2 cup brown sugar

6 slices uncooked bacon, each slice cut into thirds


Instructions

Preheat the oven to 325°.  Spray a 9×13 baking dish with cooking spray.

Heat a skillet over medium heat and melt the butter in the pan.  Add the chopped onions and cook until translucent.  In a large bowl, add the beans, onions, ketchup, molasses, mustard, and brown sugar.  Stir to mix well.  Scoop out into the baking dish.  Top with the slices of bacon and bake, uncovered, at 325° for 2-3 hours, until carmelized and bubbly.  When the beans come out of the oven, use a large serving spoon to gently press on the top to skim off the bacon fat.


Did you make this recipe?

Tag @the.platefull on Instagram and hashtag it #theplatefull

Cowboy Stuffed Chicken

February 15, 2020~ Main, The Platefull Blog

I love stuffed chicken breasts for a few reasons. One, they are perfect for prepping ahead, wrapping individually, and freezing. Two, I can throw them in the oven, microwave some steamer veggies, and dinner is on the table with very little effort from me! Three, they are super flavorful and prevent the chicken from drying out in the oven. Best of all, my kids love stuffed chicken. I think it’s all the cheese. 🙂

Start by making the filling. Combine the softened cream cheese, cheddar cheese, jalapeño, and crumbled bacon in a bowl. When I make this, I combine the cheeses and bacon and then take enough out to stuff one chicken breast before adding the jalapeños to the mixture because my kids don’t like spicy.

Mix the bread crumbs and BBQ seasoning in a bowl. In another bowl, lightly beat the egg. Cut a pocket into the chicken breasts and stuff with the cheese mixture. Dip the chicken breast on all sides in the egg, then in the breadcrumb mixture, making sure all sides are coated.

Place the chicken breasts on a foil lined sheet pan and bake at 375° for about 30 minutes, until the internal temp reaches 165°.

Print
clock clock iconcutlery cutlery iconflag flag iconfolder folder iconinstagram instagram iconpinterest pinterest iconfacebook facebook iconprint print iconsquares squares iconheart heart iconheart solid heart solid icon
Cowboy Stuffed Chicken

Cowboy Stuffed Chicken

  • Author: Sarah
Print Recipe
Pin Recipe

Ingredients

Scale

2 chicken breasts

2 oz cream cheese, softened

1/2 cup shredded cheddar cheese

2 Tbsp chopped jalapeno (1 Tbsp if using fresh)

3 slices cooked bacon, crumbled

2/3 cup bread crumbs

1 Tbsp BBQ seasoning

1 egg, beaten


Instructions

Preheat the oven to 375°.  Slice horizontally into the middle of the chicken breast, but do not slice all the way through.  This creates a pocket for the filling.

In a small bowl, combined the cream cheese, cheddar cheese, crumbled bacon, and jalapeños. 

In a bowl, combine the breadcrumbs and BBQ seasoning.

In another bowl, lightly beat the egg.

Divide the filling into 2 equal portions and stuff each chicken breast.  Dip the stuffed chicken breast in the egg, coating all sides.  Then dip into the breadcrumb mixture, coating all sides.  Repeat with the other chicken breast.

Place on a baking sheet lined with foil and bake at 375° for 30-35 minutes, until the chicken reaches an internal temp of 165°.


Did you make this recipe?

Tag @the.platefull on Instagram and hashtag it #theplatefull

Smoky BBQ Seasoning

February 15, 2020~ Sauces and Dressings, The Platefull Blog

Please note that this post contains affiliate links and any sales made through such links will reward me a small commission – at no extra cost for you. All opinions are my own. See my disclosure for more information.

Smoky BBQ Seasoning is the perfect seasoning for my Cowboy Stuffed Chicken. It’s the perfect summertime meal (or winter time when you are craving summer flavors!). The chicken can bake while you’re outside relaxing or playing with the kids. It’s hearty, full of flavor, and an all-around family favorite.

I love to make homemade seasonings. I can control the ingredients and the flavors. I mix up batches of my various homemade seasonings so that I can keep them on hand just like a jar of store-bought seasonings. It means that when it comes time to cook, there’s no extra effort involved. I like to store my homemade seasonings in these Progressive Spice Containers. They are airtight, the perfect size for stacking neatly in my pantry without taking up too much space, have a lid made for sprinkling, but also the perfect sized opening for a measuring spoon. I feel a post of all of my homemade seasonings coming on!

Cowboy Stuffed Chicken
Print
clock clock iconcutlery cutlery iconflag flag iconfolder folder iconinstagram instagram iconpinterest pinterest iconfacebook facebook iconprint print iconsquares squares iconheart heart iconheart solid heart solid icon

Smoky BBQ Seasoning

  • Author: Sarah
Print Recipe
Pin Recipe

Ingredients

Scale

1 Tbsp smoked paprika

2 tsp brown sugar

1 tsp seasoned salt

1 tsp garlic powder

1 tsp dry mustard

1/2 tsp black pepper


Instructions

Combine all ingredients and store in an airtight container.


Did you make this recipe?

Tag @the.platefull on Instagram and hashtag it #theplatefull

Cheddar and Green Chile Cornbread

February 13, 2020~ Side Dishes, The Platefull Blog

There really is nothing better than Cheddar and Green Chile Cornbread with a bowl of chili. Today is the coldest day that we’ve had all winter and I’m thinking I need to make a trip to the store for that exact meal! Although, I don’t really want to go out in this cold…decisions, decisions. In case you missed it, I of course love my own chili recipe, but here’s another recipe from one of my favorite food bloggers that I like to make to switch things up sometimes! Both are absolutely delicious! And of course, the perfect side dish for any chili recipe is Cheddar and Green Chile Cornbread! It’s easy to make and is always a crowd pleaser. I’ve gotten so many compliments on this recipe over the years!

My favorite thing about this cornbread is that it’s not dry at all! Most cornbreads come out pretty dry, which isn’t that appealing to me. Give this one a try and let me know what you think!

Cheddar and Green Chile Cornbread
Print
clock clock iconcutlery cutlery iconflag flag iconfolder folder iconinstagram instagram iconpinterest pinterest iconfacebook facebook iconprint print iconsquares squares iconheart heart iconheart solid heart solid icon
Cheddar and Green Chile Cornbread

Cheddar and Green Chile Cornbread

  • Author: Sarah
Print Recipe
Pin Recipe

Ingredients

Scale

1/2 cup butter, melted

1/2 cup sugar

2 eggs

1/2 (15 oz) can cream-style corn

1 (4 oz) can chopped green chiles, drained

1/4 cup shredded Monterey Jack cheese

1/4 cup shredded cheddar cheese

1/2 cup flour

1/2 cup yellow cornmeal

2 tsp baking powder


Instructions

Preheat oven to 300°.  Grease an 8×8 square baking dish.  Beat together the butter and sugar, then add the eggs one at a time and beat until combined well.  Stir in the corn, chiles, and cheeses.  Add the flour, cornmeal, and baking powder. and stir to combine.  Pour into the pan and bake at 300° for 1 hour.


Did you make this recipe?

Tag @the.platefull on Instagram and hashtag it #theplatefull

Egg and Feta Breakfast Wrap

February 12, 2020~ Breakfast, The Platefull Blog

This Egg and Feta Breakfast Wrap is so insanely simple, but totally crave-worthy. When we lived in Sydney, there was a local coffee shop near the office that I visited every day. Every morning I had the same thing. The Egg and Feta Breakfast Wrap with a vanilla latte. The coffee there was so good and recreating this breakfast at home takes me back to some pretty wonderful memories!

Egg and Feta Breakfast Wrap

It really couldn’t be any easier to make. To make one wrap, scramble 2 eggs. Place the scrambled eggs on a flour tortilla. Top with crumbled feta and sliced scallions. Roll up and enjoy! See? Easy!

Print
clock clock iconcutlery cutlery iconflag flag iconfolder folder iconinstagram instagram iconpinterest pinterest iconfacebook facebook iconprint print iconsquares squares iconheart heart iconheart solid heart solid icon
Egg and Feta Breakfast Wrap

Egg and Feta Breakfast Wrap

  • Author: Sarah
Print Recipe
Pin Recipe

Ingredients

Scale

1 Flour Toritlla

2 eggs

1 Tbsp sliced scallions

1 Tbsp crumbled feta

salt and pepper to taste


Instructions

Heat a small skillet over medium low heat.  Crack the eggs into a bowl and beat lightly with a fork.  Sprinkle in a small amount of salt and pepper.  Scramble the eggs, then place on the flour tortilla.  Top with the scallions and feta and roll into a wrap.


Did you make this recipe?

Tag @the.platefull on Instagram and hashtag it #theplatefull

Vietnamese Noodle Bowls

February 8, 2020~ Main, The Platefull Blog

I developed a love for Vietnamese food during our time living in Australia. It was so good there, and something that is hard to find living in the Midwest! When we moved home, I wanted to find a way to make some of my favorites at home! These Vietnamese Noodle Bowls are so delicious. I love making them because not only do they taste amazing, but it brings back wonderful memories of our time in Australia.

Vietnamese Noodle Bowls

To make these Vietnamese Noodle Bowls, start by preparing the marinade for the meat and cutting the pork tenderloin into 1/4 inch slices. You will skewer them to grill them, so be sure you have enough meat to skewer when you cut the slices, while still keeping them quite thin so that they cook quickly. To make the marinade, combine the sugar, pepper, garlic, shallot, lemongrass, and ginger in a food processor (or, I use the Magic Bullet for this). Pulse it a few times, then add in the coconut aminos (or soy sauce), fish sauce, and olive oil. If you are doing Whole 30, feel free to leave out the sugar or throw a date in for a little sweetness. Place the meat in the marinade and refrigerate for at least 1 hour (or freeze for later).

To prep the veggies, grate the carrot and mix in the sugar. After 15 minutes, add the lemon juice, vinegar, garlic, chile, and fish sauce. Cover and refrigerate until ready to serve. Slice some cucumber and chop some cilantro, mint, and peanuts.

When you are ready to prepare the bowls, preheat your grill to high heat. While the grill is preheating, prepare the rice noodles according to package directions. Remove the meat from the marinade and thread onto skewers. Grill 2-3 minutes on each side, until beginning to char.

To serve, place the noodles in the bottom of a bowl. Top with meat, carrot, cucumber, bean sprouts (not pictured), cilantro, mint, and peanuts. I like to drizzle Hoisin sauce and sweet chili sauce on top. Then there’s just one thing left to do – enjoy!

Print
clock clock iconcutlery cutlery iconflag flag iconfolder folder iconinstagram instagram iconpinterest pinterest iconfacebook facebook iconprint print iconsquares squares iconheart heart iconheart solid heart solid icon
Vietnamese Noodle Bowls

Vietnamese Noodle Bowls

  • Author: Sarah
Print Recipe
Pin Recipe

Ingredients

For the Pork:

1 pound pork tenderloin, sliced into 1/4 inch thick slices

2 Tbsp sugar

1 tsp black pepper

2 garlic cloves

1 shallot, quartered

1 4-inch piece fresh lemongrass, halved

1 1-inch piece peeled ginger, halved

1 Tbsp coconut aminos

1 Tbsp fish sauce

1 Tbsp olive oil

For the Carrots

1/3 cup grated carrots 

2 Tbsp sugar

1/4 cup lemon juice

1/4 cup rice vinegar

1 tsp minced garlic

1 Thai Chile, thinly sliced

1 Tbsp fish sauce

For Serving

Rice noodles, prepared according to package directions

3 Tbsp chopped cilantro

3 Tbsp chopped mint

1 cup sliced cucumber

1 cup fresh bean sprouts

1/3 cup chopped peanuts

Hoisin or Sweet Chili Sauce


Instructions

In a food processor, combine the sugar, pepper, garlic, shallot, lemongrass, and ginger.  Pulse a few times to chop everything and mix together.  Then add the coconut aminos, fish sauce, and olive oil.  Process until well combined.  Place the pork tenderloin pieces in a Ziploc bag and pour the marinade over the top.  Seal the bag and toss it in your hands to cover all of the meat with the marinade.  Refrigerate for at least 1 hour or freeze to use later.

To prepare the veggies, grate the carrot.  Place in a bowl and cover with 2 Tbsp sugar.  Let stand for 10-15 minutes, then add the lemon juice, rice vinegar, garlic, Chile, and fish sauce.  Stir to combine, cover, and refrigerate until ready to use.  Slice the cucumber, chop the mint, cilantro, and peanuts and refrigerate until ready to use.

When ready to serve, preheat the grill to high heat.  Prepare the rice noodles according to package directions while the grill is preheating.  Remove the meat from the marinade and skewer.  Grill over high heat for 2-3 minutes on each side, until starting to char.  

To serve, place cooked rice noodles in a bowl.  Top with meat, carrot, cucumber, bean sprouts, cilantro, mint, and peanuts.  If desired, drizzle on hoisin or sweet chili sauce.


Did you make this recipe?

Tag @the.platefull on Instagram and hashtag it #theplatefull

Pizza Stuffed Potato Skins

February 7, 2020~ Main, The Platefull Blog

It’s no secret that I love simple traditions. They give our family something unique and fun to look forward to, and a simple chance to make memories. Every Friday night in our house is pizza night. It’s been our tradition for a few years now and the boys look forward to it every week! We never miss a pizza night. Pizza Stuffed Potato Skins are perfect for those times when I’m trying to really put focus on my nutrition, but I still want that pizza taste. Pizza Stuffed Potato Skins are Whole 30 compliant and totally satisfying, so I don’t feel like I’m missing out on the party.

Whole 30 Pizza Stuffed Potato Skins

The key to having Pizza Stuffed Potato Skins come together quickly is prepping ahead. I cook the mushrooms and Italian sausage (mine is Whole 30 compliant) ahead and just reheat. Store bought, Whole 30 compliant marinara sauce (my favorite is Kirkland’s brand from Costco) is a great shortcut for this recipe. I love to serve these with my favorite homemade Dump Ranch!

Note that I use Applegate’s pepperoni for this recipe. While turbinado sugar is listed in the ingredients, it’s a small enough amount that the label reads “0 grams added sugar.” I am okay with this while on a Whole 30, but if you are not, then leave it out!

What family traditions do you look forward to?

Print
clock clock iconcutlery cutlery iconflag flag iconfolder folder iconinstagram instagram iconpinterest pinterest iconfacebook facebook iconprint print iconsquares squares iconheart heart iconheart solid heart solid icon
Whole 30 Pizza Stuffed Potato Skins

Pizza Stuffed Potato Skins

  • Author: Sarah
  • Yield: 2 servings 1x
Print Recipe
Pin Recipe

Ingredients

Scale

2 russet potatoes

4 Tbsp marinara sauce, warmed

1/2 lb Italian Sausage, cooked and drained

12 slices pepperoni, sliced

4 oz sliced mushrooms, sautéed

4 oz can sliced black olives, drained

Penzey’s Pizza Seasoning


Instructions

To prepare the potatoes, preheat the oven to 400°.  Wash the potatoes and poke holes in them.  Brush the outside with olive oil and bake for 30-40 minutes, until tender.  Let cool for a few minutes, then cut the potatoes in half lengthwise.  Use a spoon to gently scoop out the middle, leaving a small edge of potato in the skin.  Brush the inside and outside with olive oil and return to the oven, baking 5 minutes on each side.

While the potatoes are cooking, cook the Italian sausage and mushrooms.  Slice the pepperoni.  Warm the marinara in the microwave.  Drain the black olives.

When the potato skins are finished baking, fill them with sauce, Italian sausage, mushrooms, pepperoni, and black olives.  Top with a sprinkle of pizza seasoning.  I like to serve these with a Whole 30 compliant ranch for dipping.


Notes

Save the insides of the potato for mashed potatoes with another meal!

I like to prep the sausage and mushrooms ahead.  I also cook the potatoes and scoop out the insides ahead.  On the night of serving, simply brush the skins with olive oil and bake for a few minutes on both sides to heat through.

Did you make this recipe?

Tag @the.platefull on Instagram and hashtag it #theplatefull

Greek Lemon Chicken Soup

February 5, 2020~ Soups, The Platefull Blog

I have to admit, I’m not a huge fan of soup. Occasionally I’ll make it on a cold day, but the one time soup always sounds good is when I’m under the weather. I particularly love this Greek Lemon Chicken Soup. Its hearty, yet bright. I like to serve it with a simple green salad and crusty bread like sourdough. It’s the perfect soup when you are fighting a cold and need something cozy!

To make this soup, start by cooking the onion and garlic in a dutch oven. Add the broth and spices, then add the raw chicken breasts to cook them. Once the chicken is cooked (about 20 minutes), remove from the pot and shred. Put the shredded chicken back into the pot and add the Arborio rice. Let that simmer, covered, for 20 more minutes, until the rice is cooked.

Next, crack the eggs into a small bowl and add the lemon juice. Whisk together, then slowly drizzle 1 cup of the soup broth into the egg mixture to temper the eggs. Remove the bay leaf from the pot, add in the egg mixture and fresh chopped dill. Let it cook for a few more minutes for the flavors to come together, then serve! I hope you love this Greek Lemon Chicken Soup as much as I do!

As an Amazon Associate I earn from qualifying purchases. I only recommend products I use in my own kitchen and love. For this recipe (and any other soup I make), I use my trusty Le Creuset dutch oven. It is hands down my favorite pot!

Print
clock clock iconcutlery cutlery iconflag flag iconfolder folder iconinstagram instagram iconpinterest pinterest iconfacebook facebook iconprint print iconsquares squares iconheart heart iconheart solid heart solid icon

Greek Lemon Chicken Soup

  • Author: Sarah
Print Recipe
Pin Recipe

Ingredients

Scale

2 chicken breasts

2 Tbsp extra virgin olive oil

1 sweet onion, chopped

3 cloves garlic, minced

4 cups chicken broth

1 Bay Leaf

1/2 tsp salt

1/2 tsp pepper

1/2 cup Arborio rice

1 lemon, juiced

3 eggs

1/4 cup chopped fresh Dill


Instructions

In a 6 quart pot or dutch oven, heat the Extra Virgin Olive Oil over medium high heat.  Add the onion and cook 5 minutes, until softened.  Add the garlic and cook for 1 minute, then pour in the chicken broth.  Add the bay leaf, salt, and pepper.  Place the chicken breasts in the pot.  Let the liquid come to a slow boil, then reduce the heat to medium low, cover, and simmer for 20 minutes.

Remove the chicken from the pot and shred.  Add the rice to the pot, then add the shredded chicken back in.  Cover and let simmer for 20 more minutes.  Remove the bay leaf.  

In a bowl, whisk the eggs and lemon juice.  Slowly add 1 cup of broth while whisking, to temper the eggs.  Then add the egg mixture into the pot.  Add the chopped dill and stir to combine.  Let the soup cook for about 5 more minutes, to thicken slightly.


Did you make this recipe?

Tag @the.platefull on Instagram and hashtag it #theplatefull

Fruit Salsa

February 4, 2020~ Side Dishes, The Platefull Blog

Fruit Salsa is my go-to recipe when I need to bring a side dish to a party. It’s healthy and the fruit is already cut into little pieces, so it’s perfect for little kids! I often make a big batch of this fruit salsa and we eat it many ways throughout the week. We eat it with cinnamon sugar pita chips, on pancakes, on oatmeal, on fruit pizza, or just by itself! Sometimes I just use leftovers of this as our side of fruit for a weeknight meal. It really doesn’t matter how I serve it, my boys simply love this stuff!

I do not use added sugar (outside of what is in the fruit preserves), but if you would like yours a little sweeter, try adding 1 Tbsp granulated sugar and 1 Tbsp brown sugar. I try to be very conscientious of our added sugar intake and I honestly think that with the fruit and the fruit preserves, its plenty sweet!

Print
clock clock iconcutlery cutlery iconflag flag iconfolder folder iconinstagram instagram iconpinterest pinterest iconfacebook facebook iconprint print iconsquares squares iconheart heart iconheart solid heart solid icon
Fruit Salsa

Fruit Salsa

  • Author: Sarah
Print Recipe
Pin Recipe

Ingredients

Scale

2 kiwis, peeled and diced

2 Golden Delicious apples, peeled, cored, and diced

1 6-oz carton raspberries

1 16-oz carton strawberries, diced

1 6-oz carton blueberries

2 mangoes, diced

3 Tbsp blackberry preserves

Cinnamon Sugar Pita Chips (I use Stacy’s)


Instructions

Combine all of the diced fruit and berries in a large bowl.  Add the fruit preserves and stir gently to combine.  Cover and refrigerate 1 hour before serving.


Did you make this recipe?

Tag @the.platefull on Instagram and hashtag it #theplatefull

  • « Previous Page
  • 1
  • 2
  • 3
  • 4
  • 5
  • …
  • 13
  • Next Page »

Categories

  • Appetizers
  • Baking
  • Breakfast
  • Dessert
  • Drinks
  • Kids
  • Lifestyle
  • Main
  • Recipes
  • Salads
  • Sauces and Dressings
  • Side Dishes
  • Soups
  • The Platefull Blog
  • Uncategorized

Archives

  • March 2025
  • July 2021
  • January 2021
  • July 2020
  • June 2020
  • May 2020
  • April 2020
  • March 2020
  • February 2020
  • January 2020
  • December 2019
  • November 2019
  • October 2019
  • September 2019
  • August 2019
  • September 2017
  • April 2017
  • March 2017
  • February 2017
  • January 2017
  • November 2016
  • October 2016

Recent Comments

  • Jennifer on Avocado and Egg Breakfast Stack
  • Christine Kish on Recipe Organization
  • Sarah on Easy Recipes for the Whole30
  • Jenn on Easy Recipes for the Whole30

- THEME BY ECLAIR DESIGNS -