The Platefull

Inspiring home cooks to be creative with accessible, nutritious recipes.

  • The Platefull Blog
  • Lifestyle
  • Kids
  • Shop
  • About
    • Privacy Policy, Terms & Conditions, and Disclosures

Cajun Seasoning

February 21, 2020~ Sauces and Dressings, The Platefull Blog

Please note that this post contains affiliate links and any sales made through such links will reward me a small commission – at no extra cost for you. All opinions are my own. See my disclosure for more information.

I cannot get enough of this Cajun Seasoning. I use it for my Cajun Shrimp and Veggie Skillet and most recently, I’ve been using it for Blackened Cajun Chicken Salads. I cannot get enough of that salad, either! It is seriously so, so good that I crave it. I’ve added it to the weekly meal plan every week since I first made it! I keep this Cajun Seasoning pre-mixed on hand in the pantry in my favorite spice containers. I love having homemade spice mixes ready to go. It makes using homemade mixes just as easy as store bought, but I control the ingredients and flavors. I love these containers because they stack easily in my pantry and are narrow, so they don’t take up as much space as a jar. Plus, there’s plenty of room for getting a measuring spoon in.

Print
clock clock iconcutlery cutlery iconflag flag iconfolder folder iconinstagram instagram iconpinterest pinterest iconfacebook facebook iconprint print iconsquares squares iconheart heart iconheart solid heart solid icon

Cajun Seasoning

  • Author: Sarah
Print Recipe
Pin Recipe

Ingredients

Scale

1 Tbsp paprika

1 Tbsp garlic powder

2 tsp oregano

2 tsp thyme

2 tsp salt

1 tsp cayenne

1/2 tsp ground black pepper


Instructions

Combine all ingredients together and store in an airtight container.


Did you make this recipe?

Tag @the.platefull on Instagram and hashtag it #theplatefull

Smoky BBQ Seasoning

February 15, 2020~ Sauces and Dressings, The Platefull Blog

Please note that this post contains affiliate links and any sales made through such links will reward me a small commission – at no extra cost for you. All opinions are my own. See my disclosure for more information.

Smoky BBQ Seasoning is the perfect seasoning for my Cowboy Stuffed Chicken. It’s the perfect summertime meal (or winter time when you are craving summer flavors!). The chicken can bake while you’re outside relaxing or playing with the kids. It’s hearty, full of flavor, and an all-around family favorite.

I love to make homemade seasonings. I can control the ingredients and the flavors. I mix up batches of my various homemade seasonings so that I can keep them on hand just like a jar of store-bought seasonings. It means that when it comes time to cook, there’s no extra effort involved. I like to store my homemade seasonings in these Progressive Spice Containers. They are airtight, the perfect size for stacking neatly in my pantry without taking up too much space, have a lid made for sprinkling, but also the perfect sized opening for a measuring spoon. I feel a post of all of my homemade seasonings coming on!

Cowboy Stuffed Chicken
Print
clock clock iconcutlery cutlery iconflag flag iconfolder folder iconinstagram instagram iconpinterest pinterest iconfacebook facebook iconprint print iconsquares squares iconheart heart iconheart solid heart solid icon

Smoky BBQ Seasoning

  • Author: Sarah
Print Recipe
Pin Recipe

Ingredients

Scale

1 Tbsp smoked paprika

2 tsp brown sugar

1 tsp seasoned salt

1 tsp garlic powder

1 tsp dry mustard

1/2 tsp black pepper


Instructions

Combine all ingredients and store in an airtight container.


Did you make this recipe?

Tag @the.platefull on Instagram and hashtag it #theplatefull

Cream of Celery Soup

January 3, 2020~ Sauces and Dressings

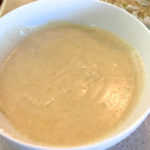
I use this soup in Tater Tot Casserole. I make a batch and freeze it into 1 to 1 1/4 cup portions (the size of 1 can of soup) so that I have it on hand. It’s surprisingly simple to make your own copycat versions of canned soups at home. It just takes a few ingredients, most of which you likely already have on hand!

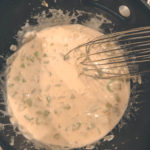
For this recipe, start by melting the butter in a saucepan over medium heat. Then add the veggies and cook, about 5 minutes, until softened. Next, you will add in the flour and stir to combine well. Cook this mixture for 1-2 minutes.

Pour in the liquid and cook, stirring, until thickened. That’s it! See, not too hard!

Print
clock clock iconcutlery cutlery iconflag flag iconfolder folder iconinstagram instagram iconpinterest pinterest iconfacebook facebook iconprint print iconsquares squares iconheart heart iconheart solid heart solid icon

Cream of Celery Soup

  • Author: Sarah
Print Recipe
Pin Recipe

Ingredients

Scale

1/4 cup butter

1 cup celery finely diced

1/2 yellow onion

1 clove garlic

1/2 teaspoon Kosher salt

1/4 cracked black pepper

1/4 cup flour

1/2 cup evaporated milk

1/2 cup chicken broth


Instructions

Melt the butter in a saucepan over medium heat.  Add the onion, celery, garlic, salt and pepper.  Cook, stirring occasionally, for about 5 minutes, until the veggies soften.  Add in the flour and stir or whisk to combine well.  Cook, stirring, for about 1-2 minutes, until the mixture is a light golden brown.  Add in the evaporated milk and chicken broth and cook, stirring, until thickened.


Notes

This recipe replaces 2 cans of cream of celery soup.

Did you make this recipe?

Tag @the.platefull on Instagram and hashtag it #theplatefull

Cheddar Cheese Condensed Soup

January 3, 2020~ Sauces and Dressings

I’ve talked a little bit about my quest to limit processed foods and focus on foods that fuel our body. I’ll talk more about that at some point, but one of the things that I’ve started making from scratch is condensed soups for use in casseroles. I make this amazing Cream of Mushroom Soup (it’s seriously way better than anything canned!). One of my favorite recipes as a kid was my Mom’s Tater Tot Casserole. It calls for cheddar cheese condensed soup and this is what I use as a real food version of the stuff in the can.

Print
clock clock iconcutlery cutlery iconflag flag iconfolder folder iconinstagram instagram iconpinterest pinterest iconfacebook facebook iconprint print iconsquares squares iconheart heart iconheart solid heart solid icon

Cheddar Cheese Condensed Soup

  • Author: Sarah
Print Recipe
Pin Recipe

Ingredients

Scale

3 Tbsp unsalted butter

3 Tbsp flour

1/4 tsp salt

1/4 tsp dry mustard

1 cup milk

1/2 cup shredded cheddar cheese


Instructions

Melt the butter in a saucepan over low heat.  Whisk in the flour and cook for 30 seconds (do not let it brown).  Add in the salt, dry mustard, and milk.  Whisk until smooth, then add in the cheddar cheese and whisk until melted and well combined.


Did you make this recipe?

Tag @the.platefull on Instagram and hashtag it #theplatefull

Homemade Velveeta

December 12, 2019~ Sauces and Dressings, The Platefull Blog

There are just some things that are better made with Velveeta. We all know that gooey, melty goodness that is the golden cheese product. Over the last year, I’ve spent a lot of time focused on nutrition and fueling our bodies in a healthy way, which has meant eliminating foods like my dearly beloved Velveeta from our diet. This left me wondering, “Is there a way to make copycat Velveet at home, using real cheese?” This recipe is pretty darn close to the real thing and it’s surprisingly simple to make. I love the fact that I can feel good about feeding it to my kids. I use this to make any sort of cheese dip or casserole that calls for Velveeta. It’s a 1:1 substitute. The only difference is that with real food ingredients, this recipe is not shelf stable to infinity and beyond (you can thank my 3 year old for that reference).

Why can I feel good about this version? Well to start, its only 5 ingredients. Cheddar cheese, milk, cream, salt, and gelatin. The gelatin is the magic ingredient – it gives it that creamy texture that solidifies it, but provides a great melt. Why can I feel good about the gelatin? I’m not talking any off the shelf gelatin here. I’m talking about 100% grass fed bovine gelatin. It’s essentially collagen that has been cooked. There are a whole host of benefits to consuming gelatin in this form, some of which are that it provides collagens (which support bone and joint health), protein (but does not contain tryptophan, etc that meat does, which can cause inflammation), and is high in amino acids. I use Vital Proteins Unflavored Beef Gelatin (found at Whole Foods – my Whole Foods has little packets, of which you’ll need less than 1 packet to make this recipe).

Alright, now that the geeky food knowledge stuff is out of the way, let’s get started. Add the milk and cream to a small saucepan and sprinkle the gelatin on top. Don’t turn on the heat – you want to just let the gelatin sit for a few minutes. After 5-10 minutes, turn the heat on to low or medium low. You want to slowly heat the milk mixture.

In the meantime, shred the cheddar cheese in a food processor. You do not want to use pre-shredded cheese for this recipe, as you won’t get as good of a melt (and I have other issues with pre-shredded cheese containing unwanted ingredients, but that’s a whole notha’ thing). Anyway, just use cheese and only cheese. 😉 . Sprinkle a little salt on the cheese.

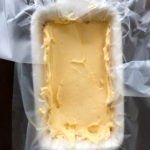
When the milk mixture is warm, pour it into the food processor and let the food processor run for about a minute. You want the cheese to melt completely and should end up with a smooth mixture. Transfer to a loaf pan lined with plastic wrap and refrigerate. If you are using in a sauce or casserole, use it right away – no need to let it solidify fully in the fridge.

Print
clock clock iconcutlery cutlery iconflag flag iconfolder folder iconinstagram instagram iconpinterest pinterest iconfacebook facebook iconprint print iconsquares squares iconheart heart iconheart solid heart solid icon

Homemade Velveeta

  • Author: Sarah
Print Recipe
Pin Recipe

Ingredients

Scale

3/4 cup whole milk

1 Tbsp heavy cream

2 tsp grass fed gelatin

12 ounces shredded cheddar cheese

3/4 tsp salt


Instructions

Pour the milk and heavy cream into a small saucepan.  Do not turn on the heat.  Sprinkle the gelatin over the top and let it sit for 5 minutes.  After 5 minutes, turn the heat to medium low and heat until just steaming, being careful not to let it get to a boil.  You want it hot enough to melt shredded cheese, but not boiling.

While the gelatin sits for 5 minutes, shred the cheddar cheese in a food processor.  Add the salt to the food processor.  Pour in the heated milk mixture and turn the food processor on.  Let it run for about 1 minute, until the cheese is completely melted and the mixture is smooth.  Transfer to a bread loaf pan that has been lined with plastic wrap and refrigerate.  If you are using in a casserole or dip, put it straight into your other recipe – no need to solidify it.  Otherwise, refrigerate for up to 1 week.


Notes

You do not want to use pre-shredded cheese for this, as it has ingredients added to prevent the shreds from sticking together.  You’ll get a smoother melt from a block of cheese that you shred.

Did you make this recipe?

Tag @the.platefull on Instagram and hashtag it #theplatefull

Categories

  • Appetizers
  • Baking
  • Breakfast
  • Dessert
  • Drinks
  • Kids
  • Lifestyle
  • Main
  • Recipes
  • Salads
  • Sauces and Dressings
  • Side Dishes
  • Soups
  • The Platefull Blog
  • Uncategorized

Archives

  • March 2025
  • July 2021
  • January 2021
  • July 2020
  • June 2020
  • May 2020
  • April 2020
  • March 2020
  • February 2020
  • January 2020
  • December 2019
  • November 2019
  • October 2019
  • September 2019
  • August 2019
  • September 2017
  • April 2017
  • March 2017
  • February 2017
  • January 2017
  • November 2016
  • October 2016

Recent Comments

  • Jennifer on Avocado and Egg Breakfast Stack
  • Christine Kish on Recipe Organization
  • Sarah on Easy Recipes for the Whole30
  • Jenn on Easy Recipes for the Whole30

- THEME BY ECLAIR DESIGNS -