The Platefull

Inspiring home cooks to be creative with accessible, nutritious recipes.

  • The Platefull Blog
  • Lifestyle
  • Kids
  • Shop
  • About
    • Privacy Policy, Terms & Conditions, and Disclosures

Archives for December 2019

Christmas Tablescape

December 19, 2019~ Lifestyle, The Platefull Blog

Today I’m sharing the way that I’ve got my dining room table decorated for Christmas, as well as a few tips for planning you tablescape. I’ve used these same decorations for a couple years now and have gotten so many compliments on them.

First, I used these beautiful tree candles that I found at Crate and Barrel a few years ago. I have three sizes, giving dimension to the center of the table. (I’ve also seen some beautiful white ones at Target this season, so I may need to add to my tree candle collection – they are my favorite!). I placed some on round pieces of tree slices to add to the rustic feel. The black reindeer modernize it a little, and again are in multiple sizes. I love having candles on the table (and I will add some tea lights for our Christmas dinner), because I love the soothing glow of candlelight. The little house name card holders and black and white napkins (these are from the Magnolia line last year at Target) tie in with the other black details on the table and in my dining room. I just love the rustic, yet elegant feel of this table design! I hope this gives you a little inspiration as you decorate for your holiday meal! Most importantly, have fun with it!

Breakfast Favorites

December 18, 2019~ Breakfast, The Platefull Blog

With guests coming to town in just a few days, I’ve been a busy little bee planning meals! That inspired me to put all of my favorite breakfast recipes in one place.

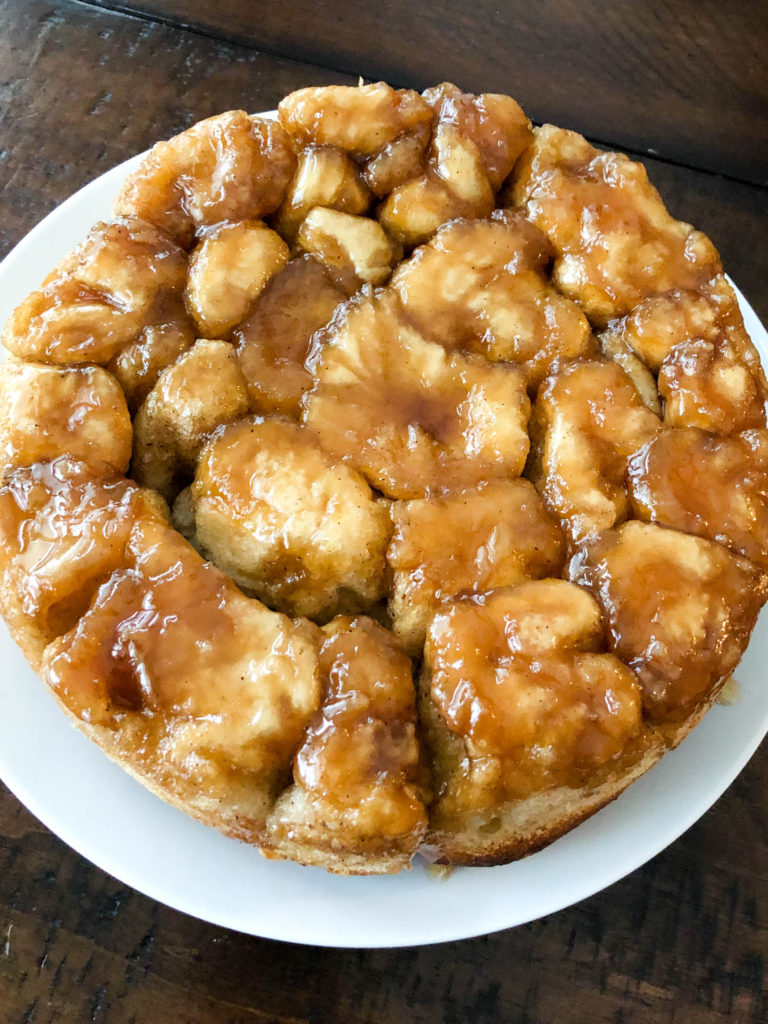
Gooey Caramel Rolls Put a little butter over the top and let it melt and you’ve got absolute perfection. These are perfect for guests – you make them the night before, let them rise on the counter overnight, and bake in the morning.

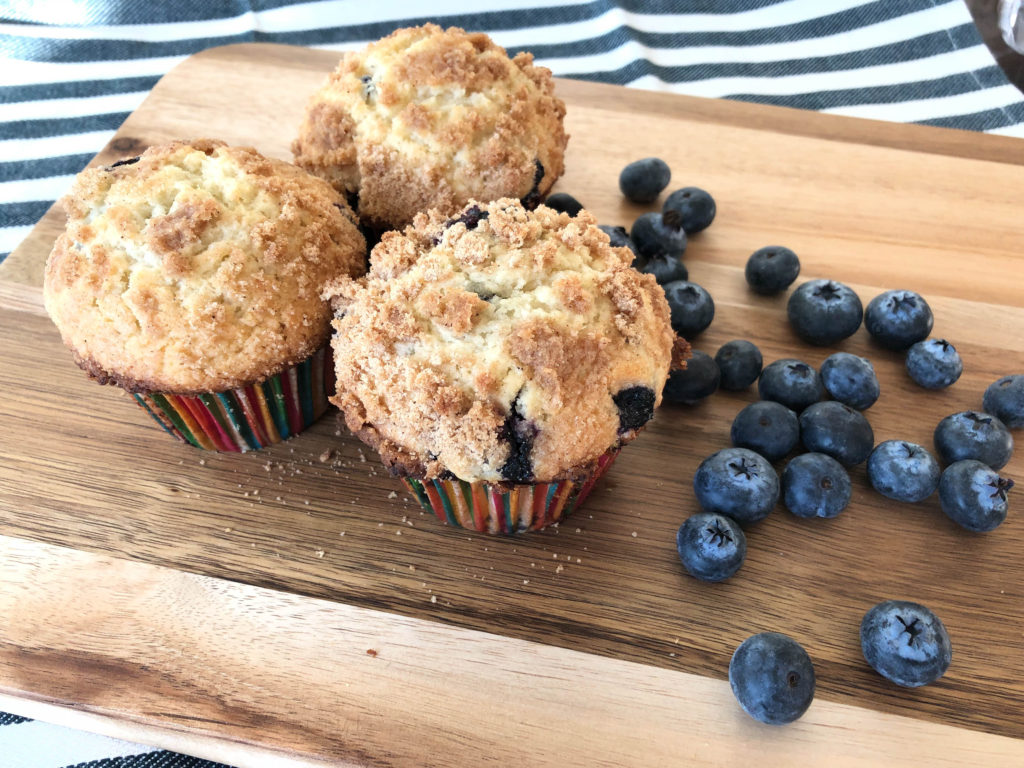
Perfect Blueberry Muffins A classic, bakery style muffin made from scratch. Doesn’t get any better than that!

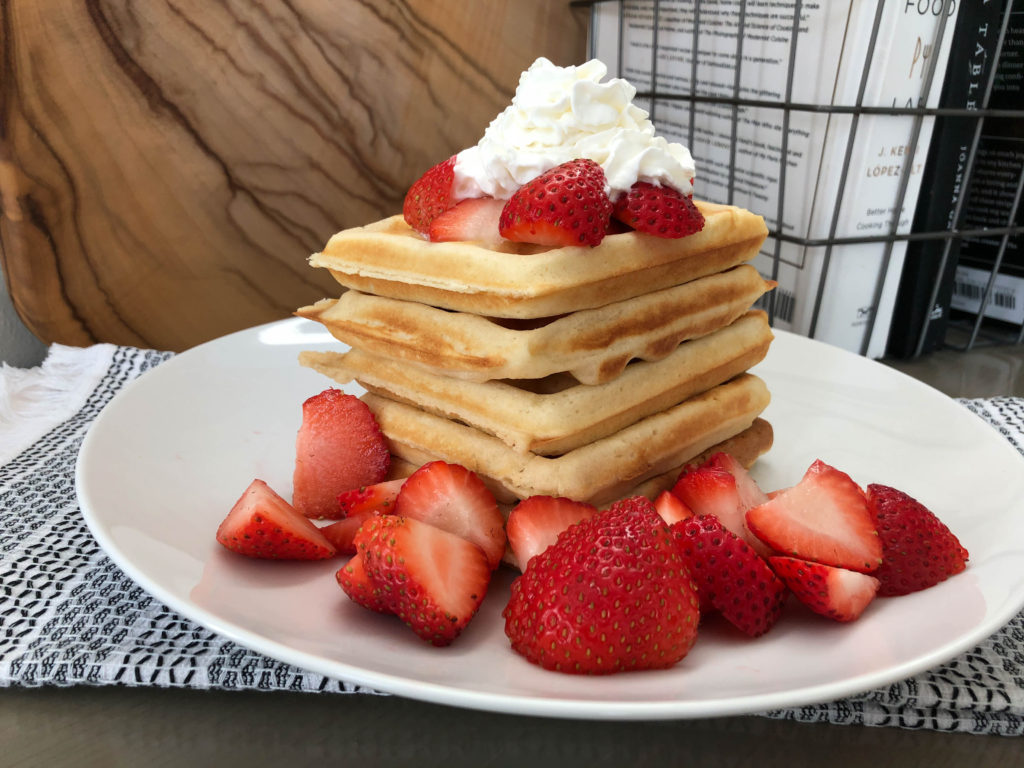
Belgian Waffles These are so fun to serve to a crowd as a waffle bar. Set out a variety of toppings and syrups and let your family or guests add waht they like! You can keep them warm in the oven (set to warm) until you are ready to serve.

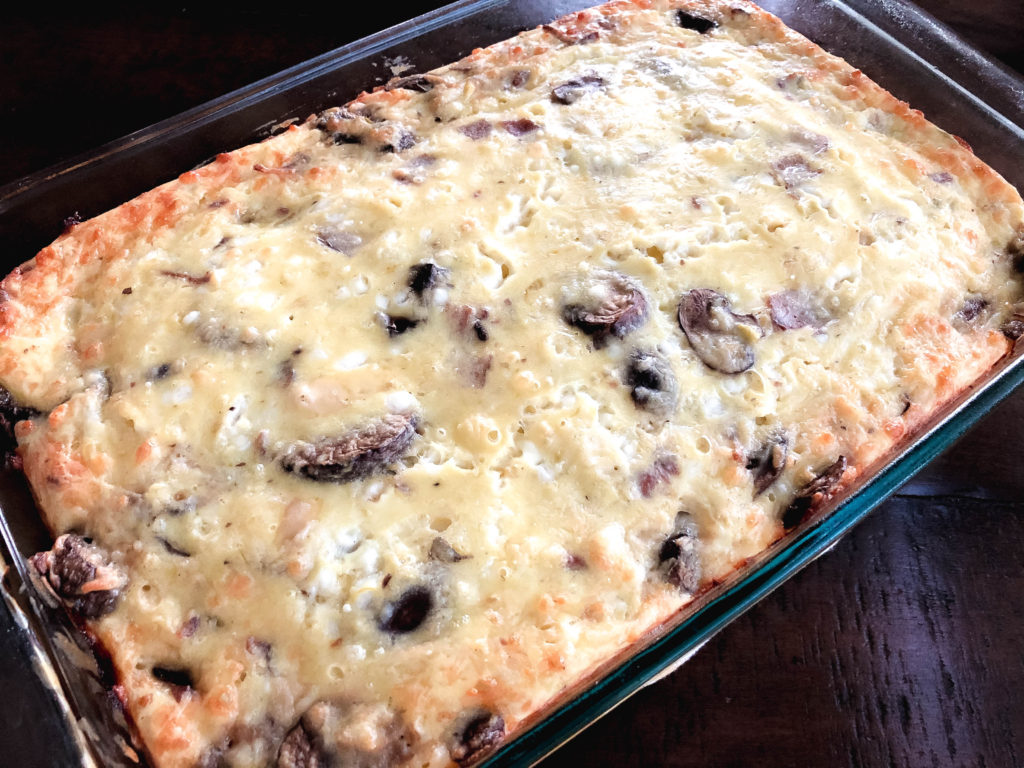
Bacon Green Chile Egg Casserole This egg casserole always gets rave reviews. Assemble the night before, refrigerate, and bake in the morning!

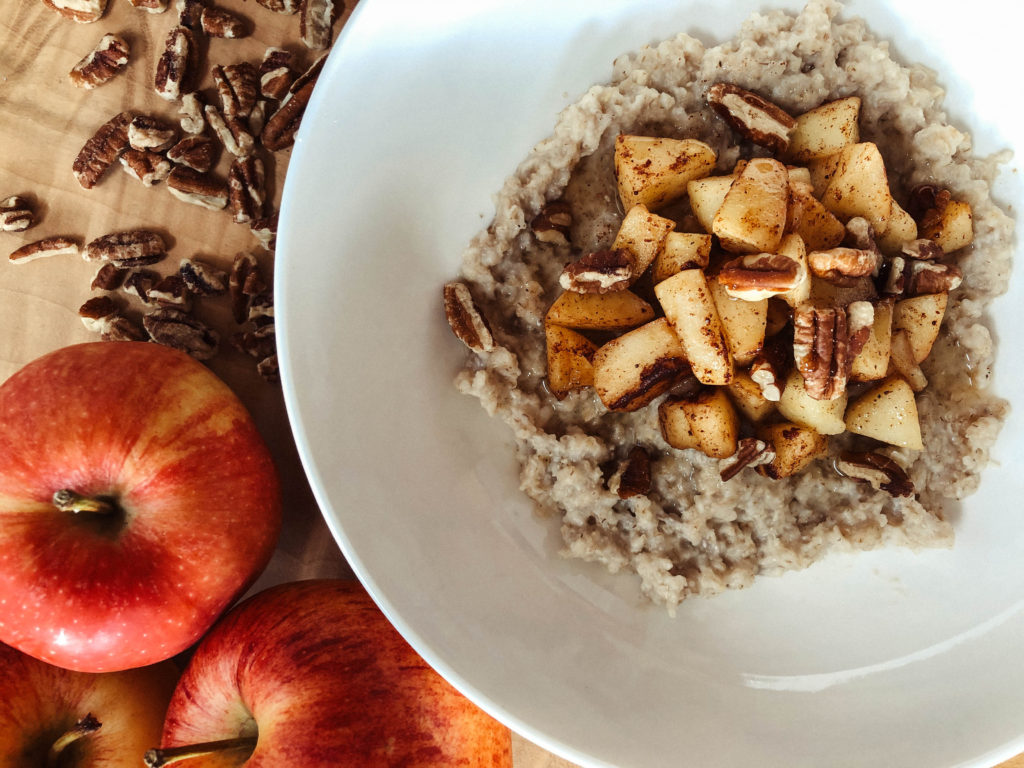
Apple Pie Oatmeal If you’re looking for a warm, satisfying breakfast that is healthy for you, this is it. It’s delicious and would be easy to make a big batch of oatmeal and apple topping for serving a crowd.

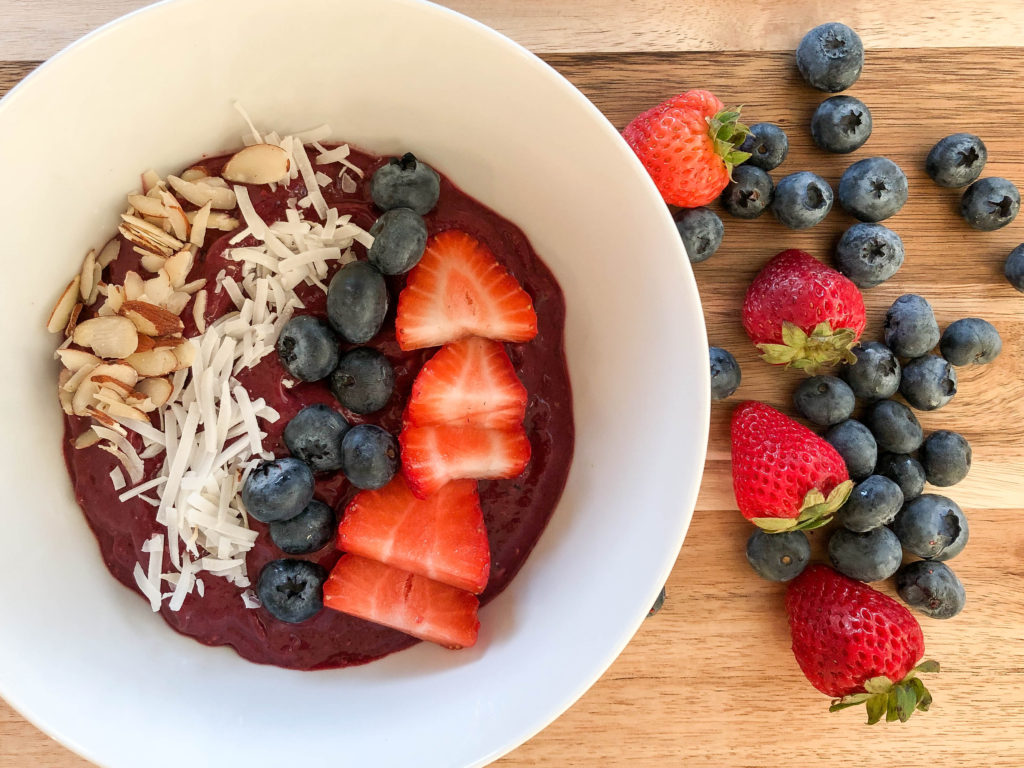
Mixed Berry Acai Bowl Blend up a big batch of this acai bowl and let your family top it with the toppings of their choice. I use my Vitamix for this bowl. You will need a high powered blender in order for the bowl to turn out thick. Otherwise, add a little apple juice to thin it out some.

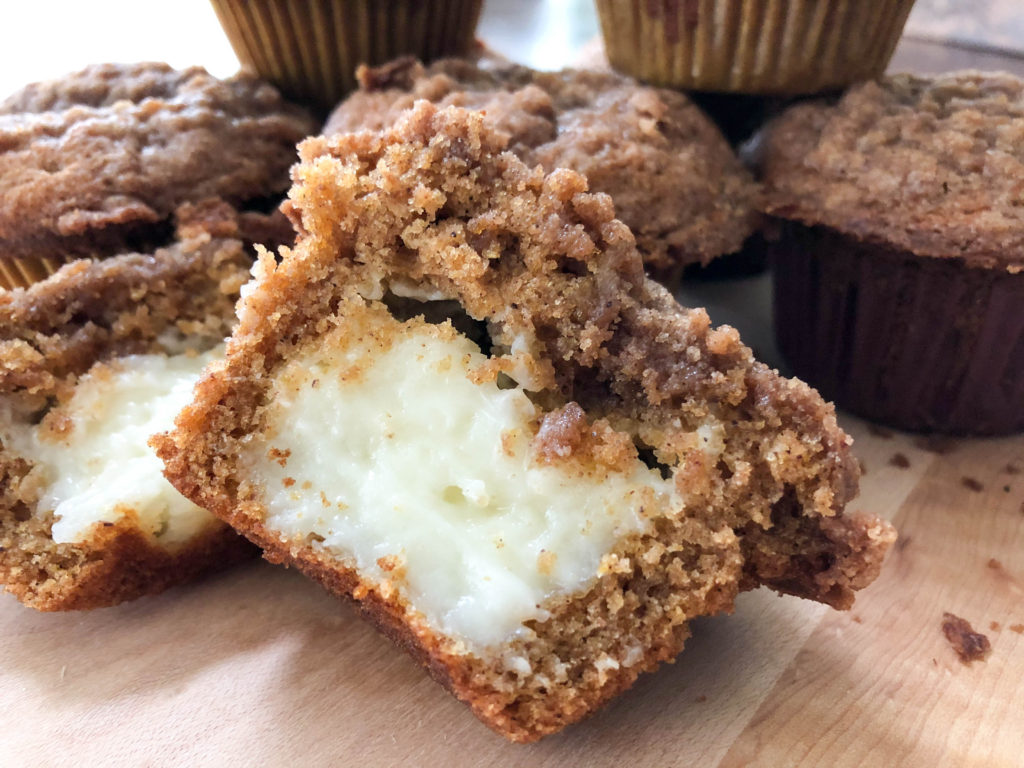
Cream Cheese Filled Pumpkin Muffins with Cinnamon Streusel Until I made these, my Perfect Blueberry Muffins were hands down my favorite for years. Now, these may have taken top spot!

Holiday Stuffed Pork Roast with Balsamic Cherry Glaze

December 17, 2019~ Main, The Platefull Blog

How beautiful is this pork roast?!

This is just the perfect main dish to serve for the holidays. It’s really not all that difficult, but definitely delivers on the “WOW” factor! The flavors are perfect – onion, fennel, dried cherries, and sage. Let me walk you through just how easy this fancy dish really is!

Just a hint to make this even easier on yourself. Prep the roast, brown it, then pop it back in the fridge until about 20 minutes before you are ready to bake it. Let it sit on the counter while your oven preheats (my oven is painfully slow and takes about 20 minutes to get to 400). Pop it in the oven, work on your side dishes, and make the glaze last while the roast rests (you can go ahead and pre-measure the ingredients for the glaze, just wait to boil the glaze until right before serving).

Start with finely chopping the onion and fennel. That’s all the chopping required! Cook it in a skillet with a little olive oil until it’s soft, add in chopped garlic for just a minute, then transfer to a mixing bowl. Combine with remaining filling ingredients.

Next, butterfly the pork loin roast by slicing horizontally through the middle, not cutting all the way through to the other side. Lay plastic wrap over the butterflied pork and use a meat mallet to pound to about 1/2 inch thick. Brush with olive oil, then sprinkle with salt and pepper. Spread the filling mixture over the pork and roll as tightly as possible, securing with kitchen twine.

Brown all sides in a skillet, then transfer to a roasting pan. Pour in a couple cups of chicken broth to the bottom of the pan and place in a 400 degree oven for 45-55 minutes, until internal temp reaches 140 degrees. If the broth starts to dry up in the bottom of the pan, just add more.

Remove the pork from the oven when the internal temp reaches 140 degrees and let it rest while you make the glaze. Slice and serve with the glaze!

Now you’re ready to impress!

Print
clock clock iconcutlery cutlery iconflag flag iconfolder folder iconinstagram instagram iconpinterest pinterest iconfacebook facebook iconprint print iconsquares squares iconheart heart iconheart solid heart solid icon

Holiday Stuffed Pork Roast with Balsamic Cherry Glaze

  • Author: Sarah
Print Recipe
Pin Recipe

Ingredients

For the Pork

3 cups chicken stock, divided

1/2 cup dried cherries, coarsely chopped

3 Tbsp olive oil, divided

3/4 cup finely chopped fennel bulb

1/2 cup finely chopped onion

2 large garlic cloves, minced

1 cup sourdough breadcrumbs

1 Tbsp butter, melted

1 tablespoon chopped fresh sage

1 1/2 teaspoons chopped fresh thyme

Salt and Pepper, to taste

1 (3-pound) boneless pork loin, trimmed

For the glaze

4 Tbsp good balsamic vinegar

1/2 cup cherry preserves

1/8 cup red wine

1 tsp chopped fresh sage

pinch of salt and pepper


Instructions

Preheat oven to 400°.

In a small saucepan over medium heat, combine 1 cup of the chicken stock and the dried cherries.  Bring to a boil, then reduce the heat and let simmer for about 5 minutes to soften the cherries.  Let stand while you prepare the rest of the filling.  

In a skillet, heat 1 Tbsp olive oil over medium heat and sauté the onion and fennel until soft.  Add the minced garlic and cook for 1 more minute.  Transfer the mixture to a mixing bowl.  Add the thyme, sage, breadcrumbs, 1/4 tsp salt, 1/4 tsp pepper, and melted butter to the mixing bowl.  Drain the cherries, reserving 1/4 cup of the chicken stock they were softened in.  Add that 1/4 cup of reserved stock to the filling mixture and stir to combine.  

Slice horizontally through the center of the pork roast, but do not cut through to the other side.  Lay it flat and cover with a piece of plastic wrap.  Use a meat mallet to pound to about 1/2 inch thickness.  Brush with 1 Tbsp olive oil, then season with salt and pepper.   Spread the filling mixture evenly over the pork.  Roll up, starting with the short side and secure with kitchen twine.  

Heat a large skillet over medium high heat. Add 1 Tbsp olive oil to the pan.  Add the pork and brown on all sides.  Transfer the pork to a roasting pan.  Pour 2 cups of chicken stock into the bottom of the roasting pan.  Roast at 400 degrees for 45-55 minutes, until the center reads 140 degrees.  Remove from the oven and let rest while you prepare the glaze.

For the glaze

Combine all ingredients in a small saucepan over medium heat.  Bring to a boil, stirring frequently.  Let cook at a boil, continuing to stir, until the sauce thickens, about 5-8 minutes.  

To serve

Slice the pork into about 1 1/2 inch thick slices.  Spoon the balsamic cherry glaze over the top.


Did you make this recipe?

Tag @the.platefull on Instagram and hashtag it #theplatefull

Gooey Caramel Rolls

December 16, 2019~ Baking, Breakfast, The Platefull Blog

My Mom has made these rolls for many, many years and they are a family favorite. They are easy because they rise on the counter overnight and then are baked fresh in the morning for breakfast.

Start by thawing the frozen bread dough. Melt the butter and mix with the brown sugar, corn syrup, and water in the bottom of a round cake pan. Tear the dough into pieces and dip in a cinnamon/sugar mixture. Place the torn bread dough pieces on top of the caramel mixture. You will fill the pan pretty tightly. Cover loosely with foil and leave on the counter overnight to rise. You will awake to this!

All there is left to do is bake the rolls! Bake for 25-30 minutes at 350, until they are golden on top. To serve, flip the pan onto a plate.

Print
clock clock iconcutlery cutlery iconflag flag iconfolder folder iconinstagram instagram iconpinterest pinterest iconfacebook facebook iconprint print iconsquares squares iconheart heart iconheart solid heart solid icon

Mom’s Caramel Rolls

  • Author: Sarah
  • Yield: 8 servings 1x
Print Recipe
Pin Recipe

Ingredients

Scale

1/2 stick butter, melted

1/2 cup brown sugar

1/6 cup corn syrup

1/6 cup water

1 loaf frozen bread dough

1/4 cup granulated sugar

1 Tbsp ground cinnamon


Instructions

Thaw the bread dough.  Spray a 8-9 inch round cake pan with baking spray.  When the dough is thawed, place the melted butter, brown sugar, corn syrup, and water in the bottom of a round 8 or 9 inch cake pan.  (You can use a 1/3 cup measuring cup, fill it halfway with corn syrup, then the rest with water to get 1/6 cup of each).  Stir to combine well.  

In a small bowl, combine the granulated sugar and cinnamon and stir to combine.  Tear the bread dough into about 2 inch pieces and roll each piece in the cinnamon sugar mixture.  Place on top of the caramel sauce in the pan.  Cover loosely with foil and let rise on the counter overnight.

In the morning, preheat the oven to 350 degrees.  Bake for 25-30 minutes, until the top in golden brown. Turn out onto a plate or serving dish.


Did you make this recipe?

Tag @the.platefull on Instagram and hashtag it #theplatefull

Bacon Green Chile Egg Casserole

December 15, 2019~ Breakfast, The Platefull Blog

Any time that I have guests coming to stay with us, this is one of my go-to breakfast recipes. Its savory and delicious and goes perfect with caramel rolls or another breakfast sweet. The best part is that it’s easy to prep. You can either prep the whole thing the night before, refrigerate, and bake in the morning, or you can just cook the bacon the night before and assemble in the morning. This recipe makes enough for a crowd, in a 9×13 pan.

Print
clock clock iconcutlery cutlery iconflag flag iconfolder folder iconinstagram instagram iconpinterest pinterest iconfacebook facebook iconprint print iconsquares squares iconheart heart iconheart solid heart solid icon

Bacon Green Chile Egg Casserole

  • Author: Sarah
Print Recipe
Pin Recipe

Ingredients

Scale

6 eggs, lightly beaten

1 lb shredded Monterey Jack cheese

1 cup milk

1 lb small curd cottage cheese

1 can diced green chiles

2 cups sliced fresh mushrooms

1 cup cooked diced bacon

I cup all-purpose flour

1 1/2 tsp baking powder

1/4 tsp salt


Instructions

Preheat the oven to 350.  In a small bowl, whisk together the flour, baking powder, and salt.  In a large bowl, crack the eggs and beat lightly.  Add the Monterey Jack cheese, milk, cottage cheese, green chiles, mushrooms, and bacon.  Stir together.  Add the flour mixture and stir to combine well.

Spray a 9×13 pan with cooking spray.  Pour the egg mixture into the pan.  Bake at 350 for 45 minutes.


Did you make this recipe?

Tag @the.platefull on Instagram and hashtag it #theplatefull

Easy Menus for Feeding Guests

December 14, 2019~ Lifestyle, Main, The Platefull Blog

There is nothing I love more than my whole family being together. I cherish that time more than anything. But when we all get together, it’s quite the crowd to feed! Planning meals can be a challenge. I want to make things that everyone will enjoy, but not spend all day in the kitchen. These recipes are some of my favorites to serve for a crowd. They are simple, delicious, and keep me out of the kitchen all day so that I can spend time with the people I love.

Let’s start with the first meal of the day – breakfast! Some of these recipes are make ahead and some are recipes you can ask the whole family to pitch in with. Here’s my roundup of my favorite breakfast recipes!

Favorite Breakfast Recipes

Up next, second meal of the day….lunch! Here are some simple lunch ideas for serving a crowd.

Buffalo Chicken Quinoa Bowls I buy the frozen organic quinoa from Trader Joes, which is microwavable. You could also just cook a big batch of quinoa. Then, I set out the ingredients and let people build their own bowls. The last time I did this, I set out ingredients for these Buffalo Chicken bowls, but I also set out a variety of other veggies and a tahini sauce. You could do any protein and mix of veggies/sauces that you want!

Barbecued Sloppy Joes This recipe is super easy to make ahead and transfer to the crockpot. Then it’s ready to serve whenever your crowd is ready to eat. And since it’s in the crockpot, you don’t have to worry about the stragglers – their food will stay warm!

Harvest Chicken Salad is easy to make for a crowd. Make a big batch the day before and it will be waiting in the fridge for you.

Pear Cranberry Salad is easy to throw together. Add some shredded rotisserie chicken to make it a complete lunch.

Chicken Tortilla Soup Make a big batch of this soup and keep it warm in the crockpot. Easy to serve a crowd. Serve it with a side of cornbread!

Next up, last meal of the day….dinner! Here are some of my favorites for serving a crowd.

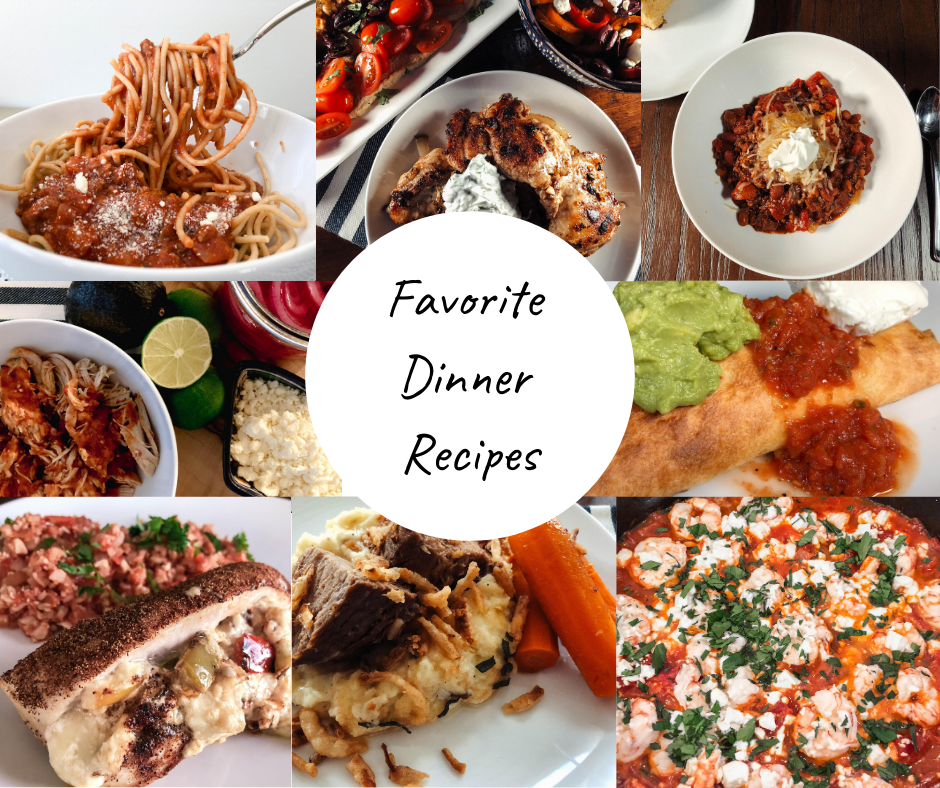
Spaghetti – It’s so easy to make this sauce in advance and just reheat it in the crockpot! It freezes well too, so this can be done way ahead of time. Just boil some noodles and serve the sauce right out of the crockpot.

Prawn Saganaki – I love anything that can cook in one pot that can be transferred right to the table. Slice a baguette and serve with a simple salad. Dinner’s done.

Chicken Chimis – These freeze great. Make a big batch ahead, thaw the number you need, and bake. Easy. Let your guests add whatever toppings they like!

Easy Pot Roast – This one cooks in the slow cooker and really could not be easier. If you want to be the talk of the holiday or family gathering, serve with these mashed potatoes.

Fajita Stuffed Chicken – this is another that you can prep ahead and refrigerate or freeze. Thaw and throw them all on a baking tray to cook.

Chili – nothing beats a hot pot of chili on a cold night! Easy to make, easy to serve. For our annual Halloween Party, I always have Chili in one crockpot and Chicken Tortilla Soup in another to give people options.

Mediterranean Grilled Chicken – If the weather is nice enough where you are, marinate this chicken ahead and throw on the grill. Keep it easy on yourself and choose store bought Tzatziki over the homemade yogurt dill sauce. Fancy up store bought hummus, buy some pita, and look at you go!

Smoky Pulled Chicken Tacos – You could easily make this in the Instant Pot or Slow Cooker. Set it out taco bar style.

Family Game Night

December 14, 2019~ Drinks, Lifestyle, The Platefull Blog

After getting extremely bored with playing Trouble every. single. night. I was on the hunt for fun games that us adults could enjoy, but would be simple enough for our 5 year old (and some for our 3 year old as well). I found the best article that reviewed multiple games and age groups! I selected a few games from that list and promptly ordered them on Amazon Prime. Two days later, we had our first family game night and our kids now beg to have game night EVERY night. They love the games and so do we! And of course, who doesn’t love popcorn and hot chocolate?! So today I’m sharing the best, richest hot chocolate recipe and the list of games we love so far. Let’s start with the games and save the best till last, shall we? 😉

As an Amazon Associate I earn from qualifying purchases. These are all games that our family loves.

Game List and Review:

  • Sleeping Queens – this has by far been the favorite of all of the games I ordered. Our 5 year old loves it and honestly, we love it too. It’s too advanced for our 3 year old, so we play this one after he’s in bed, or he “helps” one of the grown ups. It does give the option of using addition (up to 10) and our 5 year old is able to make some equations on his own. I would guess as he gets closer to 6, he will do that part even more on his own. Either way, he beats us fair and square all the time!
  • Sushi Go – This one has quite a few rules to remember, but after a few times through, our 5 year old got it down. Our 3 year old has no clue what he’s doing in this game, but he loves to be a part of the action, taking a card and passing the rest. Sometimes he even ends up with more points than I do, which is embarrassing to say since I should be using some sort of strategy I guess. This one’s definitely a keeper – we all enjoy it!
  • Taco Cat Goat Cheese Pizza – we just got this game out for the first time today. After just one round, we are still figuring it out, but the boys were really giggling with this one. It seems like it will be a really fun game over the holidays with a crowd!
  • My First Castle Panic – Both our 3 and 5 year olds can play this game. I love that it’s a cooperative game. It’s all of us against the monsters, who are trying to get to the castle to knock the walls down! You can ask other players for help, which is nice because it encourages the boys to offer help to one another, which never happens. As adults, we don’t enjoy this one quite as much because it’s pretty simple, but it is a nice short game that our 3 year old can really take part in, so the boys love it.
  • Skip Bo Jr. – Both boys like to play this game. Our 5 year old understands the rules, and our 3 year old can do it with a little help, since it only requires being able to count up to 10. He doesn’t understand any sort of strategy, but he likes putting his cards in the middle.

I’ve got a few more games planned as Christmas gifts for the boys, and I’m anxious to see if any of those become favorites. I’ll update this post after the holidays to include those as well! They are: Ticket to Ride My First Journey, Connect Four, Trouble Olaf’s Ice Adventure, and Kanoodle. I love that this has become a tradition in our home that we all look forward to!

Now for the good part. We always make a bowl of popcorn and sometimes as a special treat, this hot chocolate. I love that it cooks in the slow cooker, so there’s no work when it’s time for game night!

Print
clock clock iconcutlery cutlery iconflag flag iconfolder folder iconinstagram instagram iconpinterest pinterest iconfacebook facebook iconprint print iconsquares squares iconheart heart iconheart solid heart solid icon

Hot Chocolate

  • Author: Sarah
Print Recipe
Pin Recipe

Ingredients

Scale

6 cups whole milk

2 cups heavy cream

1/2 cup granulated sugar

8 oz semi sweet chocolate chips

1/4 cup unsweetened cocoa powder

2 tsp vanilla extract


Instructions

Add all ingredients to a slow cooker and whisk vigorously for 2 minutes.  Heat on low for 6 hours or high for 4 hours, whisking periodically.  Serve with your choice of toppings: marshmallows, candy cane, etc.


Did you make this recipe?

Tag @the.platefull on Instagram and hashtag it #theplatefull

Mediterranean Sheet Pan Chicken

December 13, 2019~ Main, The Platefull Blog

I love my Greek dinner with homemade pita, but it’s just not practical for a weeknight. I love the flavors in this dish, and it uses the same chicken recipe, but in a much easier, faster way for a quick and healthy weeknight dinner. Not only is it delicious, it is an absolutely stunning dish with the vibrant colors. This has become one of my go-to dinners for weeknights or having friends over. It’s super easy to feed a crowd with this meal!

Start by spreading the chopped veggies on a pan. Pour about 1/4 cup of the marinade mixture over the veggies and toss well. Place the tomatoes on the vine on top (you can use cherry tomatoes instead, but on the vine gives a really pretty, gourmet look with no effort!). Place the halved chicken breasts on top of the veggies and bake at 400 for 20-25 minutes, until the chicken is cooked through.

When finished baking, top with Kalamata olives, cubed feta, and a sprinkle of fresh chopped parsley. This meal is great served with my Loaded Hummus and pita (store bought for simplicity’s sake!

Print
clock clock iconcutlery cutlery iconflag flag iconfolder folder iconinstagram instagram iconpinterest pinterest iconfacebook facebook iconprint print iconsquares squares iconheart heart iconheart solid heart solid icon

Mediterranean Sheet Pan Chicken

  • Author: Sarah
Print Recipe
Pin Recipe

Ingredients

For the marinade:

3/4 cup extra virgin olive oil

1/2 cup fresh squeezed lemon juice

1 1/2 tsp fresh lemon zest

1 1/2 tsp greek seasoning

1 1/2 tsp poultry seasoning

1 1/2 tsp dried oregano

For the chicken and veggies:

4 chicken breasts, halved across the width of the center

1 red bell pepper, chopped into 2 inch pieces

1 yellow bell pepper, chopped into 2 inch pieces

1 orange bell pepper, chopped into 2 inch pieces

1 red onion, cut into wedges

1 15-oz can artichoke hearts, drained

1 package on-the-vine cherry tomatoes (or 15-20 cherry tomatoes)

1/2 block of feta, cubed

1/2 cup sliced Kalamata olives

Fresh parsley, chopped


Instructions

In advance: Make the marinade by whisking together the extra virgin olive oil, lemon juice, lemon zest, greek seasoning, poultry seasoning, and oregano. Reserve 1/4 cup of the marinade and refrigerate until ready to use.  Pour the remaining marinade into a Ziploc bag.  Add the chicken, seal the bag, and turn the bag over a few times to cover all of the chicken pieces with marinade.  You can refrigerate for 1 day or freeze until ready to use (thaw the chicken before cooking).

Preheat oven to 400 degrees.  Spread the veggies (except for the tomatoes if they are on the vine) on a sheet pan, pour over 1/4 cup of the marinade, and toss to combine well.  Lay the tomatoes on top.  Remove the chicken from the marinade and place the chicken breasts on top of the veggies.  Bake for 20-25 minutes until the chicken is cooked through.  Remove from the oven and top with olives, feta, and a sprinkle of fresh parsley.


Did you make this recipe?

Tag @the.platefull on Instagram and hashtag it #theplatefull

Espinaca

December 12, 2019~ Appetizers, Side Dishes, The Platefull Blog

I love cheese dip of any sort, but this Espinaca is especially delicious! I use Homemade Velveeta in this recipe, but of course you can use store bought. It’s the perfect side for Smoky Pulled Sheet Pan Chicken Nachos!

This recipe is simple to make – all ingredients get thrown in a pot (or the crockpot) together and cooked over low to medium-low heat until melted and combined. That’s it!

Print
clock clock iconcutlery cutlery iconflag flag iconfolder folder iconinstagram instagram iconpinterest pinterest iconfacebook facebook iconprint print iconsquares squares iconheart heart iconheart solid heart solid icon

Espinaca

  • Author: Sarah
Print Recipe
Pin Recipe

Ingredients

Scale

16 oz cream cheese

1/2 pint heavy cream

2 4-oz cans Rotel tomatoes, drained

1/4 cup diced jalapeno

8 oz frozen chopped spinach, thawed and squeezed dry

4 chicken bouillon cubes

8 oz Velveeta cheese

1/2 cup milk

1/2 onion, chopped


Instructions

Mix all ingredients together in a saucepan over medium low heat, stirring occasionally, until all ingredients are melted and well combined.


Notes

This recipe can also be made in the crockpot.  Place all ingredients in the crockpot over low heat, and stir occasionally.

Did you make this recipe?

Tag @the.platefull on Instagram and hashtag it #theplatefull

Homemade Velveeta

December 12, 2019~ Sauces and Dressings, The Platefull Blog

There are just some things that are better made with Velveeta. We all know that gooey, melty goodness that is the golden cheese product. Over the last year, I’ve spent a lot of time focused on nutrition and fueling our bodies in a healthy way, which has meant eliminating foods like my dearly beloved Velveeta from our diet. This left me wondering, “Is there a way to make copycat Velveet at home, using real cheese?” This recipe is pretty darn close to the real thing and it’s surprisingly simple to make. I love the fact that I can feel good about feeding it to my kids. I use this to make any sort of cheese dip or casserole that calls for Velveeta. It’s a 1:1 substitute. The only difference is that with real food ingredients, this recipe is not shelf stable to infinity and beyond (you can thank my 3 year old for that reference).

Why can I feel good about this version? Well to start, its only 5 ingredients. Cheddar cheese, milk, cream, salt, and gelatin. The gelatin is the magic ingredient – it gives it that creamy texture that solidifies it, but provides a great melt. Why can I feel good about the gelatin? I’m not talking any off the shelf gelatin here. I’m talking about 100% grass fed bovine gelatin. It’s essentially collagen that has been cooked. There are a whole host of benefits to consuming gelatin in this form, some of which are that it provides collagens (which support bone and joint health), protein (but does not contain tryptophan, etc that meat does, which can cause inflammation), and is high in amino acids. I use Vital Proteins Unflavored Beef Gelatin (found at Whole Foods – my Whole Foods has little packets, of which you’ll need less than 1 packet to make this recipe).

Alright, now that the geeky food knowledge stuff is out of the way, let’s get started. Add the milk and cream to a small saucepan and sprinkle the gelatin on top. Don’t turn on the heat – you want to just let the gelatin sit for a few minutes. After 5-10 minutes, turn the heat on to low or medium low. You want to slowly heat the milk mixture.

In the meantime, shred the cheddar cheese in a food processor. You do not want to use pre-shredded cheese for this recipe, as you won’t get as good of a melt (and I have other issues with pre-shredded cheese containing unwanted ingredients, but that’s a whole notha’ thing). Anyway, just use cheese and only cheese. 😉 . Sprinkle a little salt on the cheese.

When the milk mixture is warm, pour it into the food processor and let the food processor run for about a minute. You want the cheese to melt completely and should end up with a smooth mixture. Transfer to a loaf pan lined with plastic wrap and refrigerate. If you are using in a sauce or casserole, use it right away – no need to let it solidify fully in the fridge.

Print
clock clock iconcutlery cutlery iconflag flag iconfolder folder iconinstagram instagram iconpinterest pinterest iconfacebook facebook iconprint print iconsquares squares iconheart heart iconheart solid heart solid icon

Homemade Velveeta

  • Author: Sarah
Print Recipe
Pin Recipe

Ingredients

Scale

3/4 cup whole milk

1 Tbsp heavy cream

2 tsp grass fed gelatin

12 ounces shredded cheddar cheese

3/4 tsp salt


Instructions

Pour the milk and heavy cream into a small saucepan.  Do not turn on the heat.  Sprinkle the gelatin over the top and let it sit for 5 minutes.  After 5 minutes, turn the heat to medium low and heat until just steaming, being careful not to let it get to a boil.  You want it hot enough to melt shredded cheese, but not boiling.

While the gelatin sits for 5 minutes, shred the cheddar cheese in a food processor.  Add the salt to the food processor.  Pour in the heated milk mixture and turn the food processor on.  Let it run for about 1 minute, until the cheese is completely melted and the mixture is smooth.  Transfer to a bread loaf pan that has been lined with plastic wrap and refrigerate.  If you are using in a casserole or dip, put it straight into your other recipe – no need to solidify it.  Otherwise, refrigerate for up to 1 week.


Notes

You do not want to use pre-shredded cheese for this, as it has ingredients added to prevent the shreds from sticking together.  You’ll get a smoother melt from a block of cheese that you shred.

Did you make this recipe?

Tag @the.platefull on Instagram and hashtag it #theplatefull

  • 1
  • 2
  • 3
  • Next Page »

Categories

  • Appetizers
  • Baking
  • Breakfast
  • Dessert
  • Drinks
  • Kids
  • Lifestyle
  • Main
  • Recipes
  • Salads
  • Sauces and Dressings
  • Side Dishes
  • Soups
  • The Platefull Blog
  • Uncategorized

Archives

  • March 2025
  • July 2021
  • January 2021
  • July 2020
  • June 2020
  • May 2020
  • April 2020
  • March 2020
  • February 2020
  • January 2020
  • December 2019
  • November 2019
  • October 2019
  • September 2019
  • August 2019
  • September 2017
  • April 2017
  • March 2017
  • February 2017
  • January 2017
  • November 2016
  • October 2016

Recent Comments

  • Jennifer on Avocado and Egg Breakfast Stack
  • Christine Kish on Recipe Organization
  • Sarah on Easy Recipes for the Whole30
  • Jenn on Easy Recipes for the Whole30

- THEME BY ECLAIR DESIGNS -